
Simpson Strong-Tie senior field engineer Nehal Patel decided recently to create a customized swing set for his child and their friends, with a focus on durability. Instead of hiring someone, he preferred to DIY the project so he could manage costs and allow for personalization. Throughout the construction, Nehal used Simpson Strong-Tie’s black powder-coated Outdoor Accents® connectors and fasteners, contributing both strength and style to the final product. Discover the details of his project and its outcome.
A few months ago, my neighbor and friend was in the process of having his basement finished out. After his framing work was completed, he gave me several leftover pieces of 2×4 lumber in various lengths, knowing I was someone who could put this to good use. Considering that we both have young children, I thought it would be a good idea to build something that both our kids could enjoy while the adults hang out in the backyard and watch the kids.
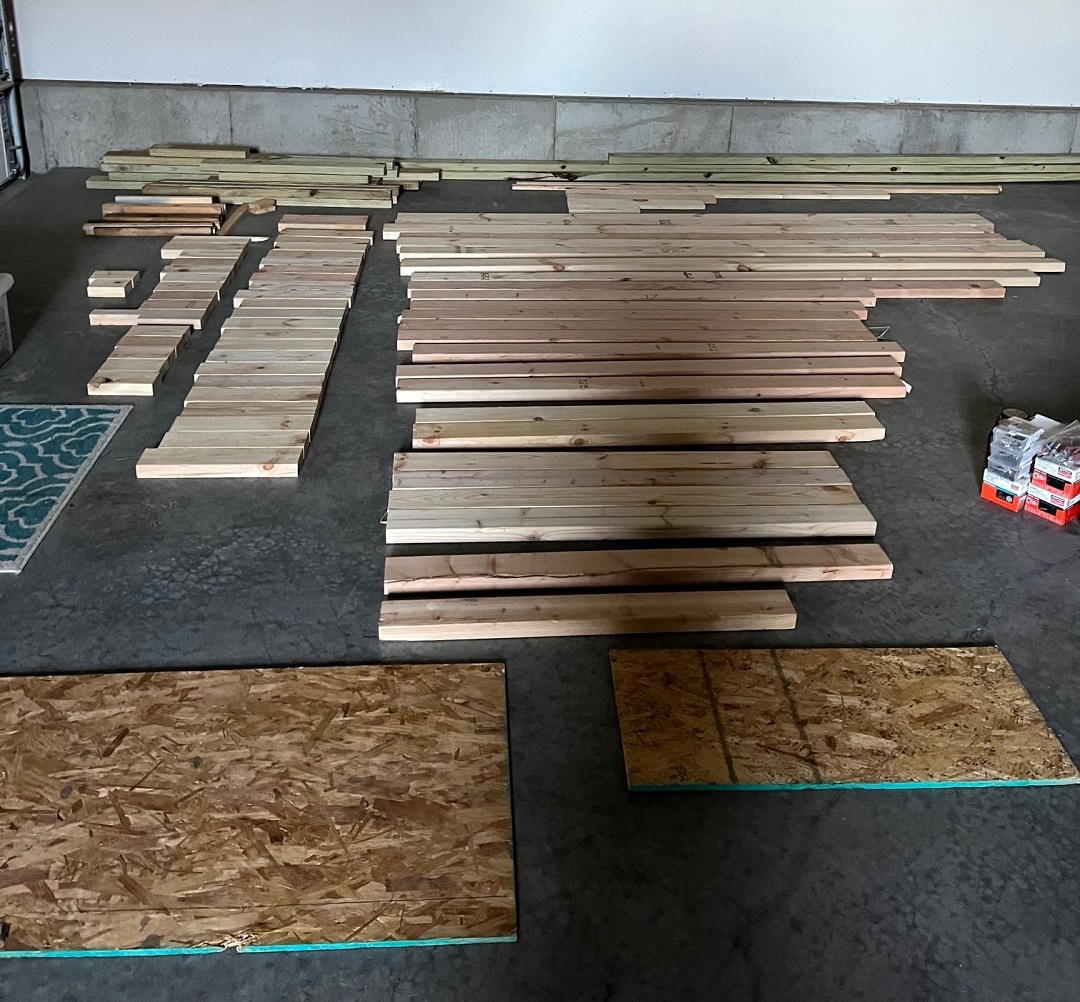
What I decided to make was a small-scale swing set with a miniature home at the top, based on the traditional big-box swing-set I see in some other neighbors’ backyards. I wanted to build something that was easy both to construct and to tear down as needed in the future. My original vision was something that would last for two years before I deconstructed it and salvaged the wood for other purposes. By then, I imagined the kids would have outgrown it anyway and there would be no need to stain or treat the wood for longer durability. The biggest advantage would be the money savings over buying something that would normally cost around $2,000.
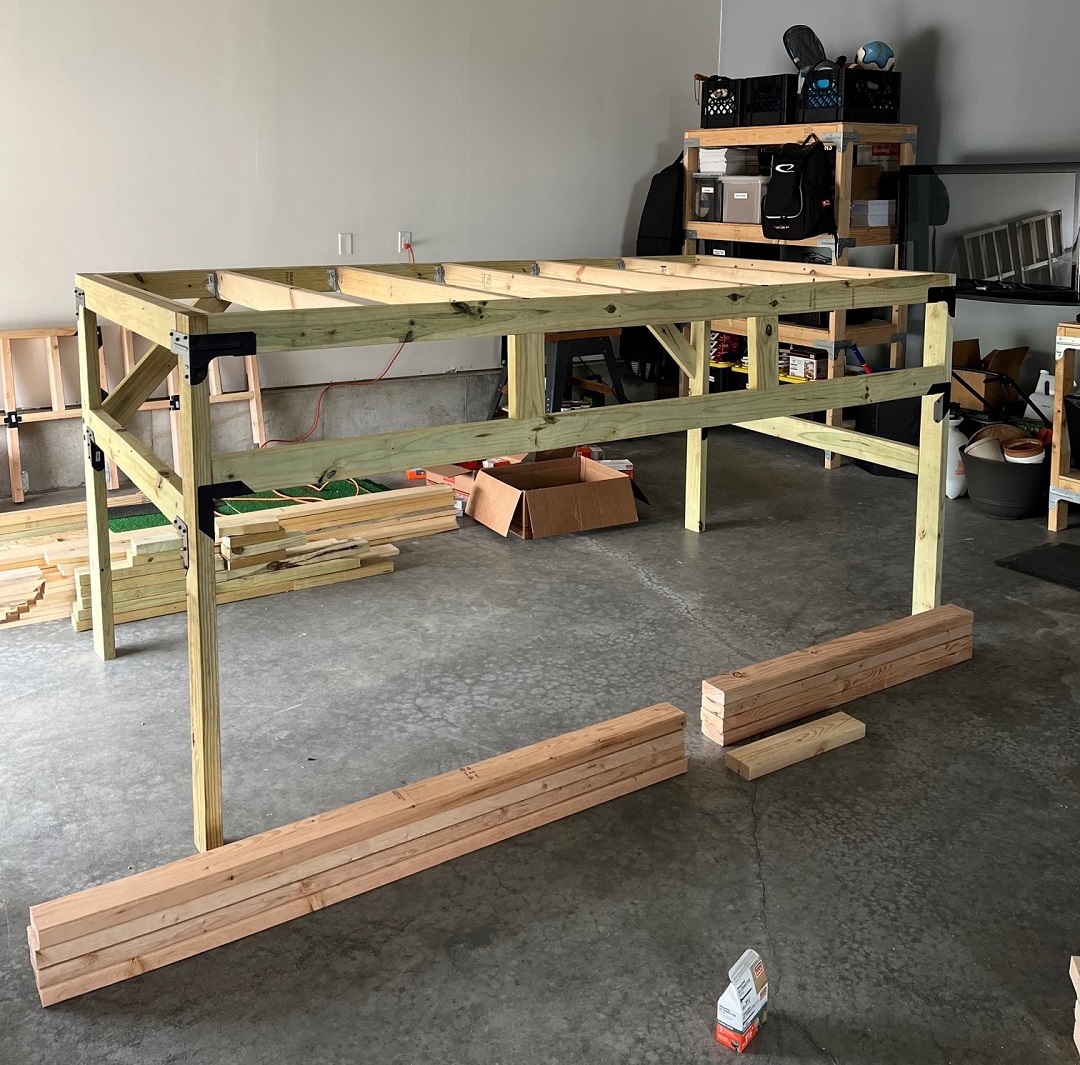
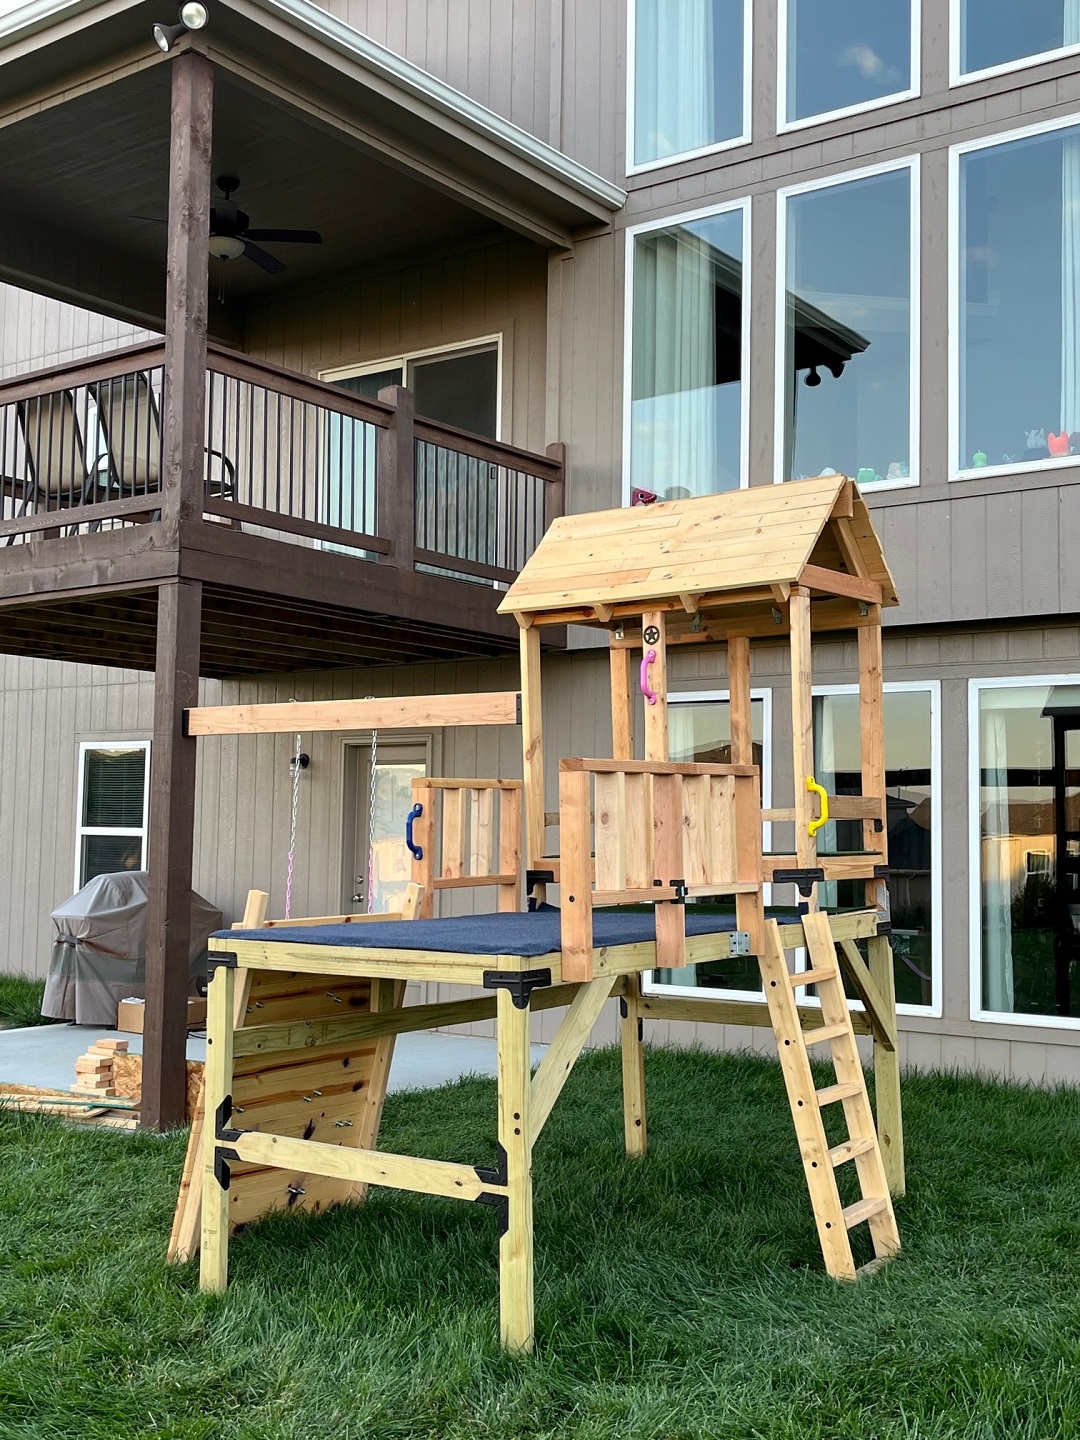
I started out by making a 4’ x 8’ frame. The overall size was based on the majority of the longest 2×4 pieces I had available and also so it would be easy to slide a 4’x8’ sheet of plywood on top. For the frame, I also used the few pieces of pressure-treated lumber I had available as I knew this part would have greatest contact with the ground. Following the framing, I continued to add some more 2×4 pieces to the frame until I felt that it was stiff enough to hold the weight of two adults safely and comfortably as this would probably be the greatest weight the swing set would ever experience. I kept the structure self-standing on the bottom to allow the lawn to be mowed easily and prevent the need to patch in grass once the structure was deconstructed in the future.
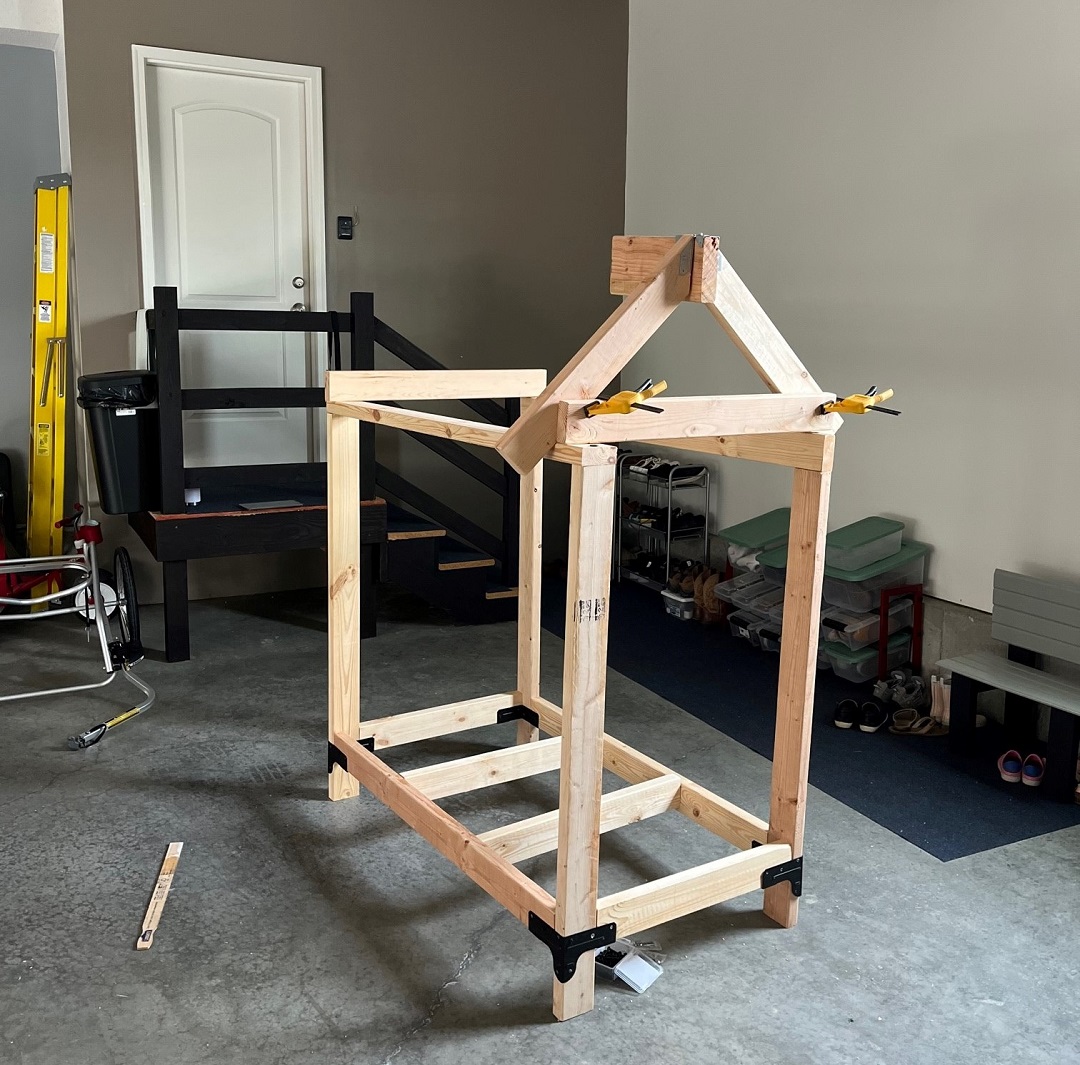
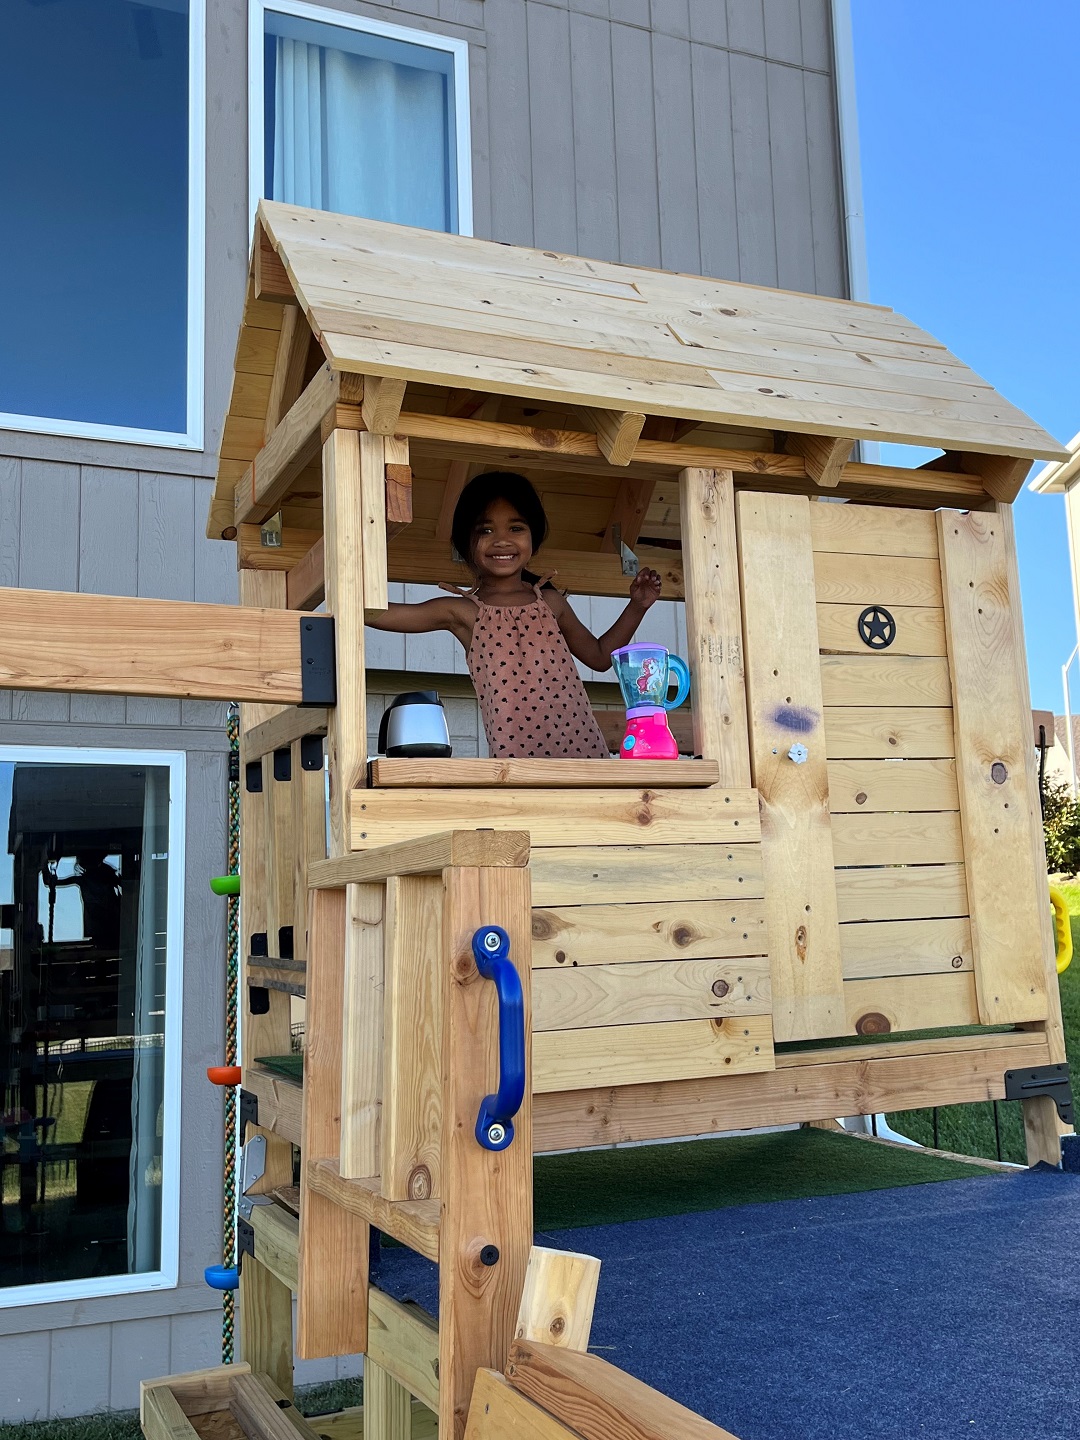
For the miniature house, I chose to make a pitched roof to add accent and used our RR (ridge rafter connector) to easily create this slope detail. I then used our hurricane ties (H3) and joist hangers (LU24) to complete the minor framing of the house, and made a single unit that I could lift on top of the deck frame. The connectors were all installed using Strong-Drive® SDS Heavy-Duty Connector screws of various lengths as needed. This house was the most difficult section to do, but it was worth the effort since the pitched roof allows 4-5- year-olds to fit into the house easily while still making the unit easy to lift and maneuver.
While I used many different connectors to make this swing set, the primary connectors and fasteners were the following (in black powder coat):
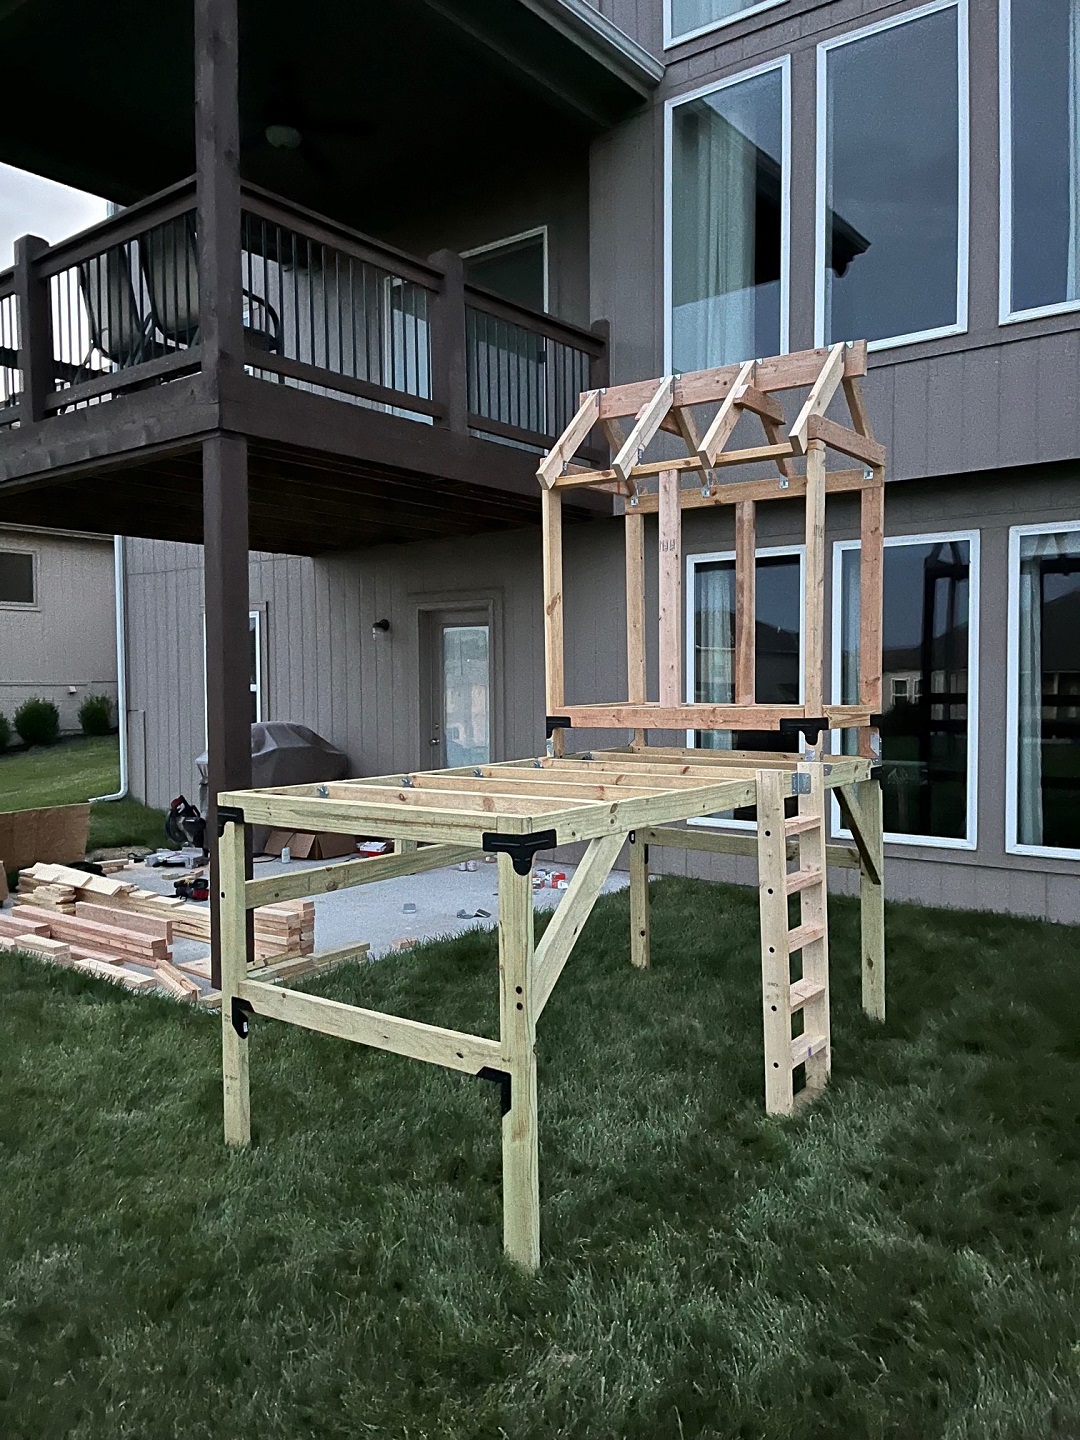
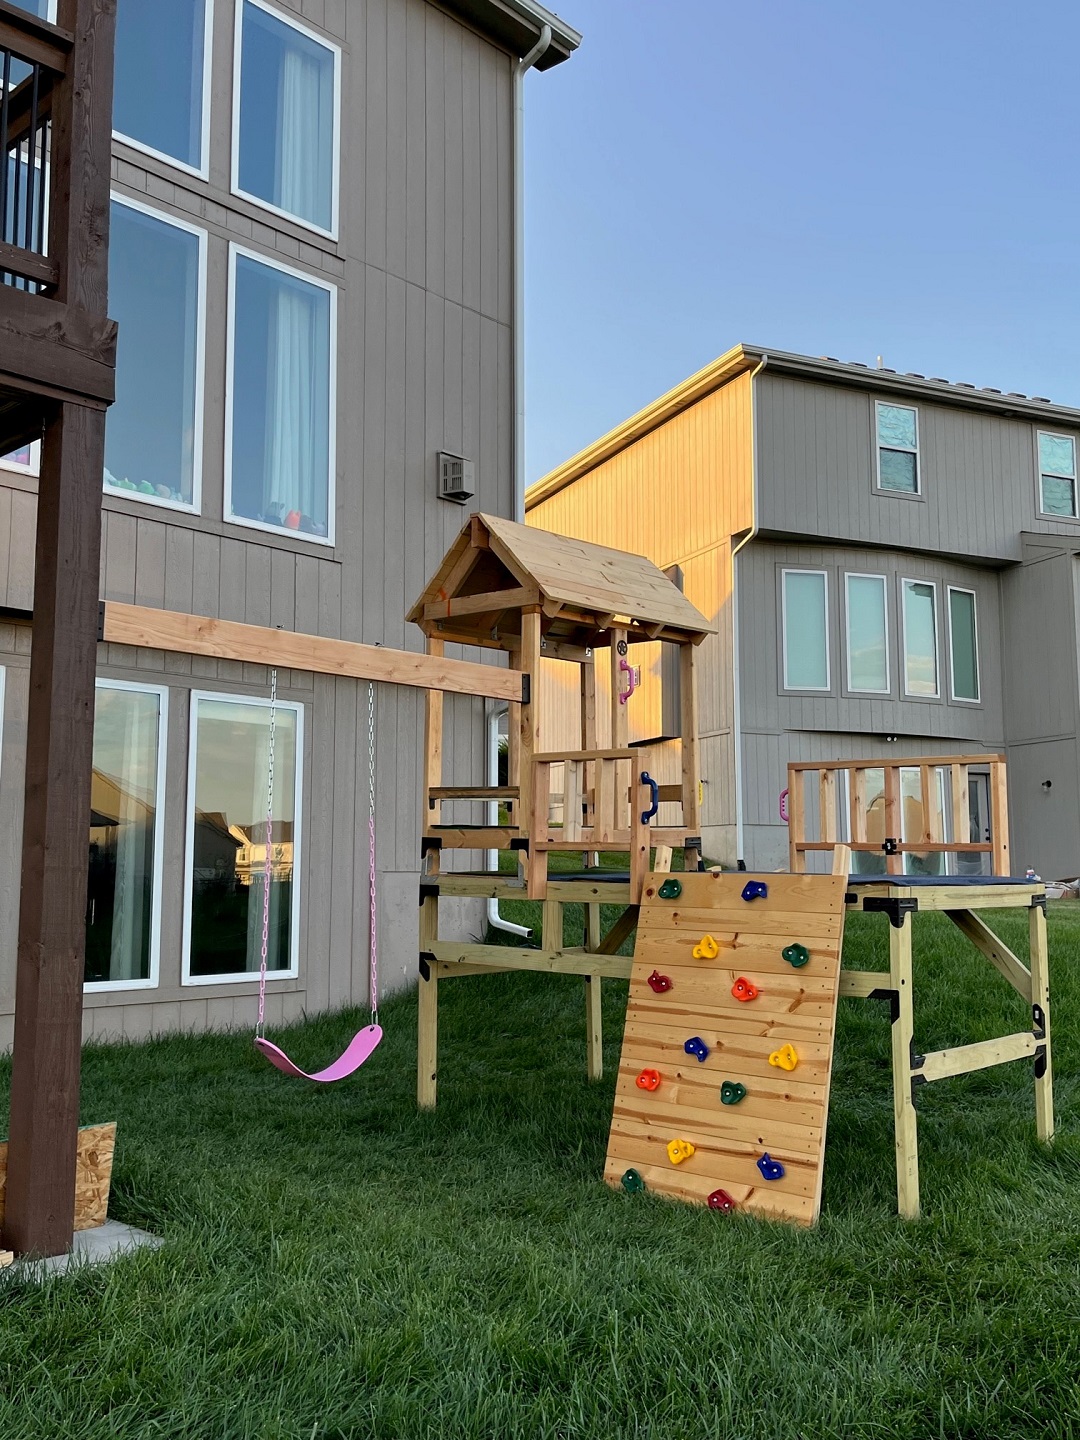
After the frame and miniature house were completed and installed into place, the real fun started — namely, adding the accessories to make the swing set look unique and complete. My wife and I ordered multicolored handles and bought some separate playground accessories, including a pink swing and a rope tree swing. The green slide and the climbing wall made the final touches, as far as playground accessories went. A 2×6 member was used to span the swing station and connect the playground to the deck structure to help give the playground a point of rigidity.
After the swing set was complete, I used some additional Simpson accents such as the star and the bottle cap opener (for the adults) to show off to my neighbors what cool products Simpson Strong-Tie manufactures! This was a great build experience, and the kids have really been enjoying it and adding their own uniqueness over time, including some holiday jingles on the doorknob and a decorative mat in front of the door. All in all, this project took me only two or three weekends to complete by myself and saved more than half the cost of a traditional store-bought swing set. It also allows me to add more accessories over time simply by using leftover generic framing pieces as needed.

Check out a short video of the playhouse!
