
Table of Contents
Windows 11, like its predecessor, features the built-in Deployment Image Servicing and Management (DISM), a command-line utility to troubleshoot critical system errors. The DISM commands can help you fix Blue Screen of Death (BSOD) errors, a slow computer due to broken system files, and even repair the Windows Recovery Environment.
In this article, we’ll show you how you can use the DISM and System File Checker utility to repair your damaged Windows 11 image and installation.
How to Use the DISM Command in Windows 11
The DISM command-line utility is a multi-purpose tool. It allows the system administrator to prepare and service Windows images. In addition, you can use the DISM tool in combination with the System File Checker utility to recover your Windows computer from critical failure.
While DISM supports multiple specified commands, to repair your Windows computer, you only need to know the DISM CheckHealth, DISM ScanHealth, and DISM RestoreHealth commands.
If you can boot into Windows 11, you can run the DISM command from an elevated PowerShell console or Command Prompt. If not, you’ll need to boot into the Windows Recovery Environment and launch Command Prompt from Advanced Options to run DISM.
Check Your System Health Using the DISM CheckHealth Command
You can check for any file corruption using the DISM CheckHealth command. It is a diagnostic tool used to detect system image corruption and report the same. However, it doesn’t perform any repair.
To run the CheckHealth command:
- Press the Win key and type cmd.
- Right-click on Command Prompt and select Run as administrator.
- In the Command Prompt window, type the following command and press Enter:
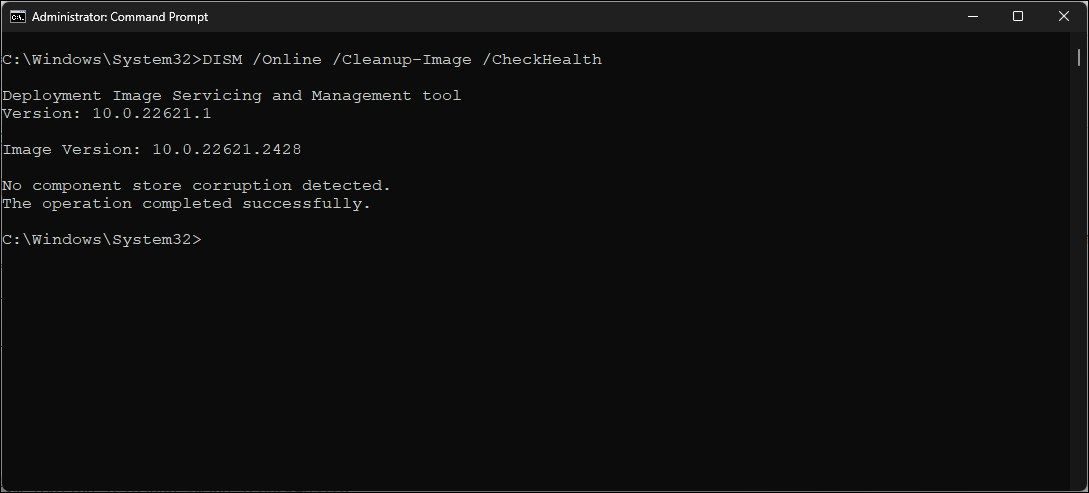
DISM /Online /Cleanup-Image /CheckHealth - In the above command, the /Online parameter specifies the scan must be performed on the currently running operating system. The /Cleanup-Image parameter specifies the operation is related to Windows image repair.
- When executed, the command will show the report as “The component stored has been corrupted” or “No component store corrupted detected.” depending on whether a component store corruption is found.

- If you use PowerShell, use the following command instead:
Repair-WindowsImage -Online -CheckHealth - The PowerShell command will report your image status to indicate whether it is Healthy, Repairable or Non-repairable. A healthy image doesn’t need any further action, and you can proceed to run the SFC tool.


If the image is repairable, you can use the RestoreHealth command to use Windows Update to fix any corruption. However, for a non-repairable image, you may need to perform a clean install to fix your computer.
Perform an Advanced System Image Scan with the ScanHealth Command

You can use the DISM ScanHealth command to perform an advanced scan of your Windows 11 system image. This will check your system for component store corruption and save the report to a log file.
To run the DISM ScanHealth command:
- Open PowerShell as administrator.
- Type the following command and press Enter:
DISM /Online /Cleanup-Image /ScanHealth - This process may take some time to complete. Once done, it will report any issues with the component store.
- If an issue is detected, run the DISM RestoreHealth command to repair your Windows image.
Run the DISM RestoreHealth Command to Repair the Windows System Image

The DISM RestoreHealth command uses Windows Update to provide the necessary files to fix file corruption and repair the Windows 11 system image. However, you must be connected to the internet so that the DISM tool can download and restore the files needed to perform a repair.
To run the DISM RestoreHealth command:
- Open Windows PowerShell as administrator.
- Next, type the following command and press Enter:
DISM.exe /Online /Cleanup-image /RestoreHealth - The DISM utility will perform a scan and start repairing the Windows system image. This process may take some time to complete. So, wait till the progress bar reaches 100%.
Repair System Image Using an Alternate Repair Source
The DISM RestoreHealth command may not work if your computer is not connected to the internet or if the Windows Update component is corrupt. In this situation, you can use a Windows installation media or a mounted Windows ISO as a local source to repair the system image.
First, create a bootable Windows 11 USB drive. Once you have the installation media ready, connect it to your computer and proceed with the below steps.
To repair your Windows 11 system image using DISM and a local repair source:
- Press Win + E to open File Explorer.
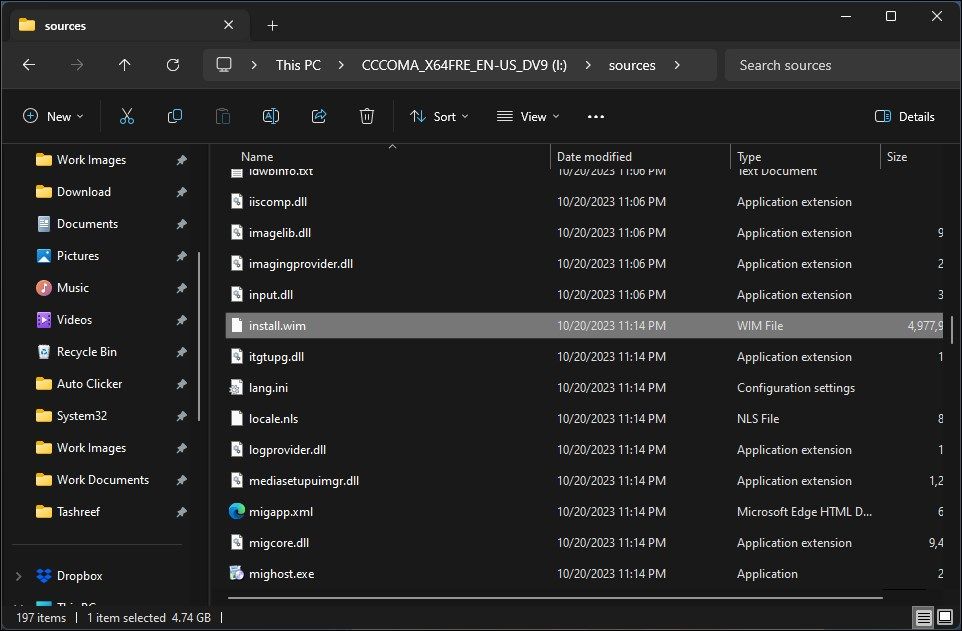
- Open your installation media drive, open the Sources folder and make sure the install.wim file exists. Also, note the driver letter assigned to your installation media. In this instance, our installation media is assigned the drive letter (I:).
- Next, type the following command to run the DISM RestoreHealth command with the installation media as a repair source:
DISM /Online /Cleanup-Image /RestoreHealth /Source:I\Sources\install.wim /LimitAccess - In the above command, replace the placeholder :I with your installation media drive letter. Also, the LimitAccess command is an optional parameter that restricts DISM access to the specified source and prevents it from using Windows Update as a repair source.
- Once the process is complete, you can close Command Prompt and run the System File Checker utility to complete the repair process.

Repair Your Windows Installation Using the System File Checker (SFC) Utility

Once you have successfully repaired your Windows 11 system image using the DISM RestoreHealth command, run the System File Checker (SFC) utility. It will scan your Windows installation for system file corruption and fix them automatically.
In almost all instances, you must run the System File Checker utility after using the DISM image repair command to complete the repair process. Here’s how to do it:
- Press Win + X to open the WindowsX menu.
- Click Terminal (Admin) to launch the Windows Terminal app as administrator.
- In the Terminal window, type the following command to run the System File Checker utility:
sfc /scannow - When you run the above command, the System File Checker utility will start verifying the integrity of system files to detect corruption. If detected, it’ll automatically try to repair by replacing the files with a cached copy located at %WinDir%\System32\dllcache.
The SFC process may take some time to complete and often may feel stuck at some stage. If you see no progress for a long time, press the Enter key a few times on your keyboard to refresh the Command Prompt window to view real-time progress.
After the process is complete, restart your computer and check for any improvements. If the issue persists, run the sfc /scannow command again to see if that helps fix the problem.
Repair and Recover Your Windows System Image Using DISM and SFC
DISM makes it easy to repair a corrupt Windows image. It works both online using Windows Update and offline with a WIM file. The steps to use DISM may look complicated at first glance; however, it only takes two commands and an elevated Command Prompt to repair your Windows 11 image and installation.
