
Table of Contents
Before and afters are so satisfying aren’t they? Especially when they are this dramatic. I’m so excited to share this with you! I’m a firm believer in the power of good landscaping to transform the curb appeal of any house.

A fresh start
It’s kind of funny how this new house required the same kind of landscape demolition and installation as our last house. Stage one was an almost complete demo of the front property including taking out the asphalt driveway and switching it out for a gravel one. It was in the wrong place and I don’t like the look of asphalt anyway.
And obviously a concrete driveway would cost too much at this stage given the landscaping needed so much work. It’s important to have priorities when tackling a project this big!
Plan to hide anything less than pretty
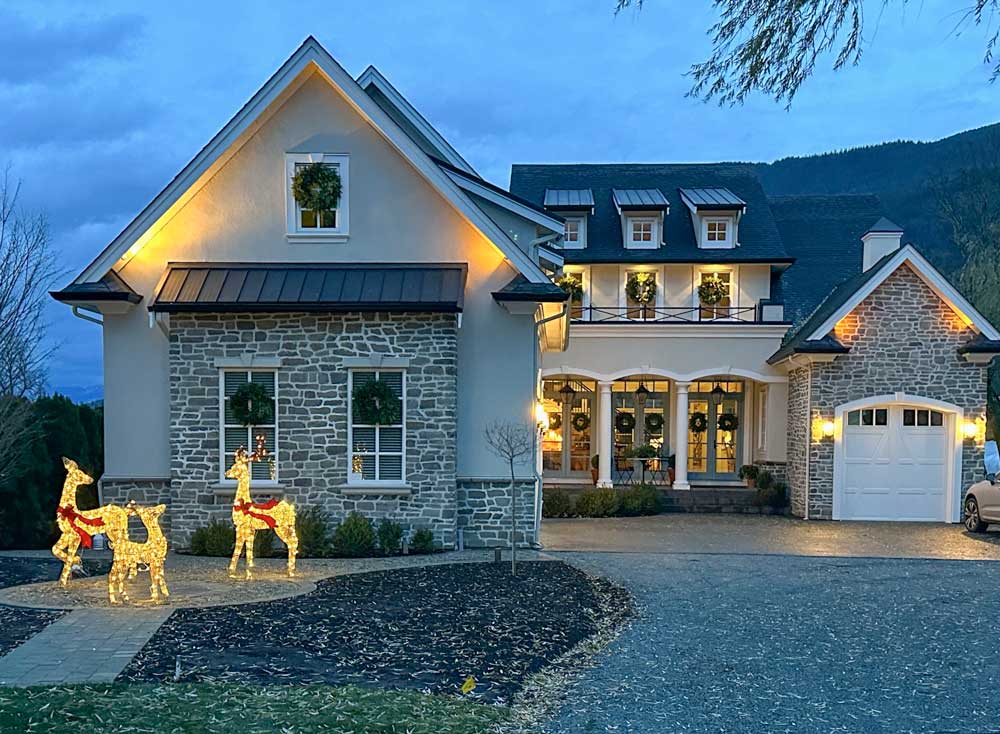
The area in front of the house had 4 septic tank covers that needed to be enclosed in a garden bed so this is how it looks now (below).
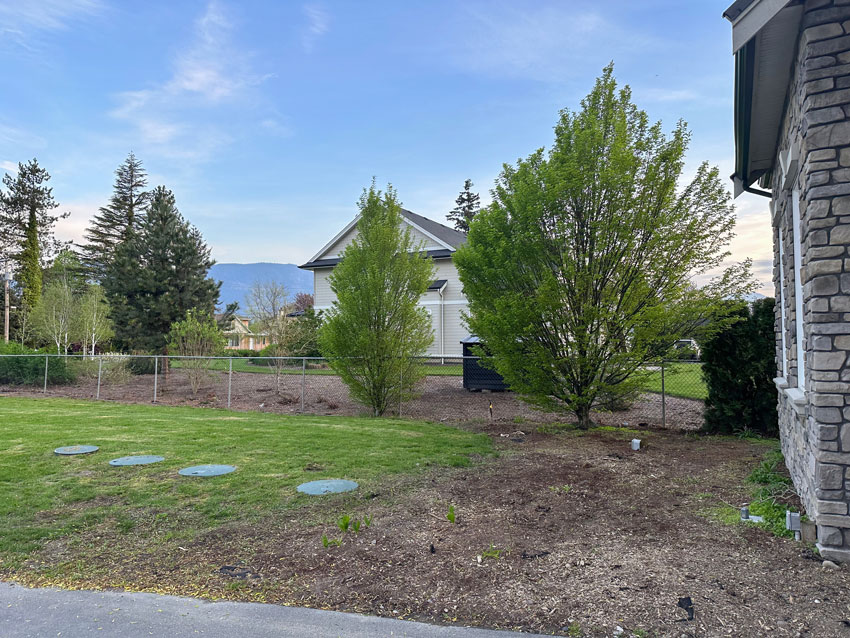
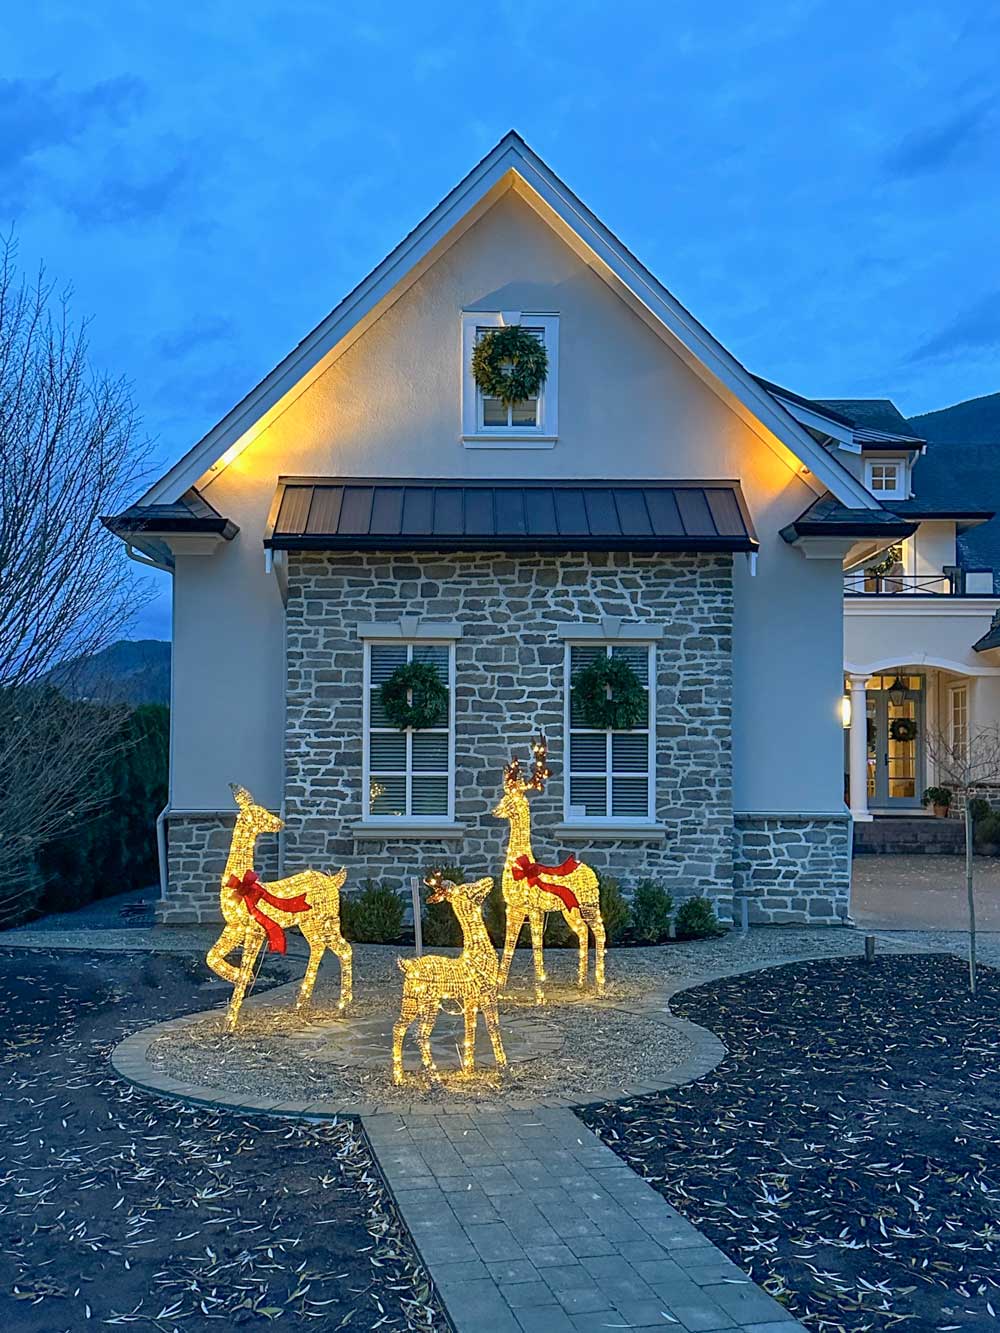
There will be garden beds on both sides of this pea gravel walkway and there will be a fountain here where I have the holiday deer right now (below).
Vandenburg Landscapes did all the hardscape and they did a beautiful job!
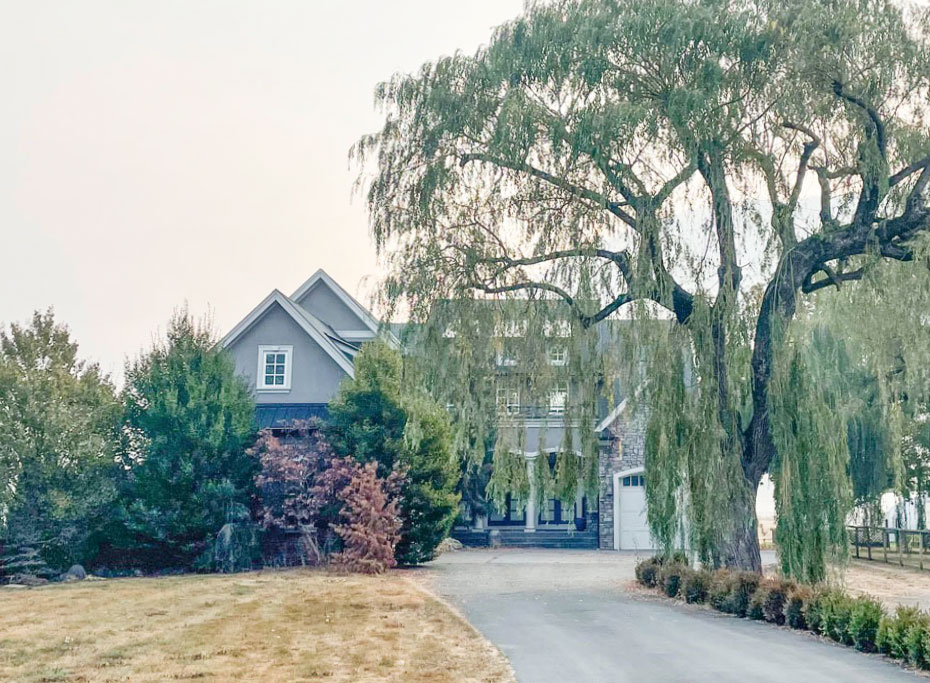
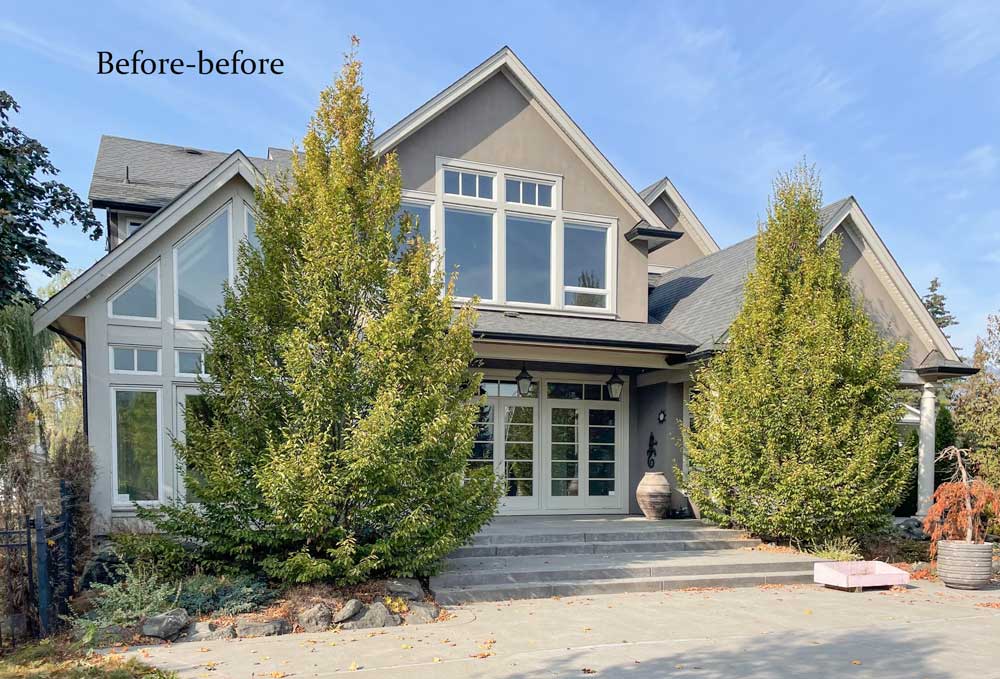
The front before
Here’s how the house looked upon possession:
And then after we removed the overgrown trees and shrubs:
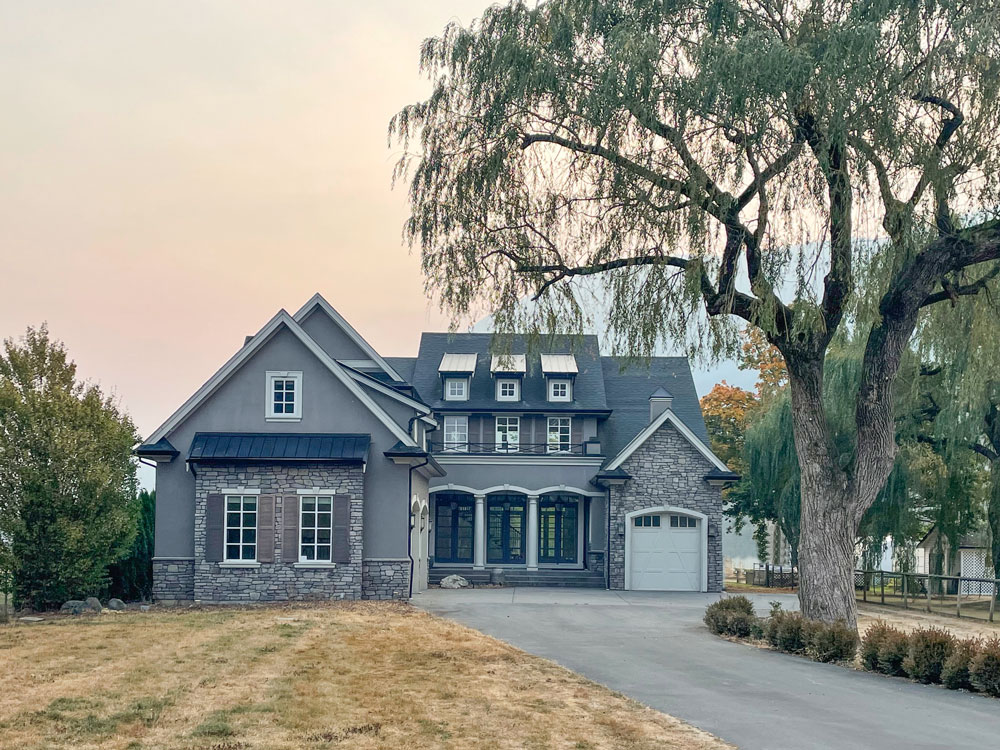
And after!
Here’s how it looks now, ready for the holidays! Plant material will be next. But it’s already so much prettier with the curvy hardscaping.
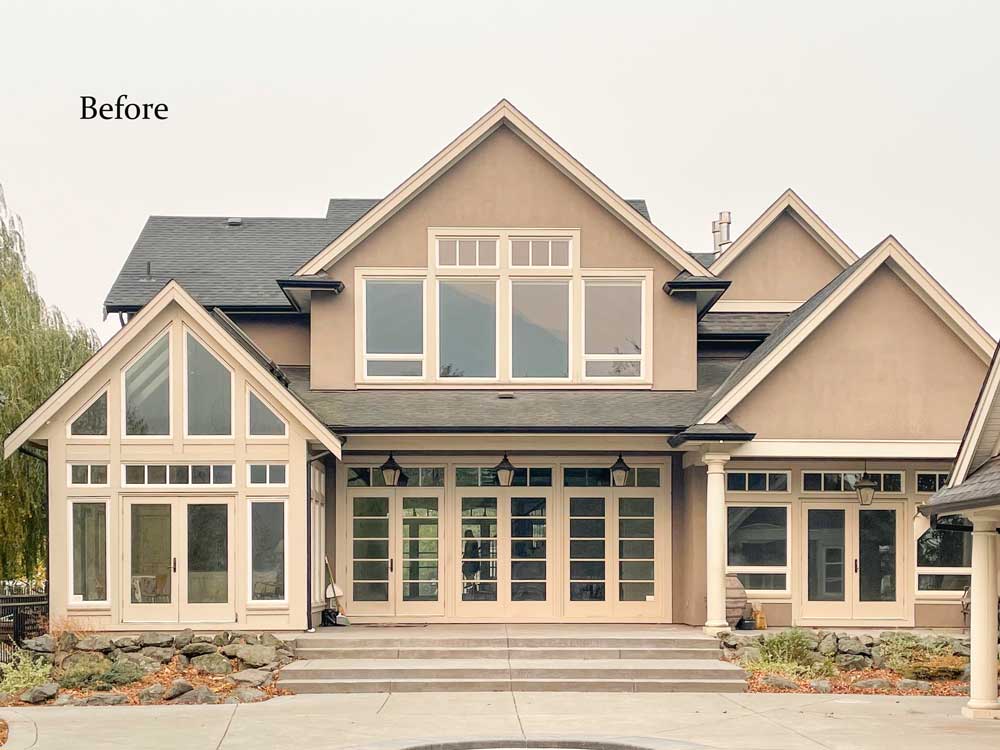
The back before
Moving onto the backyard, here’s the possession date photo:
Did I mention this property was once a Christmas tree farm? Lot’s of overgrown evergreens. They are great at creating dense walls for privacy, but tend to completely block the view when they are poorly placed like this.
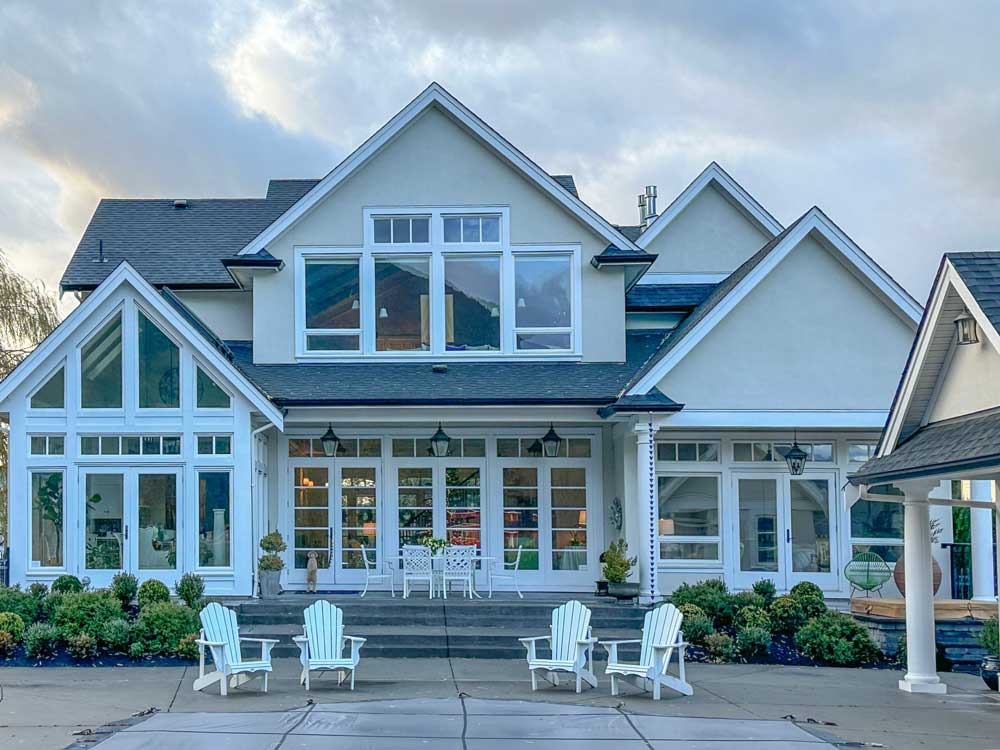
And after!
Here’s what it looked like after we took down the overgrown trees and before it was painted (below).
And here’s how it looks now!
MaryAnne White who designed my last garden suggested boxwood clouds on both sides and since I’m obsessed with boxwood, that is what we did!
Ugly rocks be gone!
I am so happy the craggy tumbled rocks are gone from either side of the patio. Too often people think rocks before they consider plant material. Maybe they think plants are too much maintenance. But weeding out a pile of rocks is no fun either! Plants are so much prettier and absolutely worth it.

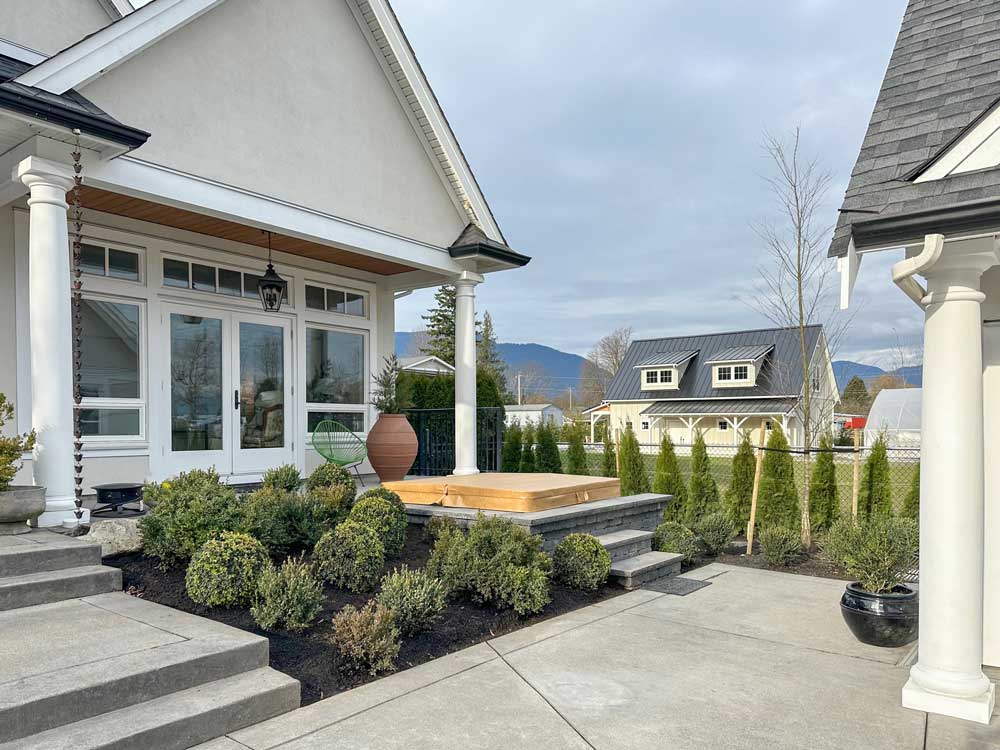
And we installed a hot tub!

Now the rest of the garden beds are ready for planting in the Spring!
It’s amazing how much prettier the exterior looks now that it’s painted and the stone overgrouted as well.
Need a gift idea?
My Understanding Undertones Colour wheel and my ebooks bundled together is perfect for the decorator in your life!

Related posts:
Professionals know When to Avoid the Obvious
Which Mulch Colour is Right for Your House?
The Real Cost of DIY Advice
