
Table of Contents
House owners Lloyd and Aimee Meyers and their two little ones, Caroline and Landon, appreciate their home, but they’re not so fond of their ’80s kitchen area.
So, we’re aiding this family members with an inexpensive renovation — at just $1,200 in products — that will depart a significant effect!
We’re bringing this ’80s-style kitchen area into the 21st century with a specific two-component episode. This posting covers element two of the job. (Missed section a single? Catch up below!)
Touching Up the Cabinets
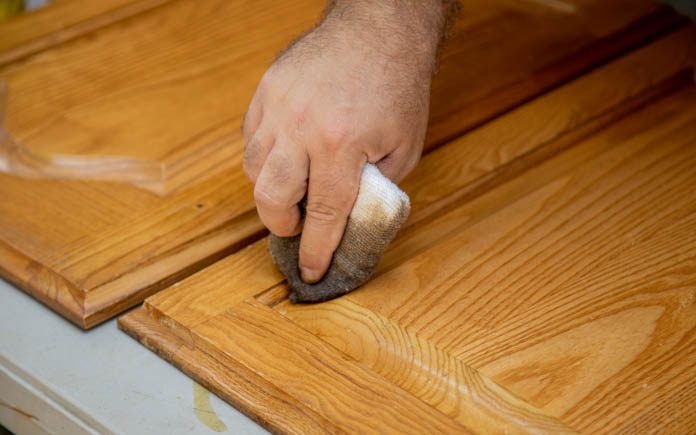
Lloyd and Aimee’s cabinets, general, are in wonderful form. Nonetheless, they have a several unsightly scratches.
The owners never want to paint these cupboards since they really like the rich wooden grain. In its place, we’re touching up the stain and supplying them a new coat of polyurethane.
In part 1 of this job, we cleaned and prepped the cupboards. In this episode, Chelsea reveals Lloyd how to effectively utilize stain, waiting around a several minutes for it to sink into the wood, ahead of taking away it.

Following the polyurethane has dried, we position the cabinet doorways back again on the bins and set up new attractive pulls.
It’s these types of a simple transform — adding new components — but a person matter is specific: these cupboards no longer scream 1980s!
Best of all, Aimee loves how the refinished cupboards and new hardware totally transform her kitchen area.
Replacing the Backsplash
Lloyd and Aimee’s kitchen area had just two smaller backsplashes in the form of dated ceramic tile at the rear of the sink and oven.
We’re replacing these with stylish subway tiles — and this new, sweeping backsplash will cover each wall in the workspace. The result will be a dependable seem that leaves a extraordinary effect.
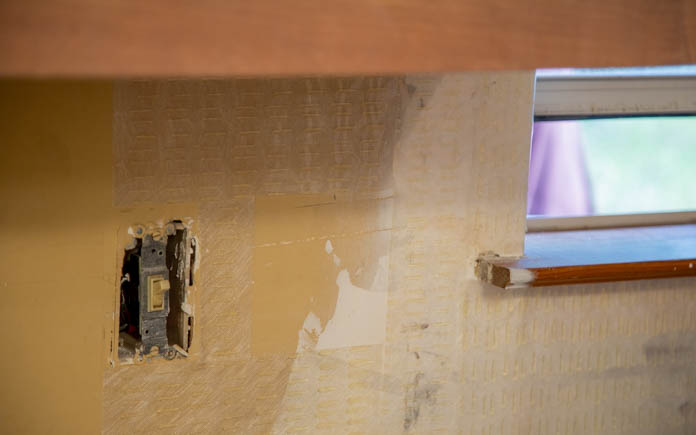
We ran into just just one stumbling block before starting perform on the new backsplash. We eliminated the outdated backsplash and recognized it taken out portions of the wall.
Things really do not usually go as planned all through house advancements, but in this situation, we just changed the drywall. Uncomplicated ample!
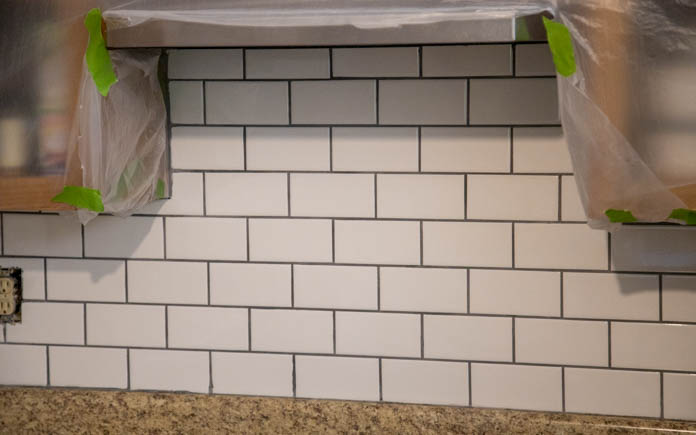
For the backsplash set up, we use SimpleMat from Customized Constructing Merchandise. It is essentially a double-sided sticker. First, you apply SimpleMat to the wall. Then, take away the adhesive front and use tiles to the SimpleMat. Immediately after that, grout the tiles and eliminate the excess.
You can discover more about the approach in our how-to video clip.
This website page consists of affiliate backlinks. If you order a item from these backlinks, we will make a compact fee at no additional price tag to you.
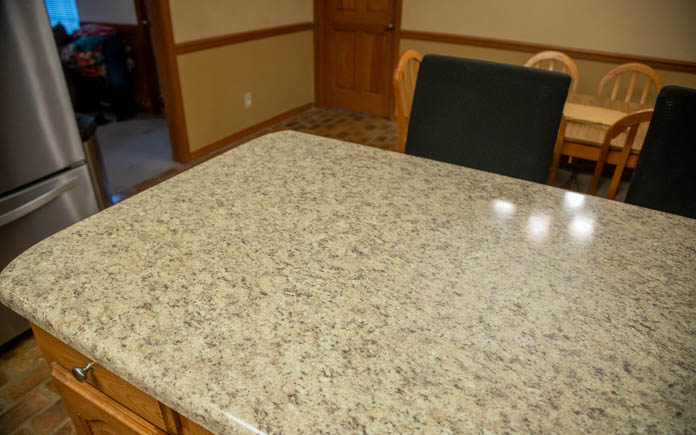
Refinishing the Counter tops
This kitchen’s counter tops are in excellent condition, but the plastic laminate no longer wows Lloyd and Aimee. And these countertops will not look good future to the brilliant white backsplash we’ve installed.
One uncomplicated decor trick is to update two adjacent surfaces with contrasting shades. The subway tiles are white, so these countertops will be black.
You can paint laminate countertops, but we’re heading to do one thing further distinctive, resurfacing them with Daich Coatings’ SpreadStone Countertop Refinishing Kit.
This solution, seen in Volcanic Black, fundamentally mixes darkish paint with real stones for a beautiful countertop makeover, and the software could not be a lot easier.
Initially, we sand the countertops to smooth out the laminate and get rid of any grime. Then we clear the countertop so primer will bond to it.

Once the primer is dry, we apply the stone coating, as directed, and allow it dry. Afterward, we sand it so the stone shines through, giving the countertop a magnificent granite seem.
Last but not least, we finish it off with sealer.

Generation Ideas
When we first saw the Meyers’ kitchen area, it was stuck in the ’80s and in dire have to have of a present day makeover.
By painting in excess of mustard-colored partitions, changing outdated light-weight fixtures and setting up a new backsplash, this kitchen is now in the 21st century!
The new wall coloration is lighter and brighter. The cupboards glance new, with a new coat of polyurethane and elegant pulls. And the white subway tile backsplash contrasts superbly with the dim countertops and light-weight fixtures.
