Table of Contents
Guest post by Micheala Diane Designs Builder Shawn Harris
This is an informative step-by-step guide on how to build a raised deck with no prior experience.
Can a beginner build a deck?
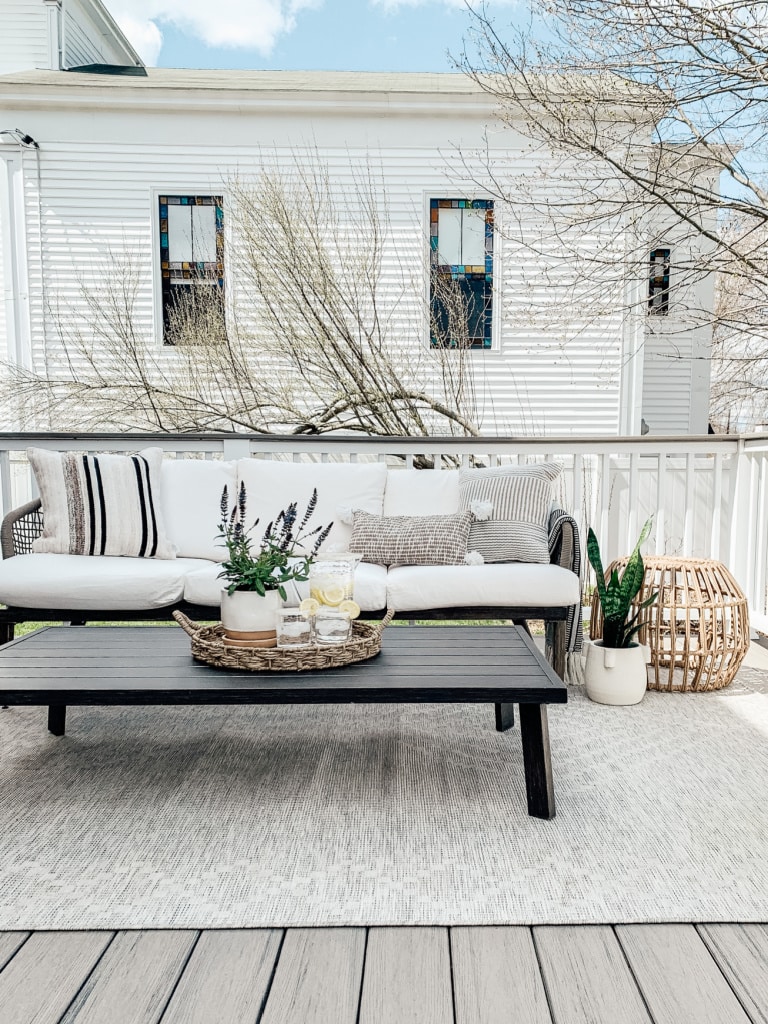
The first question you may have is can I build a raised deck and the answer is Yes! Anyone can build a deck with some knowledge at hand and basic tools. We are by no means carpenters but we were able to do enough research and figure out all the parts and pieces to construct a beautiful deck that we use and love all Spring Summer and Fall long.
Don’t forget this important step!
The most important part of deck building is following local building codes. PLEASE check with your local building department and building inspector before starting any projects. The local building inspector is usually more than happy to help with any code questions and will approve your project before you begin.
Depending on the town or city you live in you may need a permit. If you do not pull a building permit you may not be able to sell your house without ripping it down and you may even have to legally demolish it after you finish it even if you are not moving. So my advice: Get a Permit and check all your local building codes, it’s important!
Is it Cheaper to Build your Own Deck?
The short answer is…yes! I say this with labor costs in mind. Labor can add significant costs to your deck, sometimes as much as double the price of your finished product.
Not only will you add labor costs, but the builder will usually charge you more for the materials and lumber than what they paid for it! This common upcharge ensures the builder makes a profit and passes the costs onto you. And with the cost of lumber and materials skyrocketing, the price to build a raised deck has gone up at least 20% in the past 2 years, if not more.
Deck Structure Basics (Post and Beam Construction)
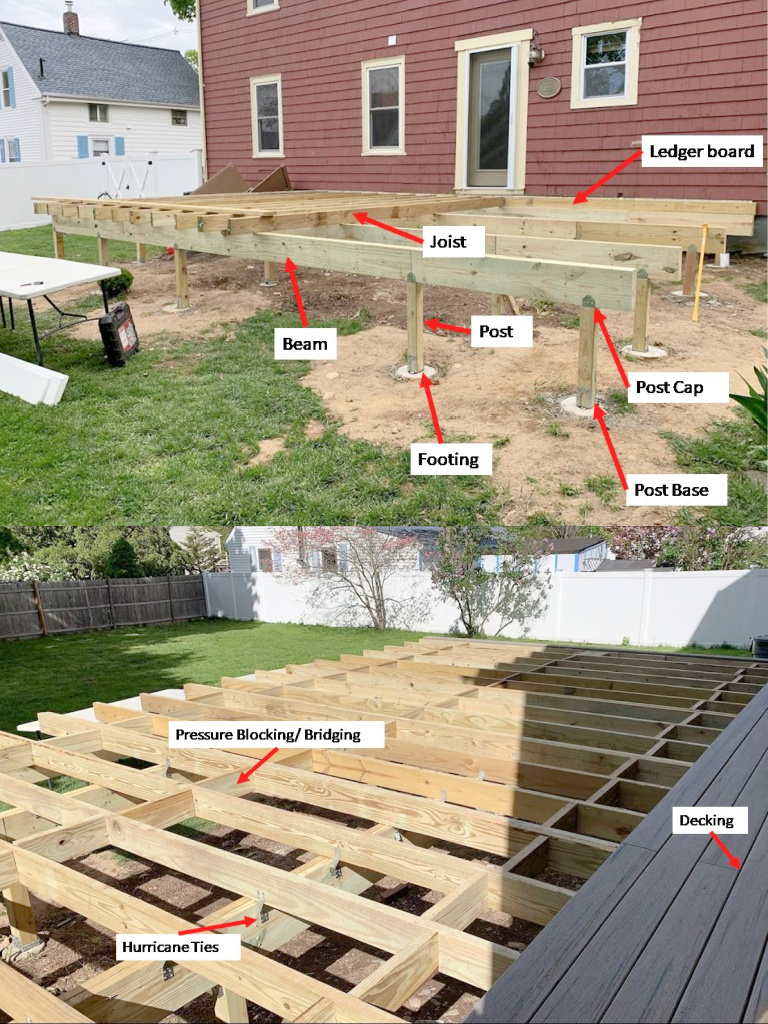
There are a number of basic elements to a deck that all together adds strength, stability, and function. Think of a deck in layers. Each layer transfers the live load down through the structure and into the ground. I will explain the layers from the ground up.
Footings
These will act as the foundation. Your house is built on a foundation, sometimes below ground to make a basement, sometimes a large slab. Decks use footings instead of poured concrete to save on material and act as small anchors for the overall structure. Footings can be poured into forms or can be pre-purchased and placed on the ground.
Post Base
This is a piece of hardware bolted or sunk into the wet concrete to act as the anchor for the rest of the deck.
Post
This element will support the beams and transfer the loads to the ground. It adds height to the deck.
Post Cap
The post cap is a piece of hardware that will positively connect your posts to your beams.
Beams
Sometimes called girders, this element connects the posts together and creates the substructure on which the “floor” level sits.
Joists
Joists are the main elements that make up the subfloor. All homes use joists to make up the subfloor structure. The standard spacings between joists are 12” On Center (O.C.), or 16” O.C.
Pressure Blocking
These are small blocks of wood that add rigidity to the joists and prevent them from warping or moving after you initially hang the joists
Hurricane Ties
Hurricane Ties are an additional positive hardware connection between the joists and beams. They reduce the uplift force caused by strong winds.
Rim Joist
This board caps off your joist members and completes the box for framing your deck. They provide lateral support for your joist.
Decking
This will make up the main floor of your deck. It can be made of wood planks or artificial deck pieces. Each has its own benefits. We went with TimberTech Driftwood decking for its look and 30-year warranty.
Deck Building Tools
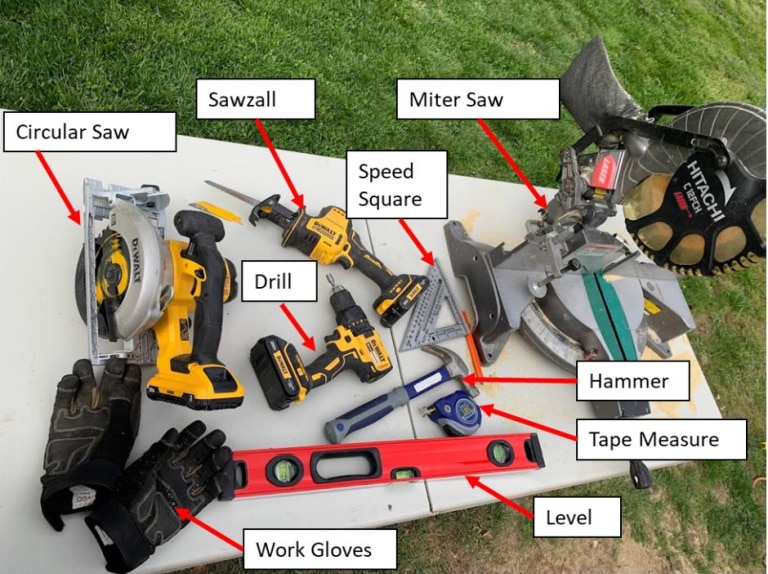
We were able to build our raised deck with all the tools you can see pictured and listed below. We also rented some equipment for the cement pouring and hole digging.
Circular Saw
Sawzall
Drill
Miter Saw
Hammer
Tape Measure
Level
Speed Square
Work Gloves
Pneumatic nailer
Finish Nails
How to Build a Raised Deck Step by Step
Step 1: Plan
Always start with a plan for your deck. How big do you want it to be? What finishes can you afford and prefer? You can plan with programs like Sketchup, a free CAD system, or sketch plans by hand on paper.
I would recommend sticking to standard lengths and widths (I.E., 12’/16’ feet, etc.). This is because these are the sizes joists are sold in. Typically they come in lengths of 10, 12, and 16 feet. This will eliminate waste by right-sizing the lumber you buy for the size deck you choose.
Another critical decision is, where are your footings going and what span (or length between posts/ beams) will you use? This Handy Website will help you choose what size lumber to buy and how much depending on a few factors:
- Type of Lumber (i.e. Pine, Hemlock, etc.)
- Joist Spacing (12”/16” On Center)
The last step of planning revolves around the decking and the pattern.
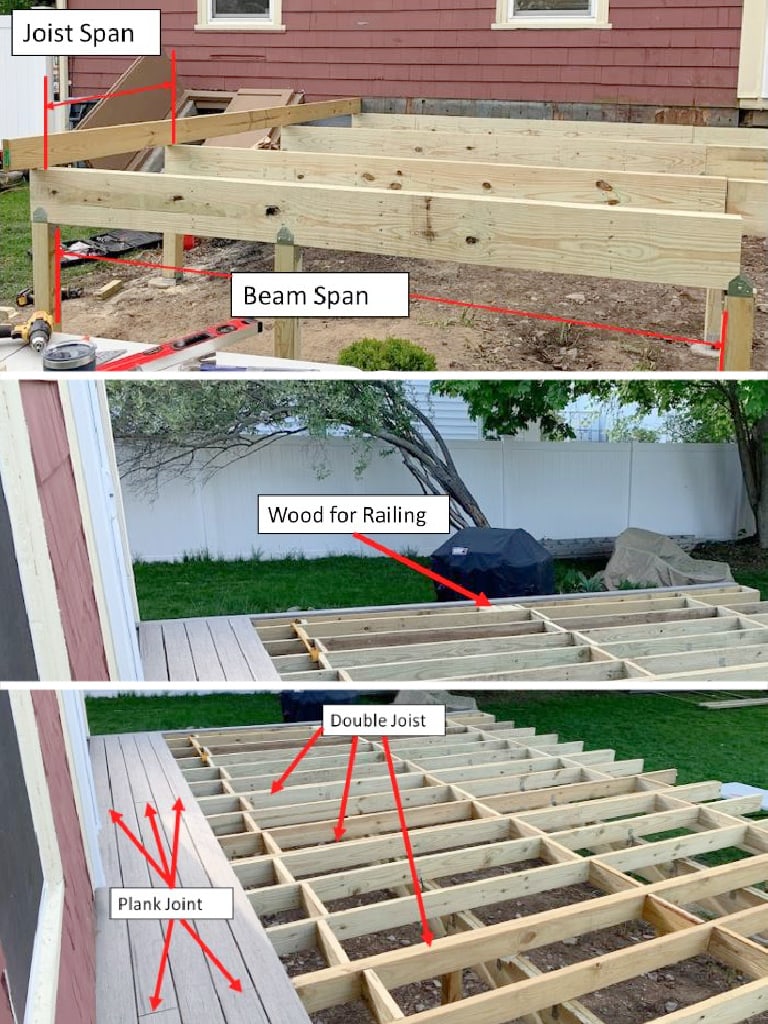
We planned our joists with our pattern of decking in mind and made sure that we had double joists where there would be a butt joint in the decking planks. We chose a Picture Frame Style for the decking and designed the frame accordingly.
Additionally, we knew where we wanted to install a railing and therefore installed blocking where the railing posts would be bolted to the frame.
Step 2: Time to Dig and Pour
Depending on where you live, you may have to dig down a certain amount of feet below the frost line. This prevents the footings from heaving or getting pushed up by the frozen ground in the wintertime.
In Washington state it’s 2 feet, in the Northeast, it’s usually 4 feet or more. Check your local requirements.
I recommend renting a post-hole digger to dig the holes. Many local rental companies offer this equipment and will even deliver it to your home for a small fee.
I would also recommend getting your concrete and concrete mixer delivered if possible. That stuff is HEAVY. This website has a deck footings calculator that can help you calculate how much you need.
Once your holes are dug, it’s time to mix the concrete. All you need is a hose and the mixer does all the turning for you. Pour your concrete into your pre-dig holes and forms.
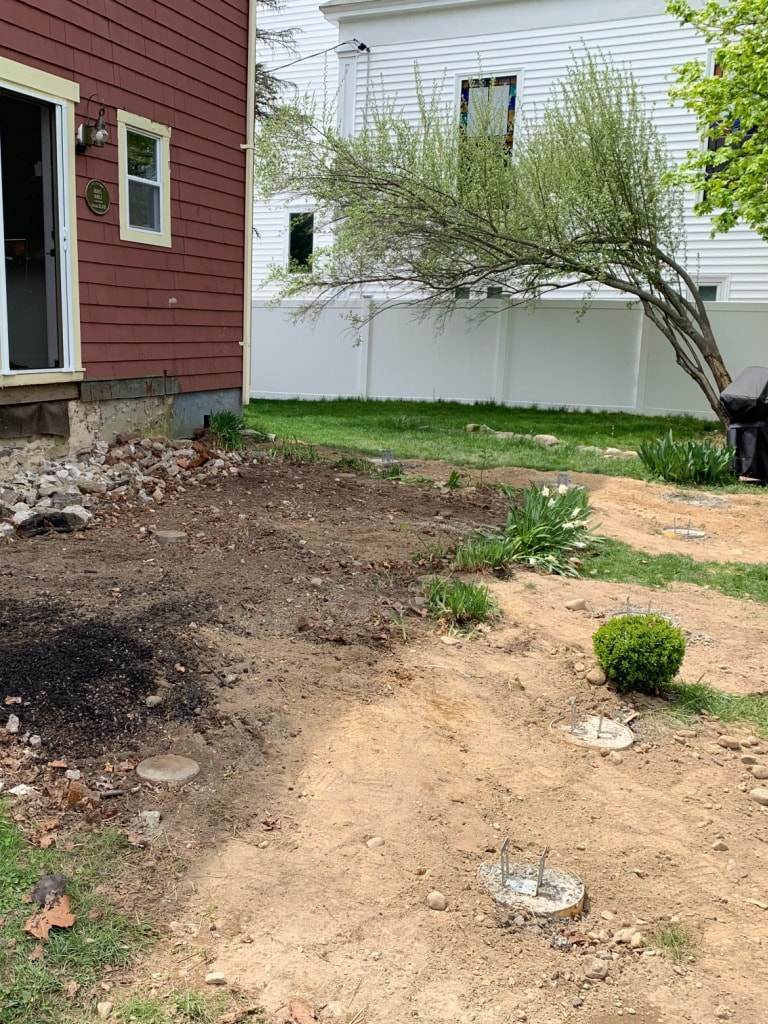
Then, if you are using post-base hardware that is directly set in the concrete, install those as well. You can see in the photo below where we poured new footings to support a bigger footprint of the new deck.
Step 3: Framing
We shopped at a local lumber yard for all of our wood. They let us hand-pick our materials and then delivered them to our house.
I would recommend doing the same if you can. It ensures you know you are getting quality lumber for building. Lumber yards typically get the first pick of materials with big box stores getting the leftovers.
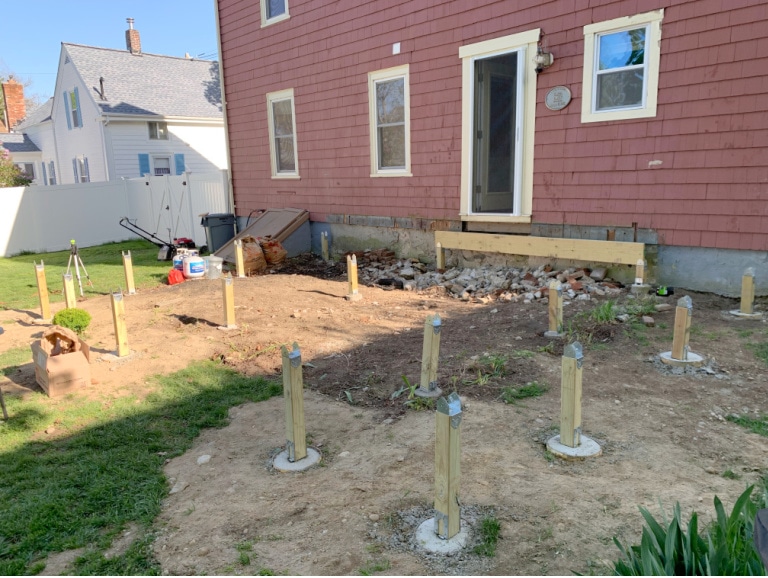
After your footings and Post Base hardware are installed, it’s time to start framing. We used a laser level to cut all of the posts. When measuring the height of the post, take into account:
- Height of Beam
- Height of Joists
- Thickness of Decking
Once you have added all these heights up, it will help you cut the posts to the right height. The laser level will ensure all posts are in line with a level deck.
Post and Beams
Once the posts are installed, install the post cap hardware that will accept the beams.
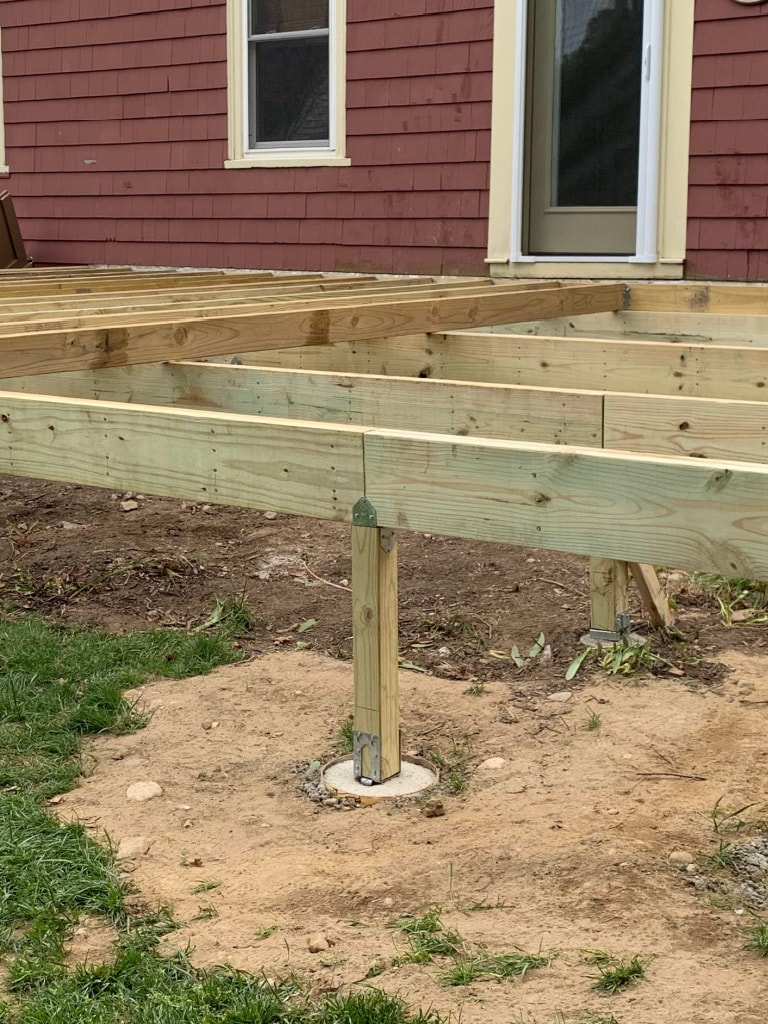
When installing the beams, ensure that if you have joints between beams that the load is shared by one post, meaning, one beam sits on ½ of the post and the second beam sits on the other ½. See the photo below.
ledger board and joist
Next is to install your ledger board ( this is a great video) to your home before installing the joists. You can layout where your joists will sit on the ledger board with pencil marking to help the installation of the joist hangers go smoothly.
Now it is time to install the joists. When installing the joists, you should grade your lumber ( watch this video) before installing. This will ensure your deck is level once the decking is installed.
Not all joists are going to be exactly the same height. Grading your lumber before installing puts them in order from shortest to tallest board and ensures a smooth transition between deck boards.
Install each joist to the ledger board with a joist hanger. Ensure you use every single screw/nail hole on the joist hanger hardware. It won’t be safe if you skip holes and don’t install enough hardware, also you could fail your inspection for this.
Pressure Blocking and Hurricane Ties
Next, you will install pressure blocking and hurricane ties. This ensures your joist frame is structurally sound.
At this point, you can measure the final width of your deck and cut all the joists to length, and install your rim joist. However, we chose to install our decking first and leave the joist ends open until the final decking board was to be installed. This ensures that you can use a full deck board for your final board.
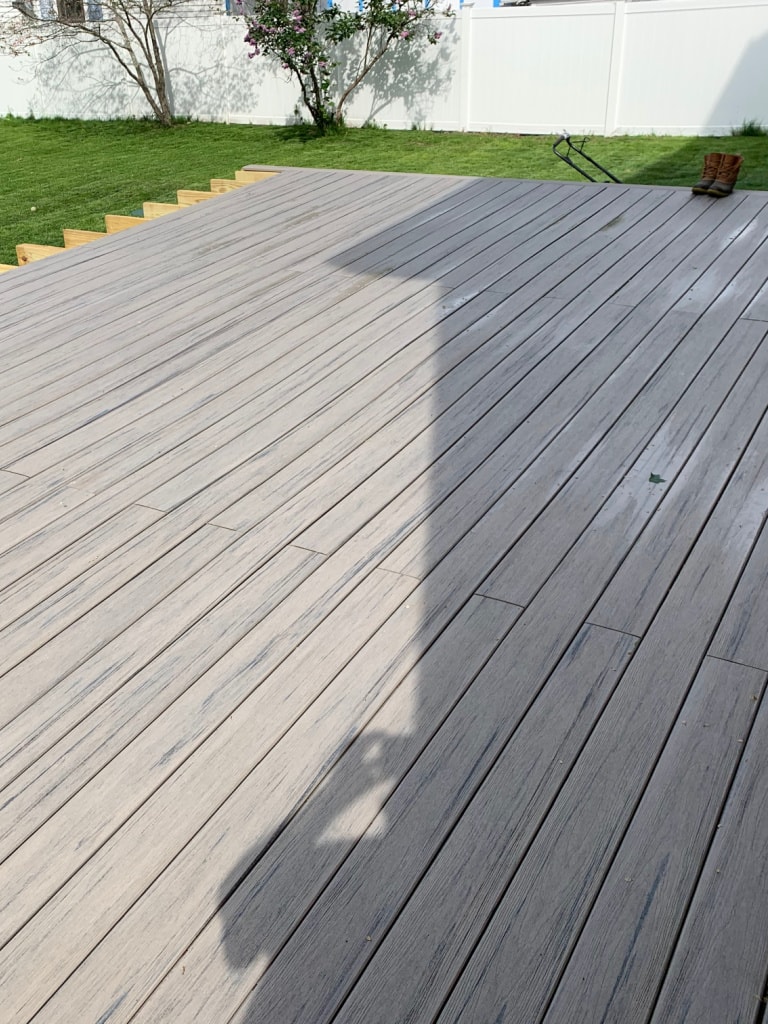
Step 4: Install Decking
We choose Azec Timbertech Driftwood to install on our deck. We also used CONCEALoc® Hidden Fasteners for most of the deck boards. And TimberTech Cortex® Hidden Fastening System on the outer edge deck boards.
I would recommend getting a spacer to ensure all your boards are spaced equally. If you are using artificial decking, check your install guide for proper spacing requirements.
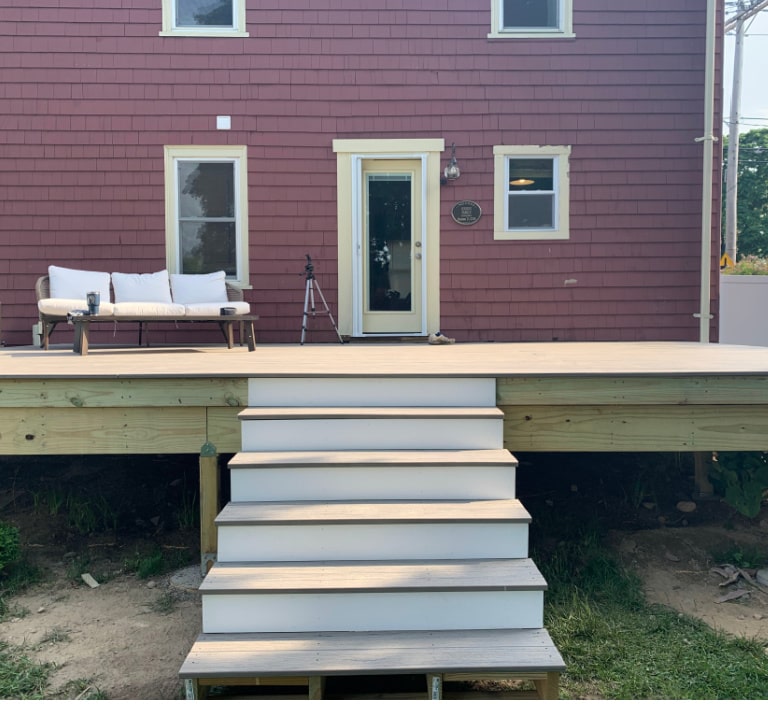
Step 5: Install Stair
I would recommend buying your stair stringers from the hardware store. This ensures that you have the proper rise and run of your steps and makes life easier.
You can also pour a concrete pad where the bottom of your stairs will land on the ground. This gives the steps proper footing and allows you to use hardware to connect the steps to the concrete.
Standard spacing between stair strings is 12” O.C. For the treads and kick boards, we used Timbertech boards with Cortex® Plugs and PVC fascia board.
Step 6: Install Railing
The way we designed our deck, we didn’t have to account for posts for the railing. This is because we used an artificial post and railing system. There was a slight learning curve to the installation process of the railing system, but once you get the hang of it, it was simple. Once you install the railing your deck is DONE!
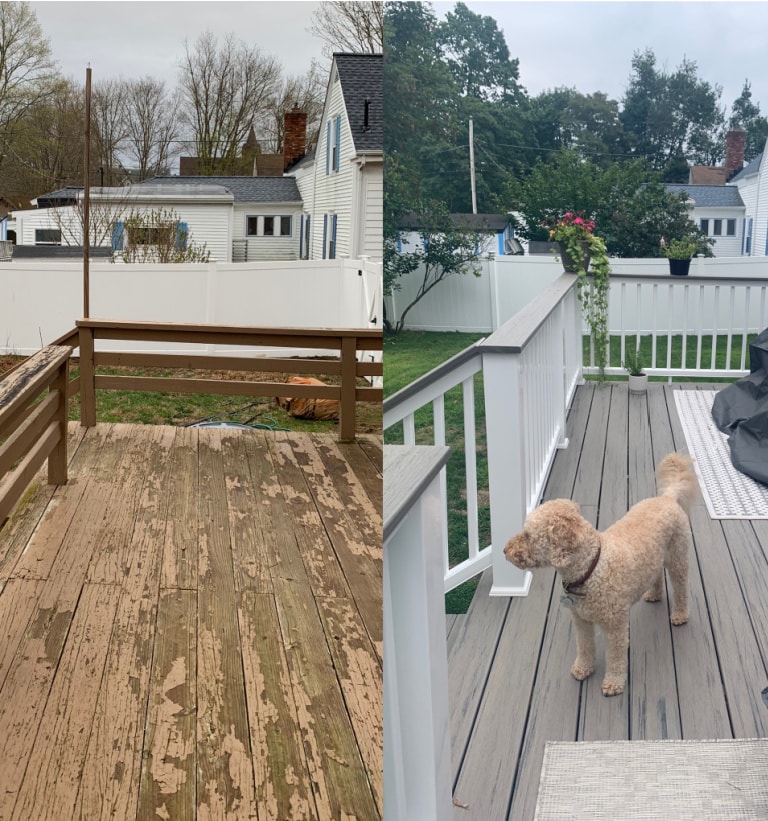
I hope this post gave you the information and confidence to build a raised deck on your own. Please feel free to leave any questions in the comment section and we will do our best to answer based on our experience.
What to Read Next:
Outdoor Furniture and Deck Progress
Affordable Outdoor Rugs
Simple Lemon Tablescape
Want to save this for later? Post this How to Build a Raised Deck to your favorite Pinterest Board!
