Table of Contents
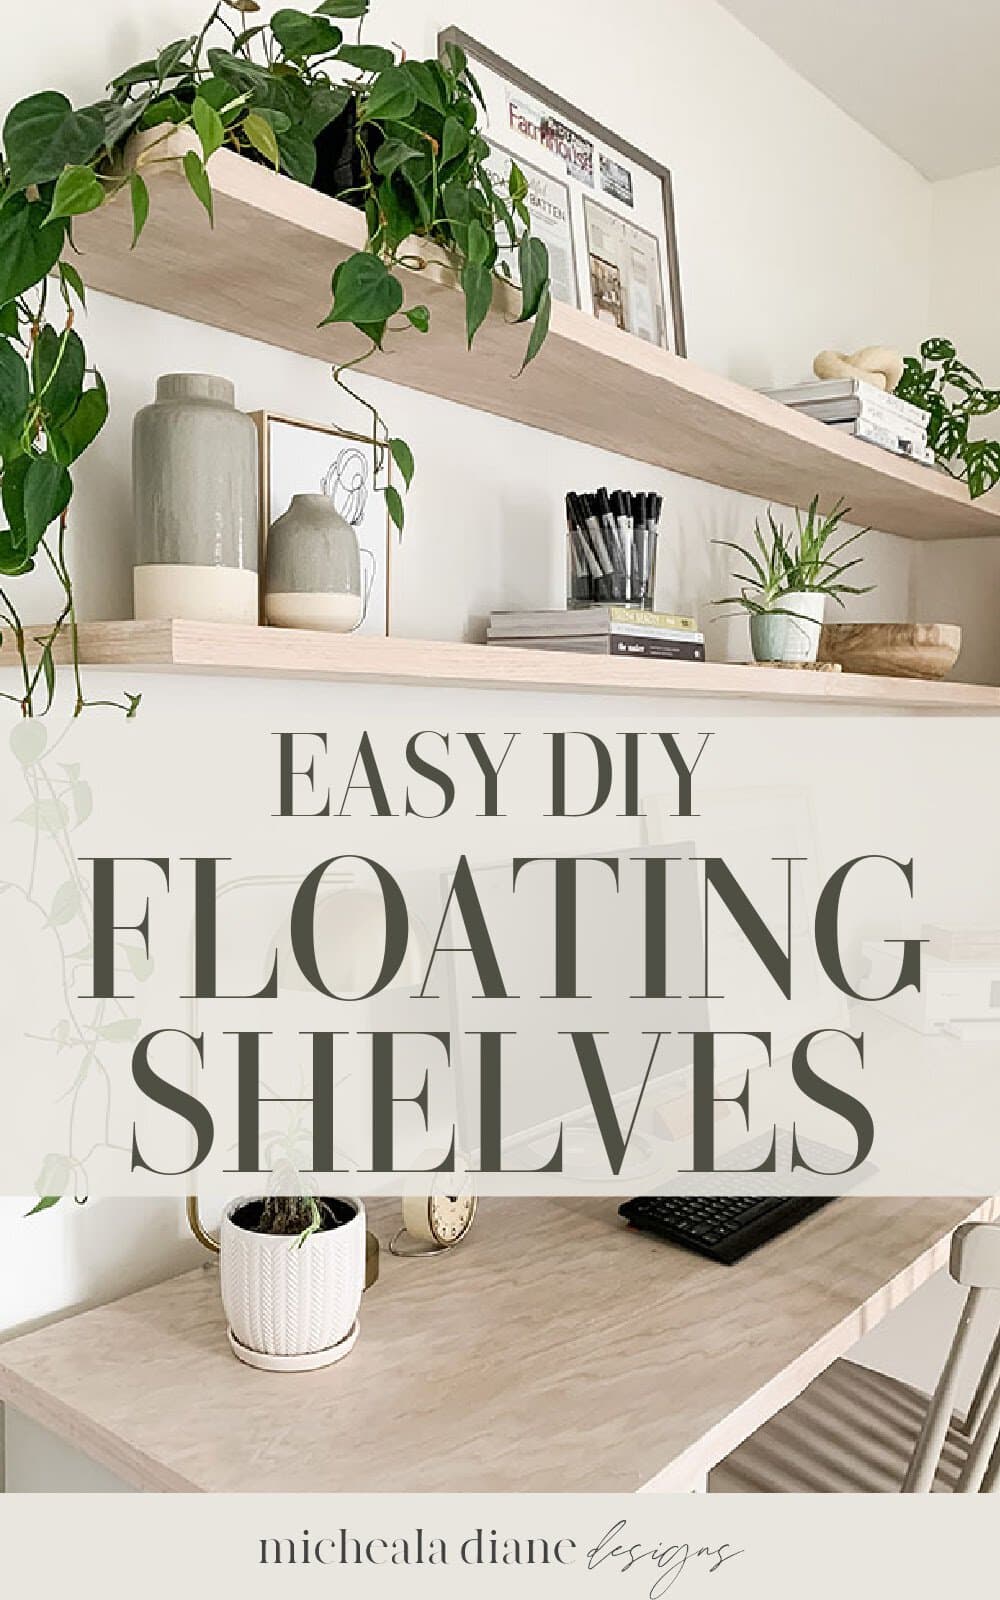
In this post, I am sharing a step-by-step tutorial on how to create DIY thin floating shelves. This easy DIY can be used for any space you want to add open shelving.
We recently renovated our guest bedroom and turned it into a multifunctional guest bedroom, home office, and home gym combo! You can check out all the design details HERE and why a multifunction bedroom might be the best option for your home.
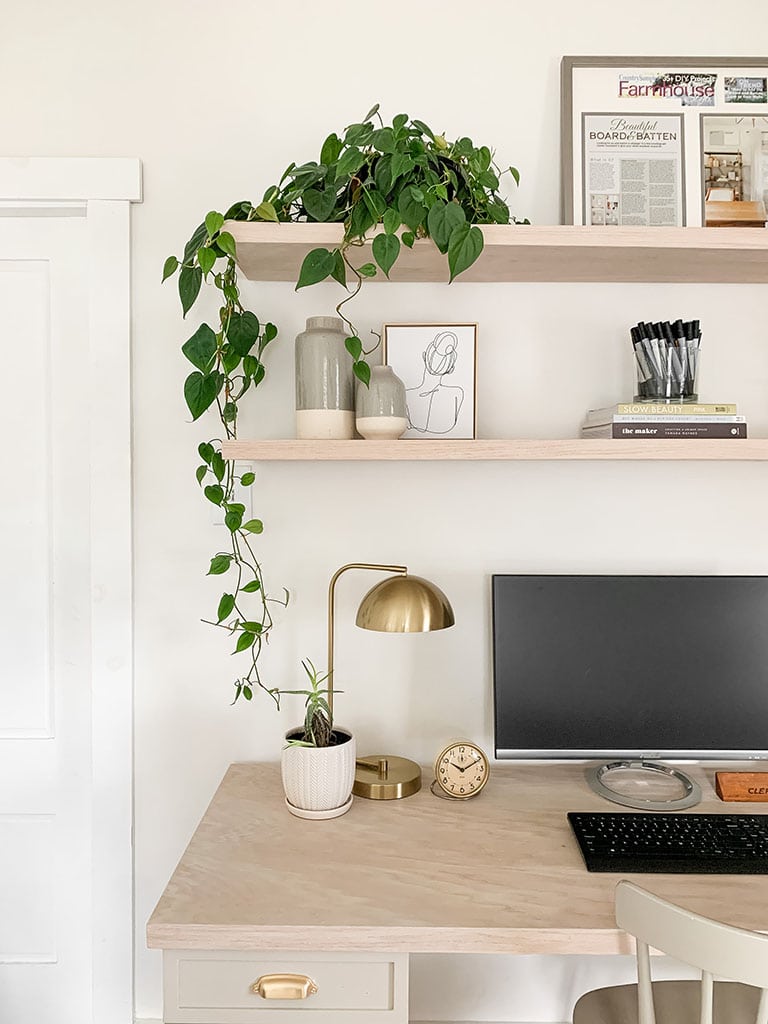
During our renovation, we decided to DIY our own custom L-shaped desk. This desk shape allowed for both me and my husband to work from home. This was an Ikea Alex desk hack with a custom wood desktop. You can check out the full tutorial HERE.
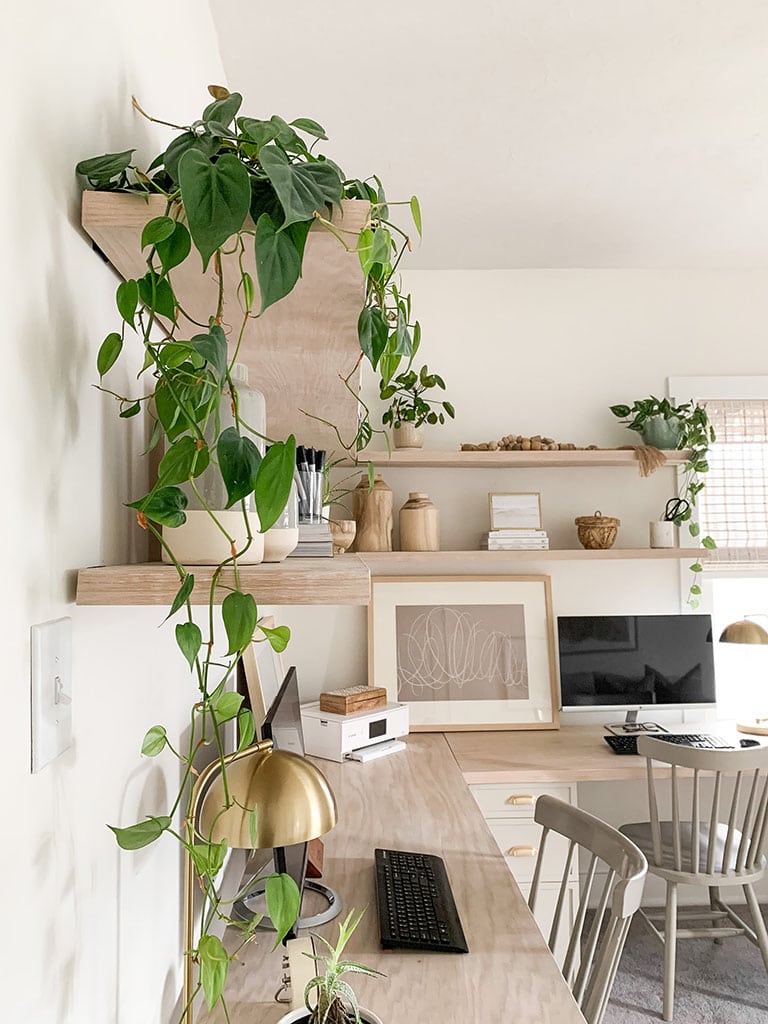
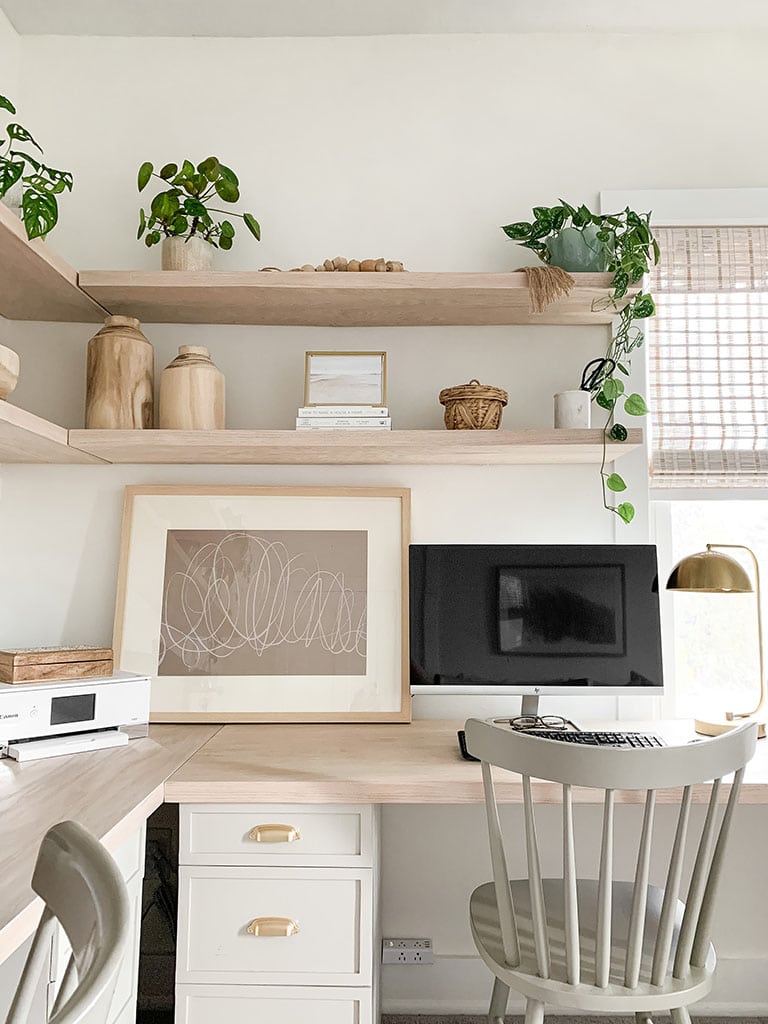
All of those projects lead to the need for beautiful DIY thin floating shelves. The floating shelves are the perfect complement to the DIY desk and match the desktop finish perfectly. This project was the perfect finishing touch for our office installation.
This post is a step-by-step tutorial that can be done together with the DIY desktop project or on its own. If you are doing our desktop tutorial as well many of the materials and processes are the same.

DIY Thin Floating Shelves Materials List:
Although we did double L-shaped thin floating shelves above our desk you can use this tutorial for any length of shelves. They can also be used in any location you need the extra storage. Adjust material quantity based on your project.
“Affiliate links provided for your convenience, please read my disclosure for more information.”
Sand Paper
Tools Required:
Step One: Measuring & Cutting the Plywood
The first thing you want to do for any project is plan out where you want your shelves and how long and deep they will be. Since we used 4 x 8-foot plywood boards and needed 4 shelves we decided to do 12-inch deep shelves. The length will depend on your space.
We used (2) 8-foot and (2) 4-foot 5-inch shelves. This allowed us to create (2) L-shaped shelves to mimic the shape of our desk.
Once you have all your materials the first step is to cut your plywood to width and length. Our shelves are 12 inches deep and 1.5 inches thick. This means we cut the 4-foot boards into (4) 12-inch boards lengthwise and then glued them together.
Taking your circular saw and Kreg Guide, set the guide to 12 inches. Mark 12 inches with a Chalk Line to ensure you are cutting your boards in a straight line. When everything is in place carefully rip your boards in half. Alternatively, if you have a Table Saw, you can feed your board through that at 12 inches.
Safety Tip: Plywood boards are ¾ inch thick, 8 feet long, and made of oak, they are going to be heavy and awkward to handle. If you can, get a second set of hands to help with moving the boards around and cutting them.
Next, you will need to decide if you need to remove any length from the 8-foot pieces based on the length that you want your shelves to be. Because the boards are glued together, if you have to cut one board to a specific length, you will be cutting two. Keep this in mind as you plan out the boards before cutting to length.

Image Source Home Depot
Step Two: Gluing the Plywood Boards
Once all your boards are cut to the proper width and length, it’s time to glue them together. This is going to create your 1.5-inch thick wood desk.
Using wood glue, cover the entire surface of the plywood board and sandwich the other “half” on top. We used short wood screws and clamps to secure the boards while they dried. Be sure to use the nails on what will be the top of the shelves ( or where they will not be seen). Make sure they are short enough that they do not come thru the bottom of the shelves.
When the boards are dried and glued together, you will want to sand the edges to be completely flush. This is important for the next step. If the boards are not completely flush, the veneer will not adhere to the edge properly.
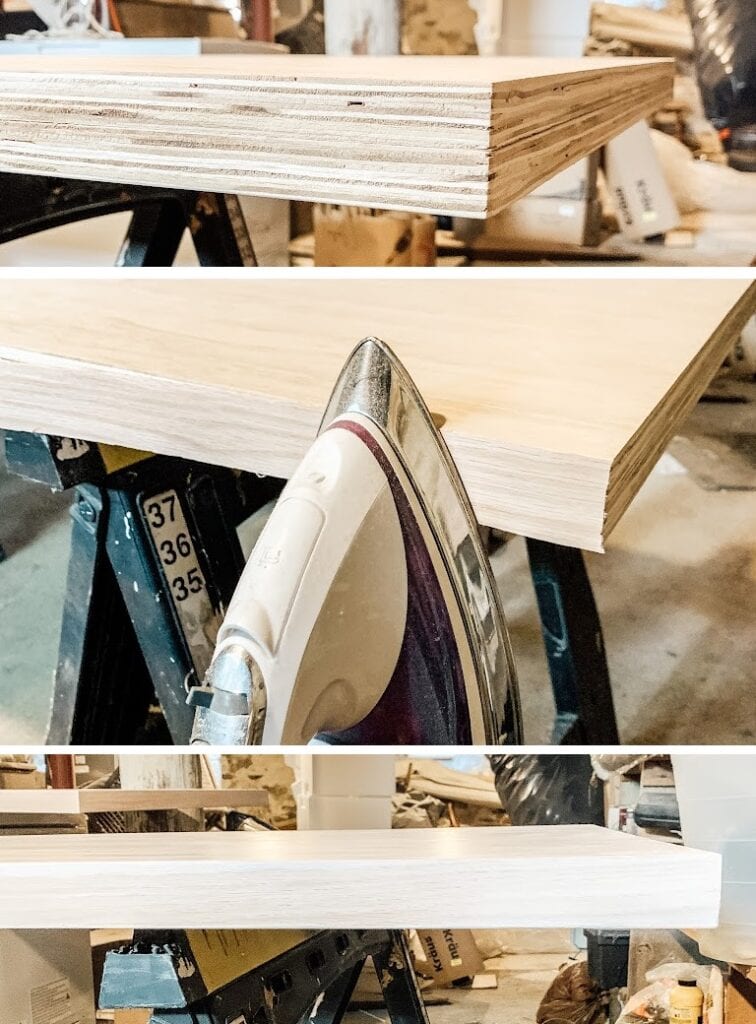
Step Three: Applying the Veneer Edges
Savings Tip: You do not need to apply veneer edges to the sides that will be facing the wall.
The next step is applying the veneer to the edges to your shelves. For this project, we used a red oak veneer with a 1.5-inch thickness. This matches the same wood type as the plywood boards and is the exact thickness of our thin floating shelves.
It is very simple to apply the veneer edge and the end result looks like a solid wood shelf. The veneer has heat-activated glue on the back. Simply use the veneer and a household iron on the lowest setting to attach the veneer.
Leave a slight overhang on the edge as shown in the picture. When the strip is attached, let it cool for about 10 minutes. Then go over any stubborn spots that didn’t get glued all the way. After the strip is attached, sand the edge flush. You should end up with a sharp edge.
Follow the steps above for all the sides that will be exposed when the shelf is installed.
Step Four: Stain DIY Thin Floating Shelves
For the stain, we choose the stain Simply White by MinWax. This stain color is the same that we used for our DIY desktop. We wanted the desk and the floating shelves to be a perfect match.
You can choose any stain color that you would like for this project.
Simply White has a beautiful pickled white-washed look that gave us the light wood finish we were looking for. When choosing a stain be mindful of the type of wood you are staining. The same color stain will look different on each wood type. We selected ours based on what it looked like on Red Oak.
Before applying the stain we used a wood conditioner following the directions on the can. This allowed us to get an even coat of stain and prevented any streaking.
Next, we applied our stain liberally with a rag, wiping off the excess. Finally, we finished with two coats of matte polyurethane to protect the finish.
Step Five: Installing Floating Shelves Brackets
This step takes some planning and lots of patience. The smaller your shelves are the easier this will be but we have very long shelves and it was a bit more complicated to hang.
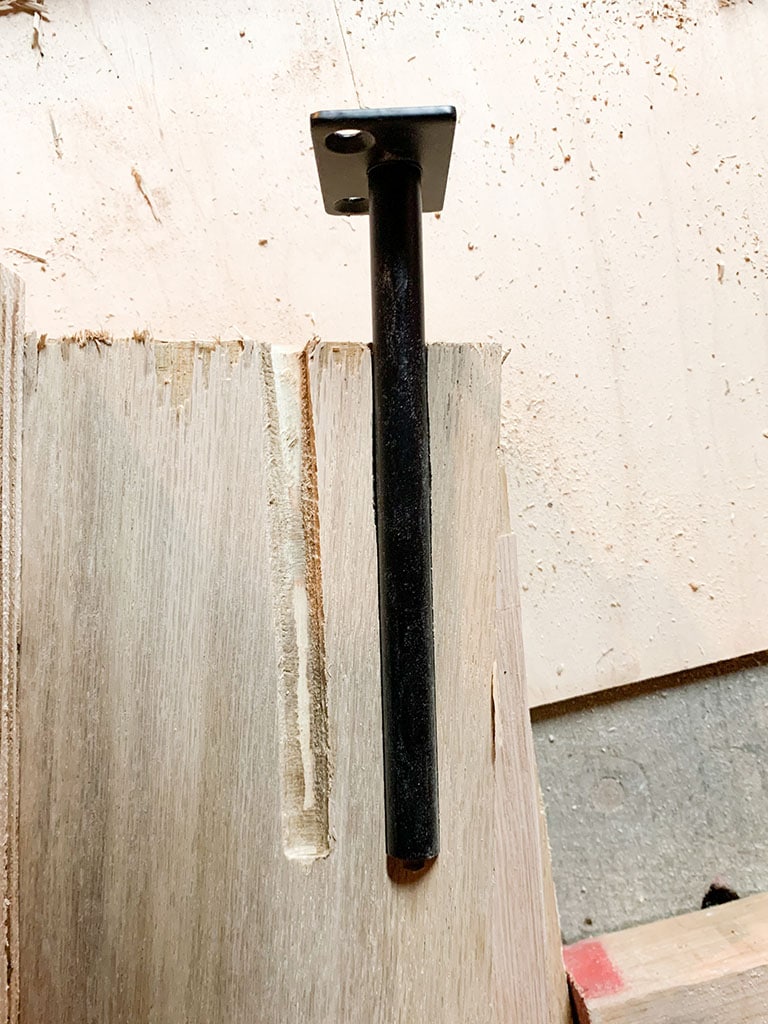
Floating shelf brackets allow for a seamless modern floating shelf. All the hardware is hidden inside the shelf. There are a couple of different ways to achieve this look. One way to achieve this look is to create a hollow pocket for the hardware to sit in. We wanted our shelves to be “thin” and not bulky so we decided to drill out the hole for the hardware.
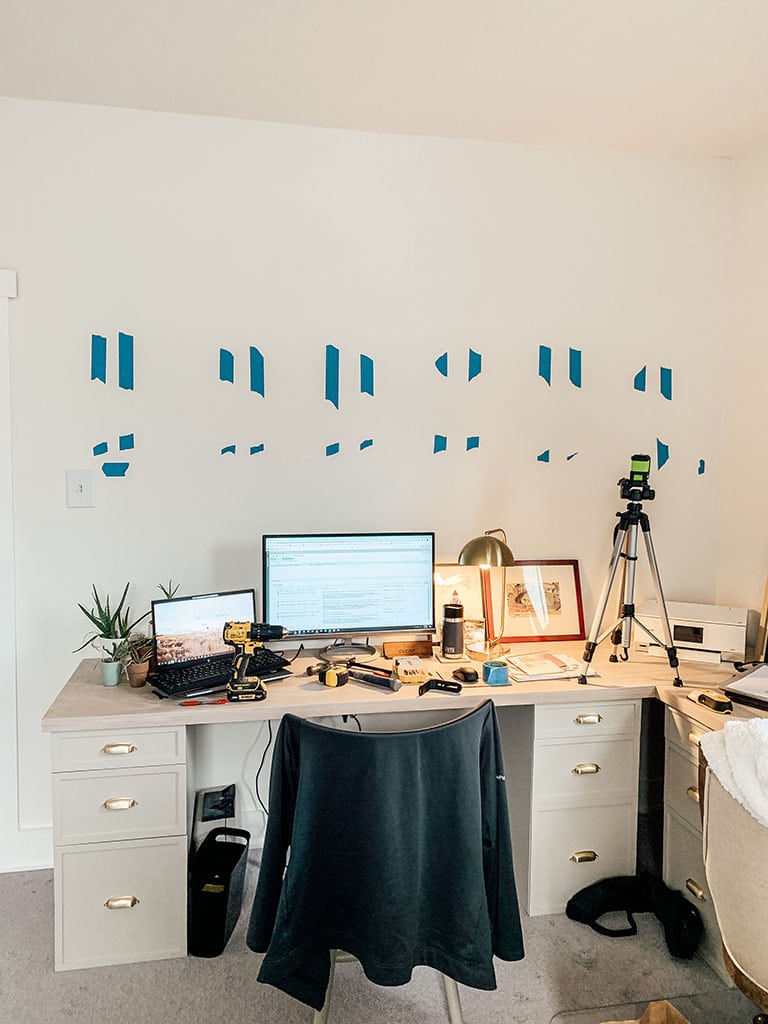
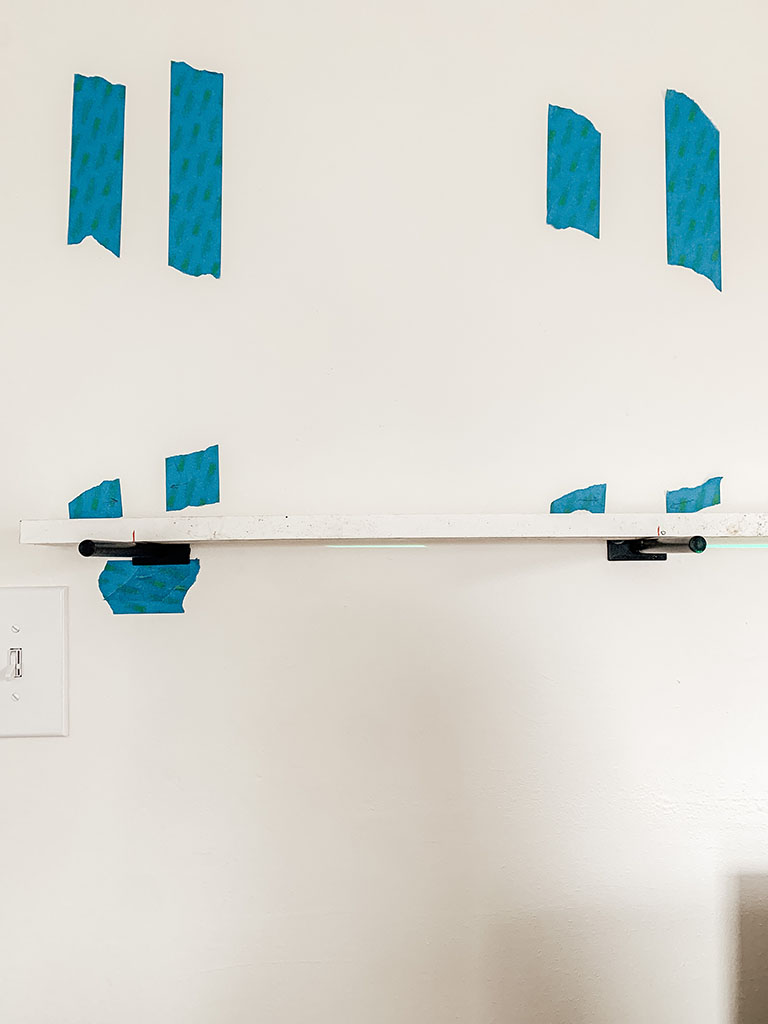
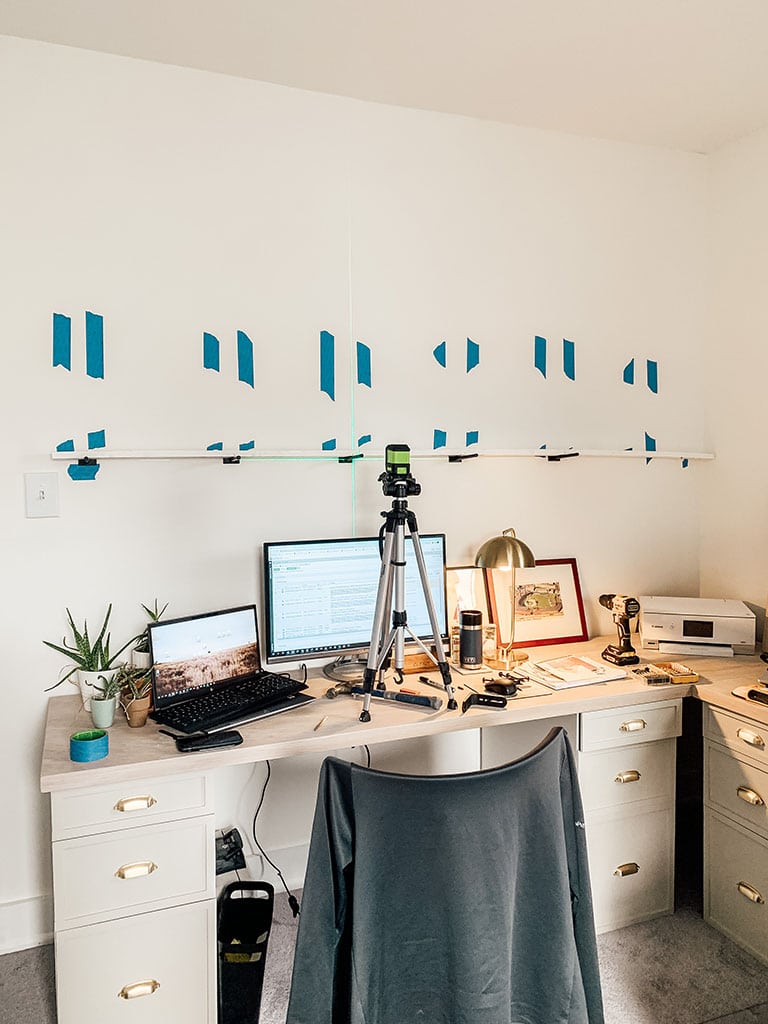
Before deciding where to hang your shelves you need to find the studs in your wall. Using painter’s tape mark where your studs are. This is where your floating shelf bracket will be installed. We placed a piece of hardware on every stud available on our walls.
Use your laser level to mark a perfectly level line where you want your shelf to sit. Bolt your hardware to each stud. Finally, take a piece of scrap wood and lay it across your hardware. Mark on the scrap wood at the center of each hardware post. This will be your guide for drilling holes in the floating shelves.
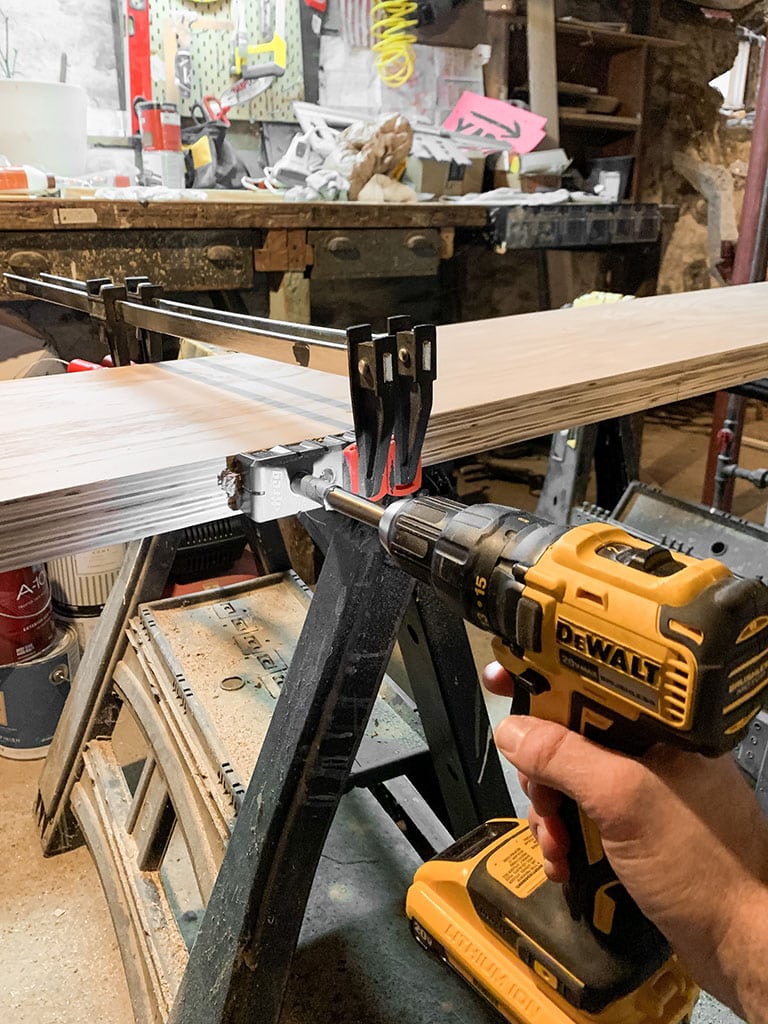
Step Six: Predrill Bracket Holes
This step requires a drill guide( trust us, lol). This will keep the hole straight for the bracket and ensure you are not drilling through the side of the shelf.
Clamp your drilling guide to your shelf. Mark on your drill with painter’s tape the maximum depth to drill. If you don’t mark the depth, you run the risk of drilling through the front of the shelf.
Go slow when drilling. Because of the size of the drill and depth, you will need to back the drill out and clear wood chips as you drill in small increments. Repeat this process until all holes are drilled.
Step Seven: Install DIY Thin Floating Shelves
Depending on the length of your shelves you may need two people for this install.
The final step once the brackets are installed and the holes are drilled into your shelves, is to do the installation of the wood shelves. We placed our shelves right on the hardware by lining up the holes with the floating shelf brackets.
You may have a few that do not line up completely centered with the predrilled hole. We use a piece of scrap wood and a mallet to tap the shelves in place if they are installed with any resistance.
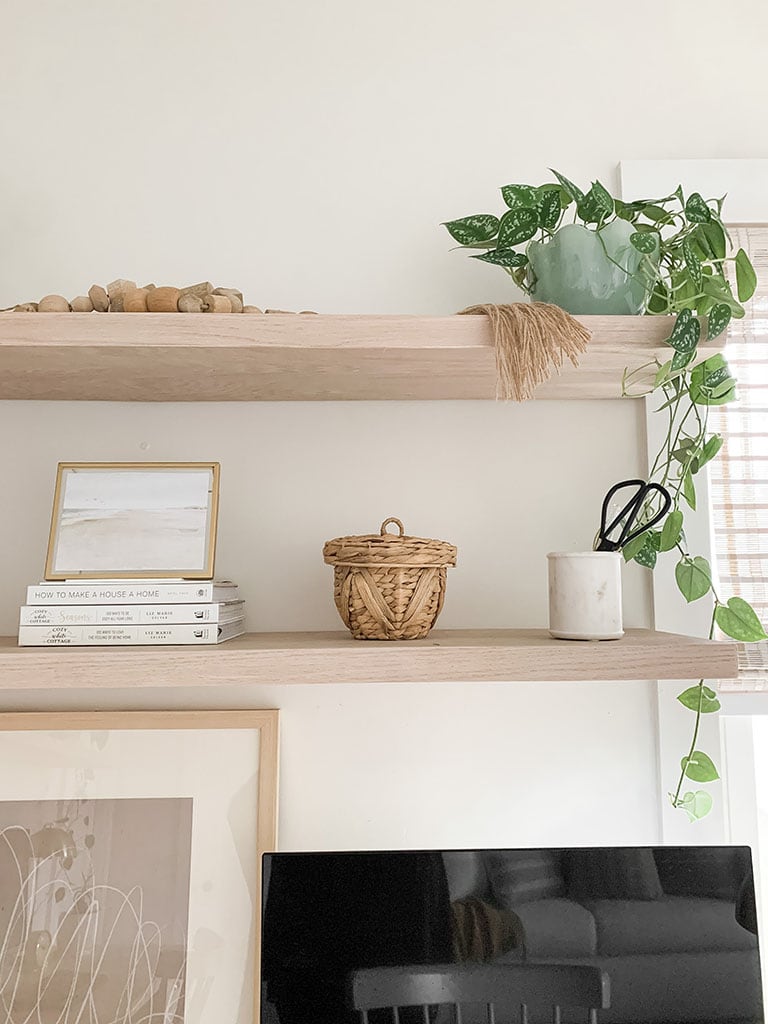
That’s it, I hope that this DIY thin floating shelves post was helpful. If you have any questions I will reply in the comment section. If you need help styling you can check out my post on how to style open shelving HERE.
What to Read Next:
Ikea Alex Desk Hack
Home Office Guest Room Design
DIY Skinny Board and Batten
DIY Shiplap Electric Fireplace & Mantel
The Best Tools for DIY’ers
Want to save this for later? Post this DIY Thin Floating Shelves to your favorite Pinterest Board!