
Table of Contents
For nearly a year, we’ve been in the process of reimagining our pool area as a bigger, more multi-functional space.
It ended up being a bit more than just that, so I’ll take you through the various steps we took to maximize this yard. In short, here’s what we did:
- Moved a section of fencing
- Built a platform deck to create an outdoor dining space
- Poured concrete walkways, stairs, and retaining walls
As part of this overhaul, we also added a driveway and pathways along the front of the house too, and we’re in the process of putting all of those details and photos into another post. So back to our bigger and more functional pool area.
Video Walk-Through Day & Night
The video tour below shows how everything flows together better than any series of photos could – and even shows you how it transitions at night when all of our outdoor lights come on.
Note: You can also view this video on YouTube.
Step 1: Moving The Fence
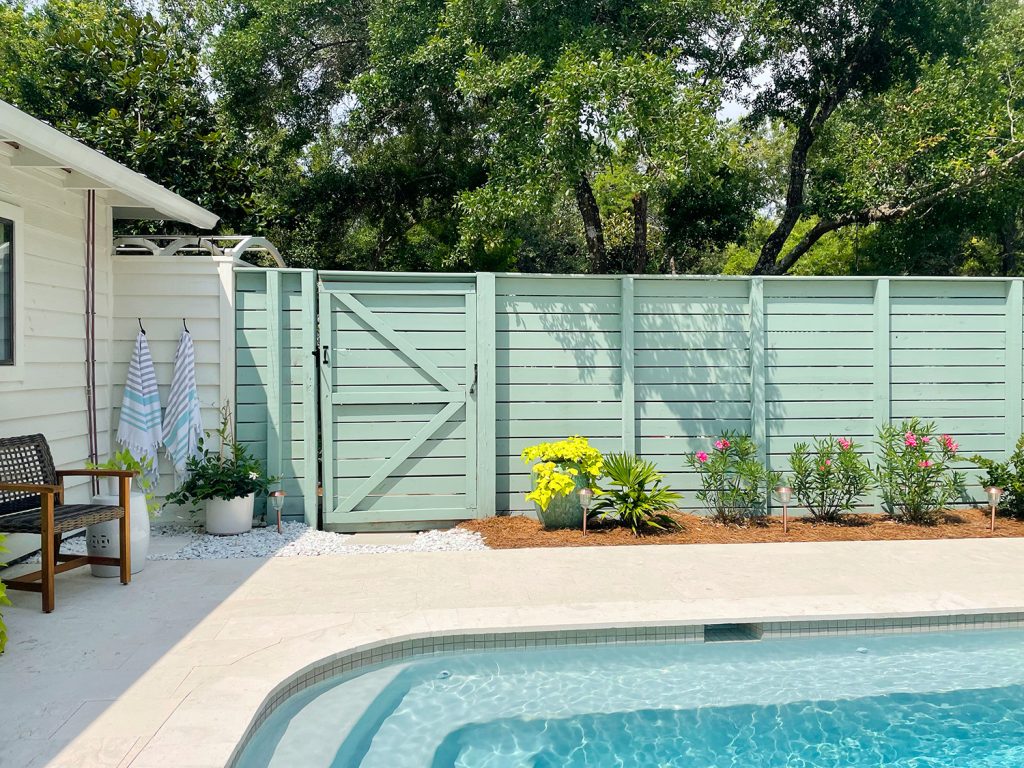
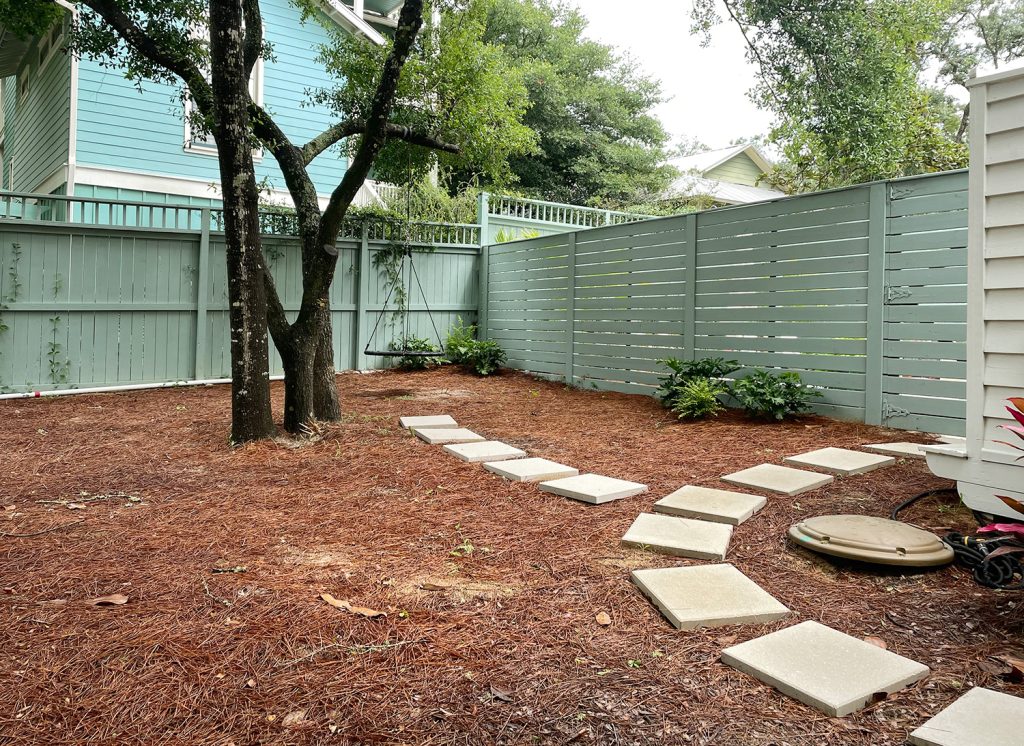
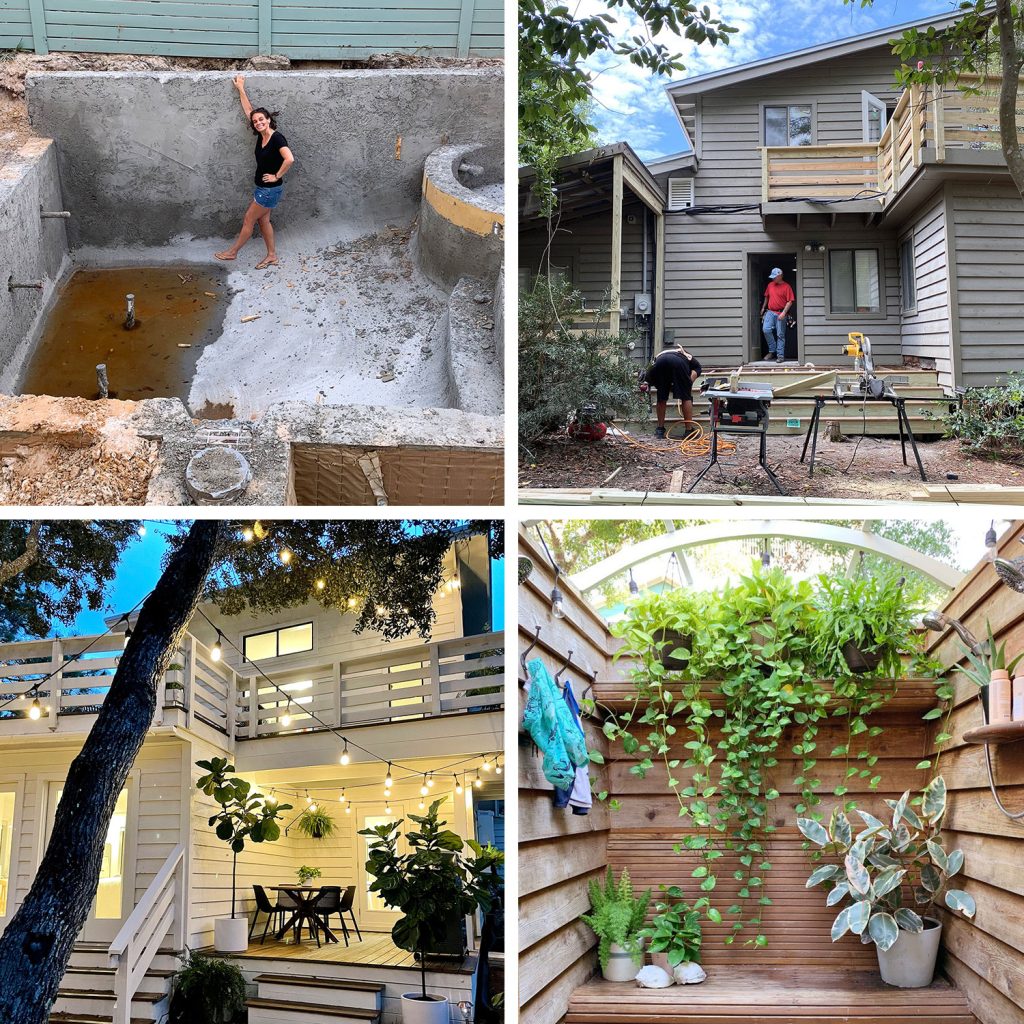
To pass our final pool inspection in 2021, the pool understandably needed to be fully enclosed with fencing. The yard was already fenced on all sides except one, so we just added this short section pictured below. We considered it to be “temporary” because once we fully recovered from the exhaustion of pool construction, we had planned to build a small guest structure (we affectionately called it “a shed with a bed”) right where those flowering bushes are and obviously would have to redo the fence around that.
We eventually decided that structure was unnecessary. One of our neighbors rents us her guest house for such a deal just a few houses away, so our friends and family love staying there – and it’s much roomier than any shed with a bed that we could squeeze between our pool and that beautiful tree that we were unwilling to lose. So that big realization led to us nixing the idea of a guest shed completely – and the fence stayed right where it was for a while.
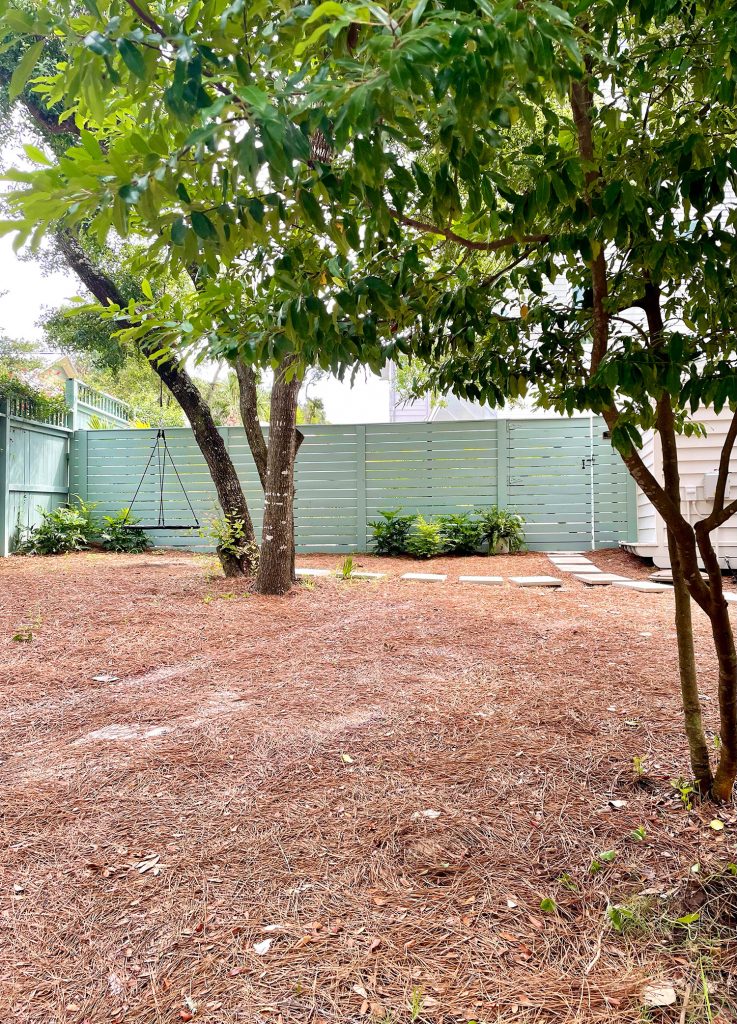
Over time (which can be SUCH a good illuminator of things), we realized that the section of fencing that we added to pass inspection cut off the pool from a large section of the yard beyond it that we weren’t using (except for the tree swing, below). This is the view from the street, with the pool behind the fence. See all that space???
So last summer, we finally decided to redo this portion of the fence as planned – but without a guest house coming into play first. Here’s a photo that was taken from our upper deck the day the fence crew showed up to start work (hence the pavers being moved out of place). You can see the old section of the fence in the upper right corner of the photo below. Note: not only was the old fence taken and reused, our old pavers live on in another house too.
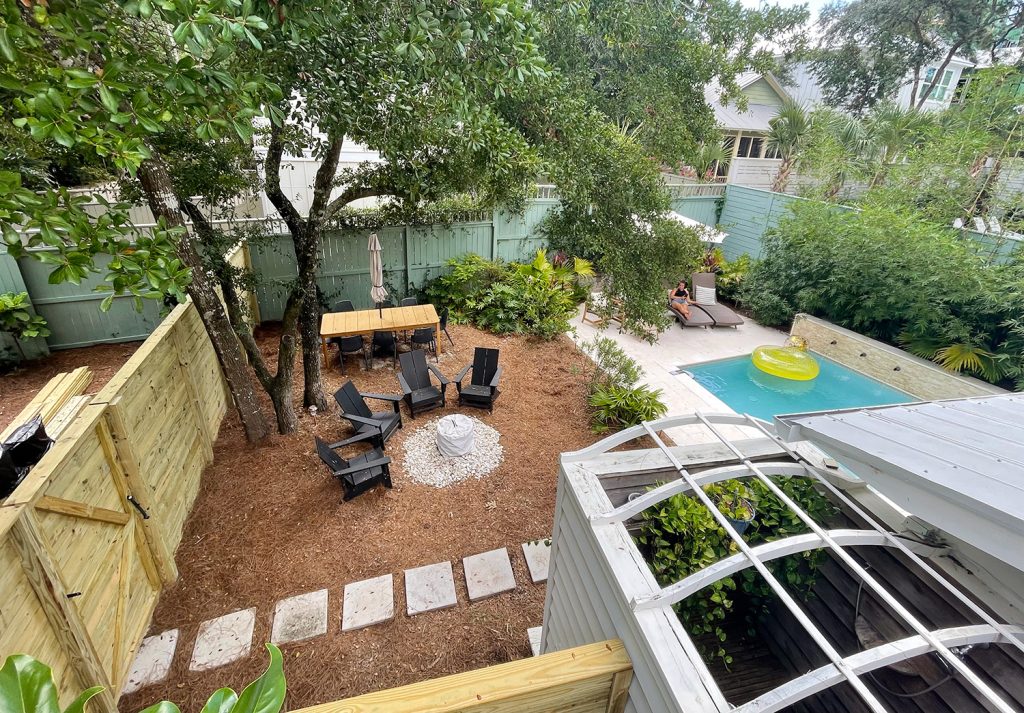
I’ll jump right to an after photo here, for easier scroll-to-compare purposes. Prepare to see lots of other changes besides just the moved fence. But fence-wise, you can see how we had it rebuilt to enclose that previously underutilized area around our big oak tree, which we can now enjoy from the pool area. And don’t worry, the tree swing just moved to the other side of the house.
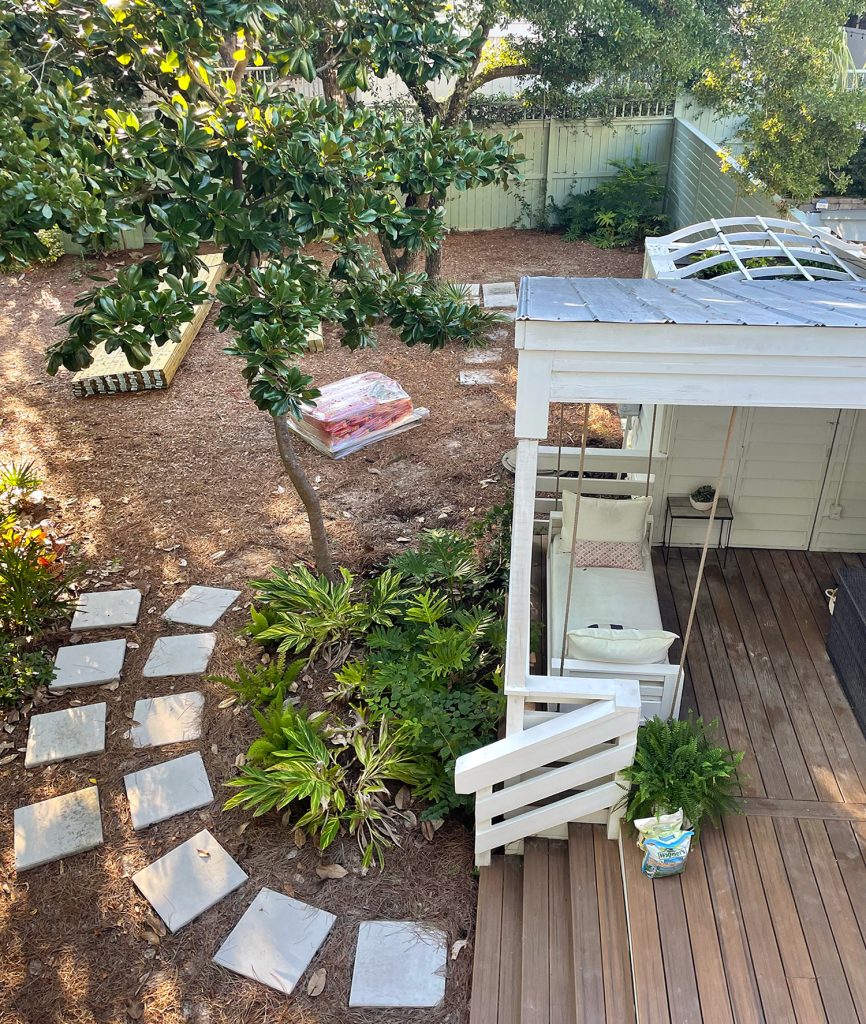
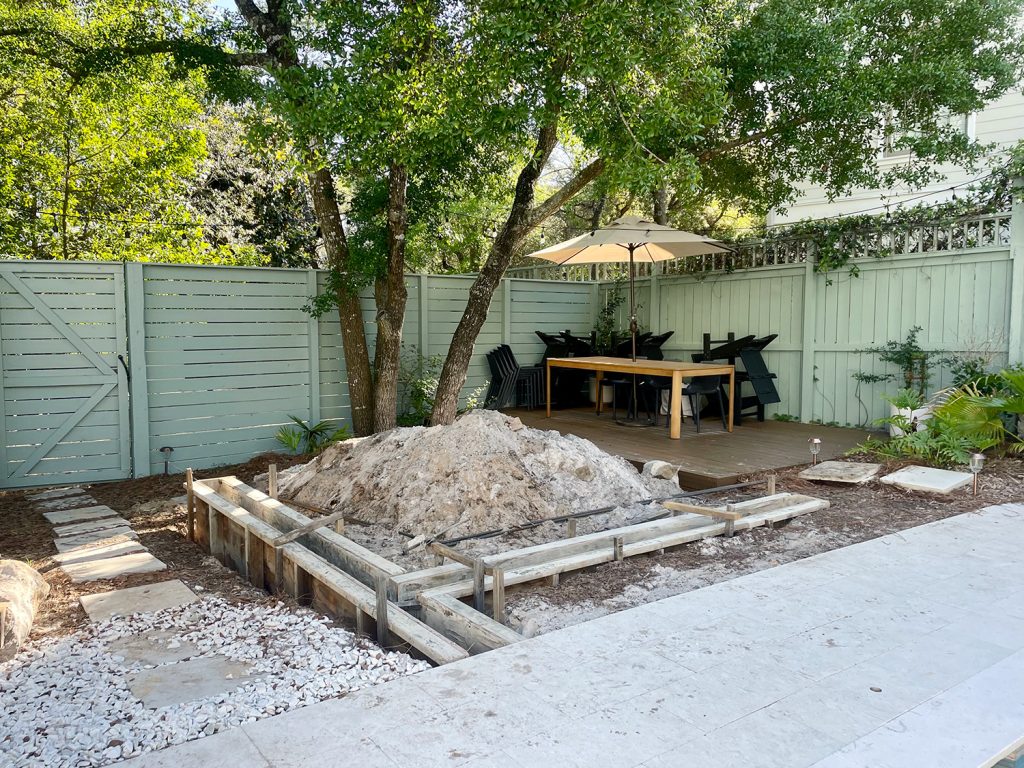
Here’s another view (now we’re jumping back in time to right after the new fence went up, before it got painted). I climbed onto the roof of our covered porch to take this shot because Sherry and I were trying to figure out exactly how to lay out the “new” space we had gained next to the pool. This photo helped us visualize the whole space from above (always useful if possible when space planning). Can you find Sherry in it? She’s googling photos to show me an idea she had for a retaining wall around a firepit to differentiate it from a nearby outdoor dining space.
You can see we had already moved some furniture into the new space just to try to picture things – but fully bringing it to life has taken us nearly 8 months. So let’s move on to the next step.
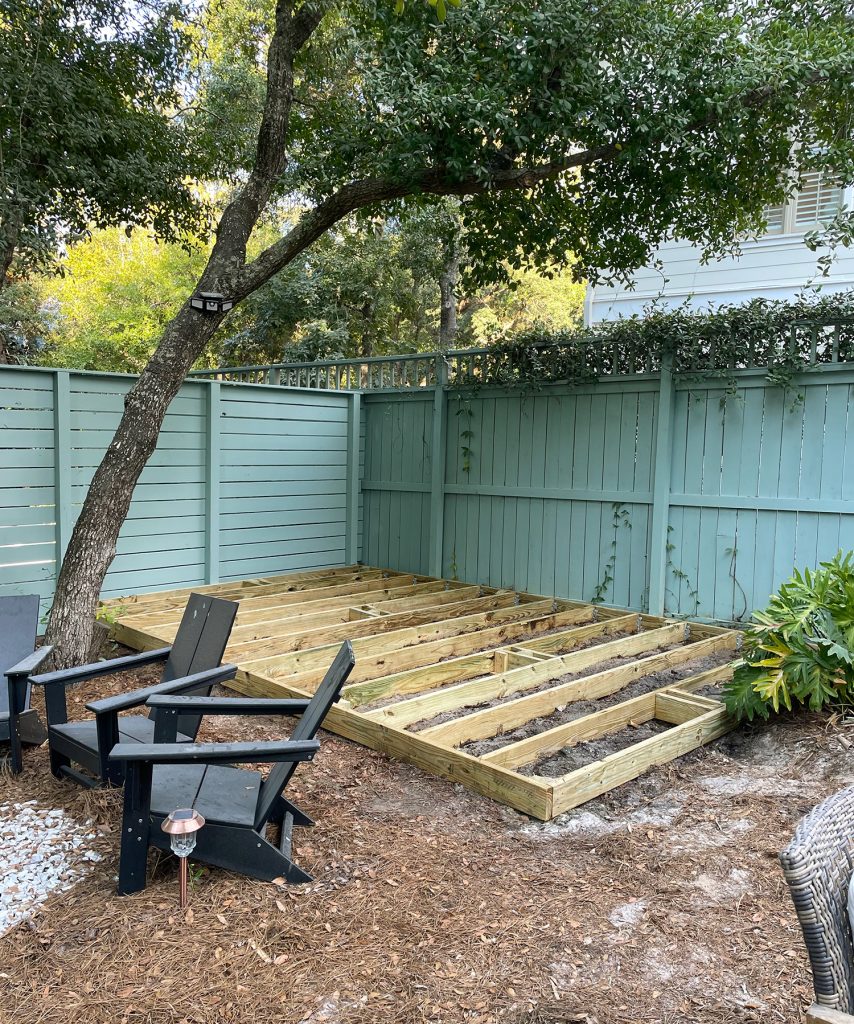
Step 2: Building A Platform Deck For A Table
Part of the goal of enlarging our backyard was to group more outdoor functions in one place. Before this, our large outdoor dining table was on our upstairs deck and our firepit was on the other side of our house. Back when everything was so scattered, we definitely used each zone, but it became clearer that we’d be able to more comfortably entertain bigger groups of friends and family all in one spot if we had all of these features in one large outdoor area.
When we moved the furniture from these zones to the new bigger backyard, the general layout clicked almost immediately. Dining table in the corner under the tree. Firepit area in the middle (with six chairs instead of the four we originally had). Some sort of walkway connecting everything. Bingo. Bango. We’re done. We even used Photoshop to play around with what it might look like:

We knew we could do better than just plopping our dining table into the pine straw. Plus, the ground slopes down a bit here, so we wanted a solution that would provide a level surface for the table. That’s how we came up with a plan (loosely photoshopped above) to have a simple platform deck built in that back corner, and construction took place last October.
You may be asking: why didn’t you just extend the pool pavers? The main reasons were:
- We wanted to preserve the pool area as it was, especially since the pool deck has a nice balanced curve on this end.
- We didn’t want to add a lot more bright white hardscaping that would detract from the naturalness of the yard on that side, which we really liked.
- We already have this Havannah Gold Trex on our front porch and upper deck, so we knew it would tie in if we used it out by the dining table as well.
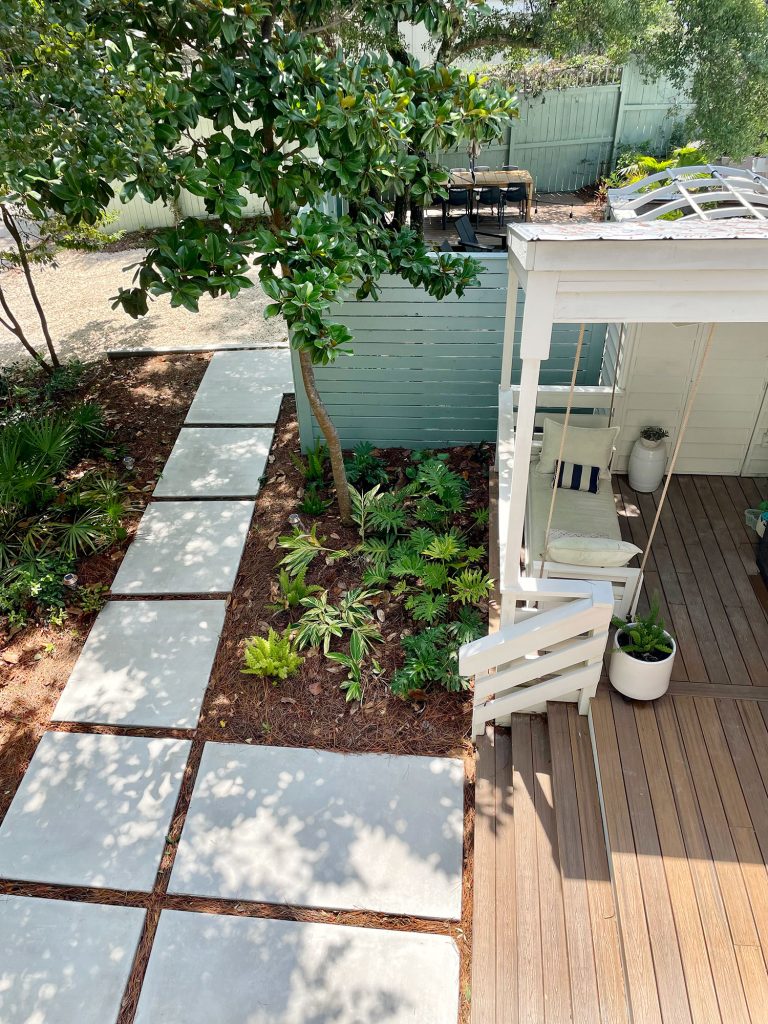
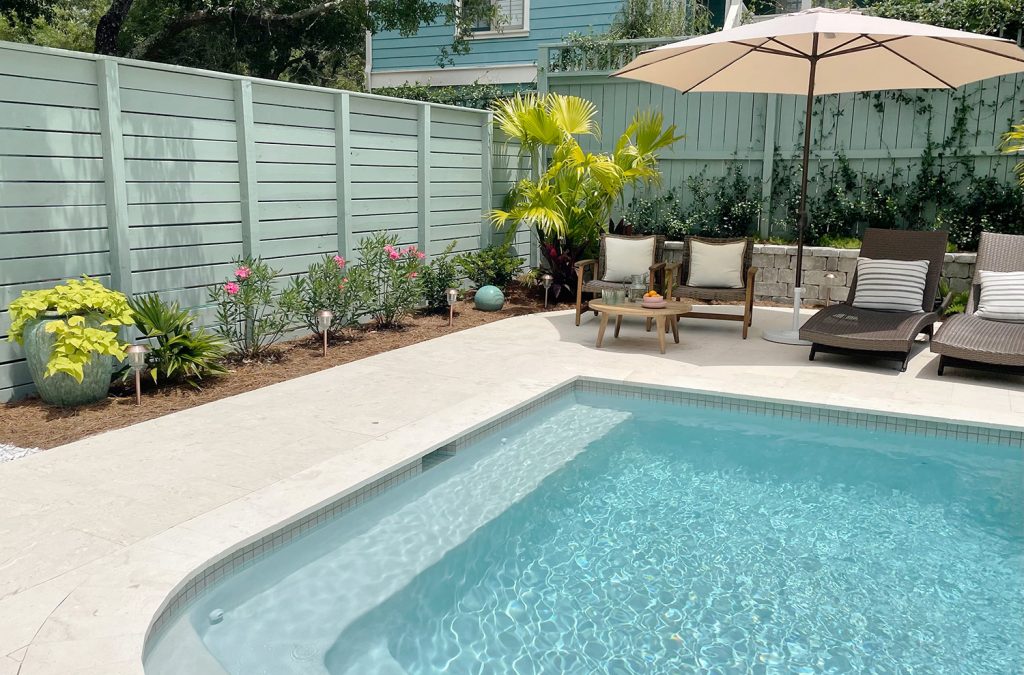
See how the Trex blends nicely with pine straw, meaning the deck doesn’t really “scream” at you back here.
We were careful to make sure the new deck was perfectly level with the existing pool deck, which helps the spaces feel more seamless and connected (minimizing tripping hazards is always a good idea). Don’t mind how dusty the Trex looks here. Sandy beach life + sand roads + no rain for a few weeks = dusty decks. Of course right after we took these photos it poured rain and the deck looks new again.
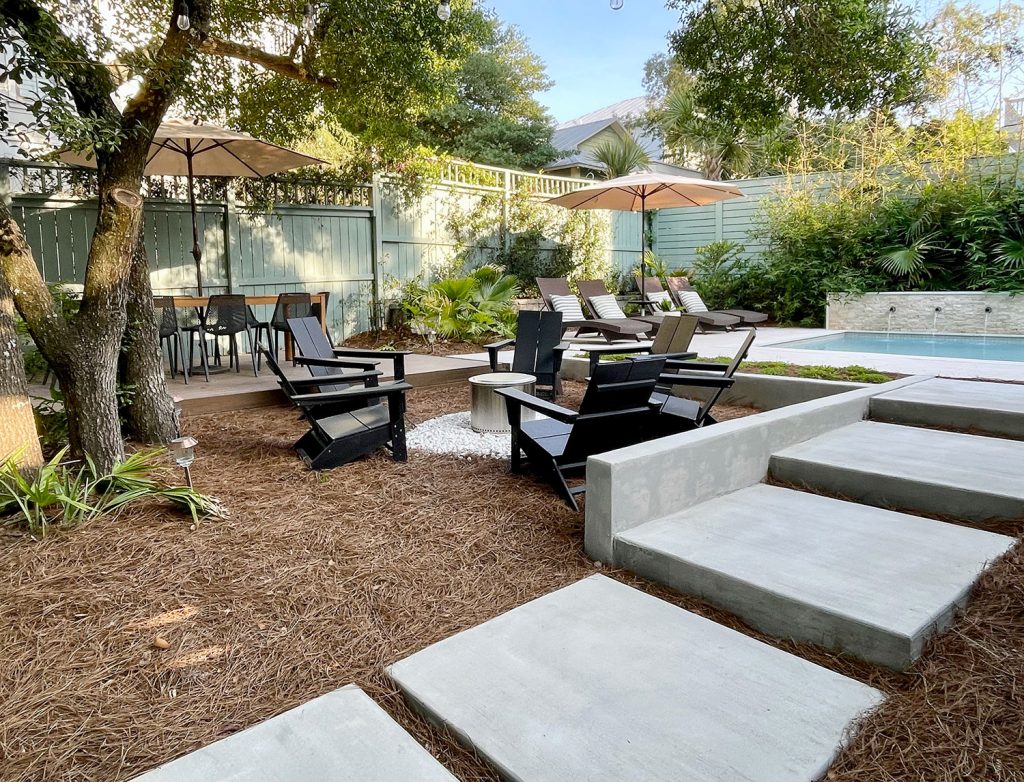
Here’s that view from our roof again so you can see how the space looks now:
Again, for easier scroll-to-compare purposes, here’s how it looked right after the new fence was constructed:
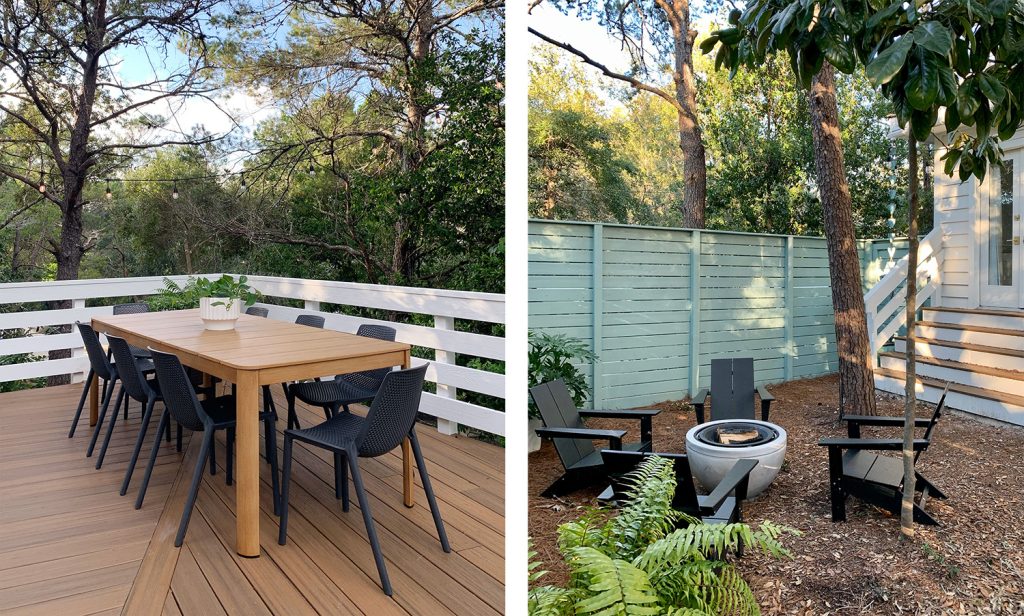
Honestly, this deck & table situation has been one of the best parts of this new backyard situation. It stays in the shade most of the day, so we use it for all sorts of things. We eat pool lunches out here. We work on our laptops out here. We’ve hosted a kid’s birthday party, had friends over for dinner, and it has become our go-to outdoor family board game spot too!
We even bought this detachable ping-pong net that I doubted would work with the slatted table and umbrella in the middle, but I was proven wrong. It rarely has a rogue bounce since the table slats are so close, and the umbrella is just sort of an added fun obstacle (the kids play it right off the pole in the rare event that they hit it) so it’s actually pretty fun. So far this summer it has been used almost every day.
Not to give you whiplash from time-hopping so much, but here’s a similar view from right after the pool was finished in 2021. See how the old fence ran so close to the edge of the pool patio? And in the view above, we’ve opened up a whole new area for additional function? We actually moved the fence back around 20 whole feet! And still had room for a two-car parking zone behind that.
With the fence and deck completed last fall, we thought we were on the fast track to a finished space by Christmas. Then came…
Step 3: Adding Poured Concrete Walkways
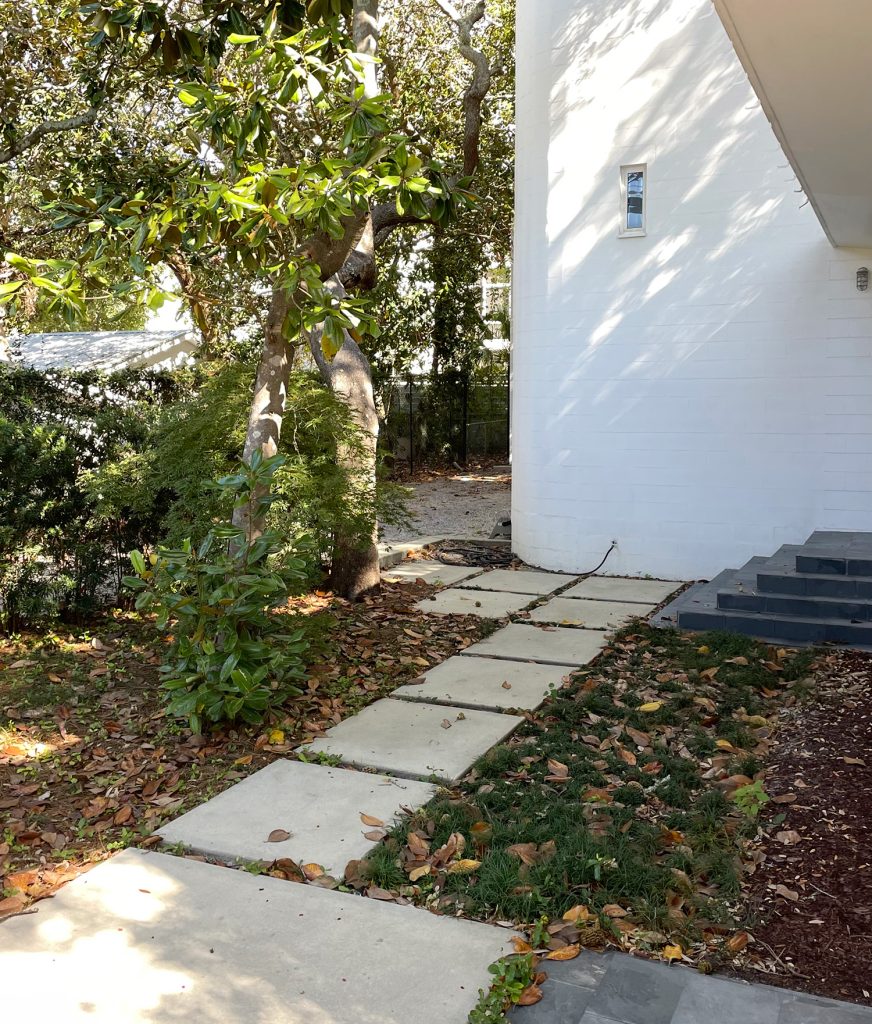
As you’ve seen in some of these before photos, we had created some placeholder walkways around our house using these inexpensive concrete pavers. They did the job of keeping our feet off the dirt, but some would drift and teeter, and they were pretty small. Again, fine for a temporary solution but we were ready for a more permanent fix.
This was the part of the project we struggled with the most. We went back and forth a lot on what material to use and where exactly to put these permanent paths. Our house wasn’t built completely parallel to the property lines, so we often run into some weird angles around here.
After a few weeks of being stuck, we enlisted the help of a local landscape pro who had worked with several of our friends. We had a lot of images of large concrete or stone stepping stones and walkways – but we weren’t sure what sizes of stone or poured concrete were available/doable, if the stone would clash with our pool deck, etc.
After hearing our ideas, the landscape pro immediately drove us to a nearby project he’d worked on years ago (below) after saying that the house had the same vibe we were describing – and everything clicked into place for us. Thirty years ago he added these exact BIG. POURED-IN-PLACE. CONCRETE. PAVERS.
It seems obvious in retrospect – they’re like the bigger, more permanent, can’t rock-or-drift version of what we already had. But seeing them at this other house and having the contractor responsible for them at our disposal made it feel like it was meant to be. Plus these were poured in the early 90s which makes them around 30 years old and they’re all still going strong!
So that little excursion with the landscape pro happened in November of last year, but it took until April of this year to finally get it going. Between holidays, contractor schedules, and nailing down our exact plan, the whole thing took a while but let me tell you, it was well worth it. And the process itself was pretty labor-intensive too (aka, LOTS of digging) so we’re really glad we hired it out to a team of pros.
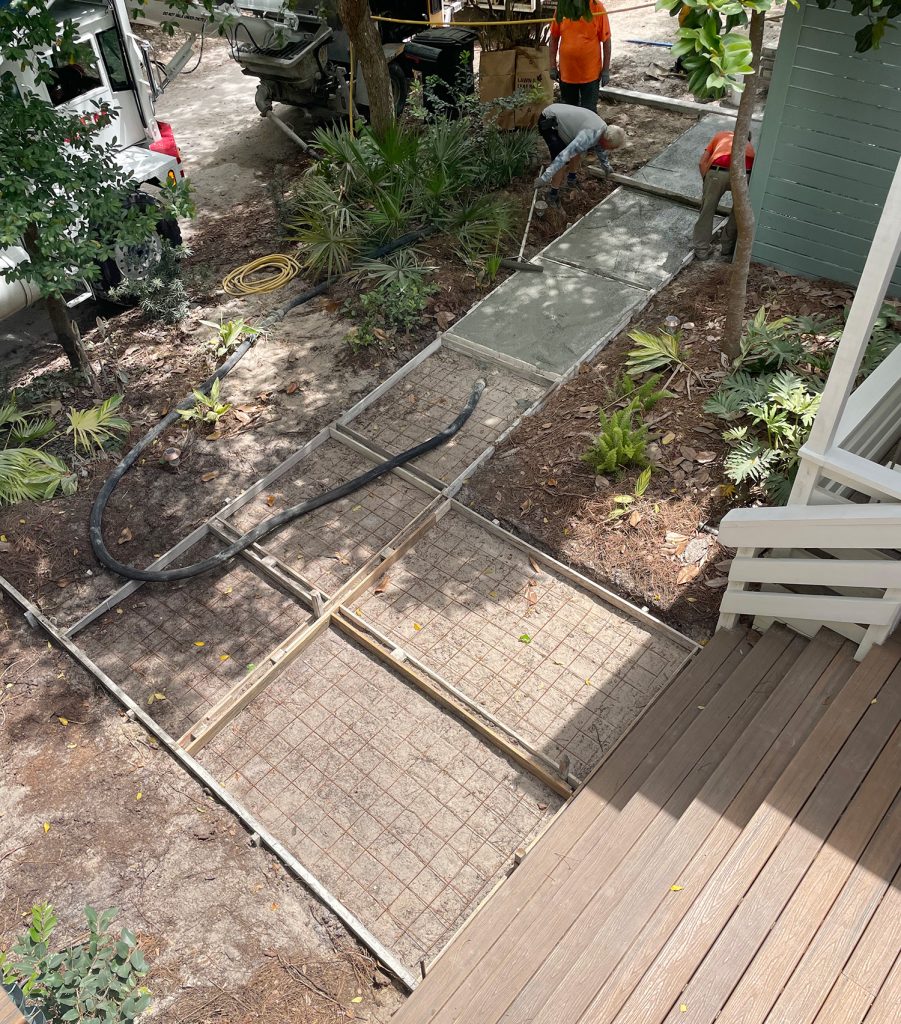
Part of the challenge (and another reason we needed outside help) was because of the gradual grade of the yard. We determined that, in addition to the walkways, we’d need a retaining wall around the firepit area too (assuming we wanted the area where the chairs and firepit are to be reasonably level). So first they had to dig, frame, and pour concrete for that wall before they could begin on any walkways – which also included some steps leading up to the pool.
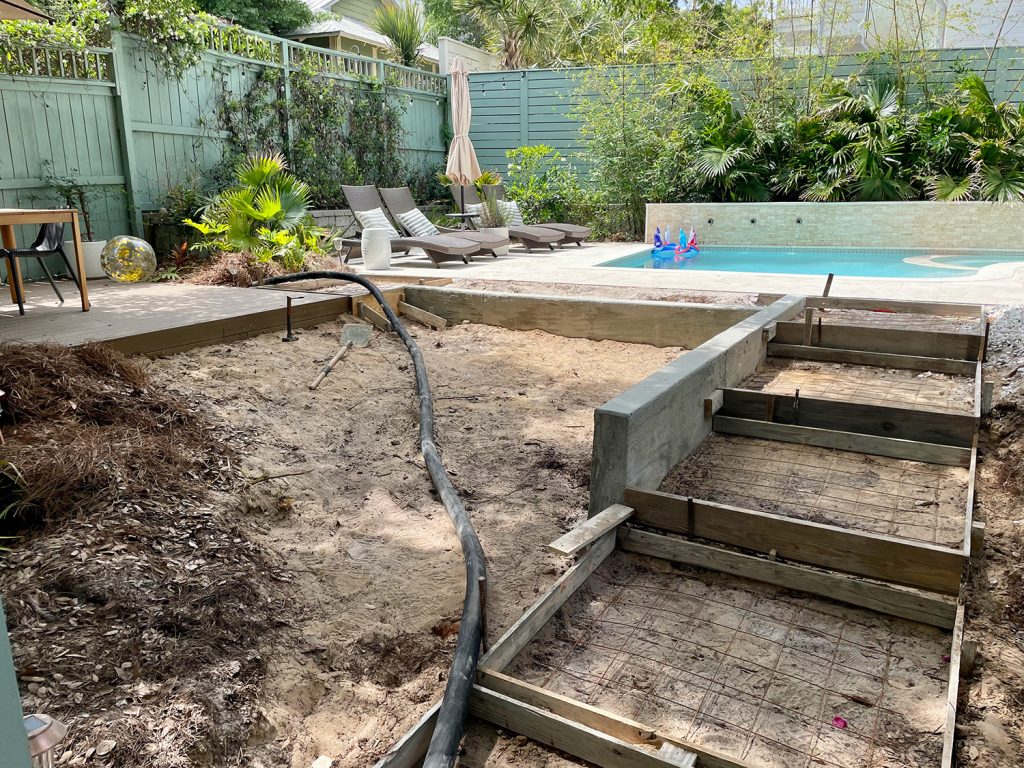
It was a pretty fascinating and meticulous process to watch. And even once everything was framed and ready for concrete, there were several stages of smoothing, brushing, and refining of edges to give everything the final look. Don’t sleep on concrete guys – they’re artists!
We’re ridiculously happy with how they turned out. It’s like our property had a full-fledged glow up to a legit, finished space. It no longer looks piddly or in limbo from the street and the new larger pool area feels so welcoming and intentionally planned.
And because concrete is such a durable material, it feels like a smart long-term choice. I mentioned that the project that inspired us is three decades old and still looks awesome – and some estimates say poured concrete lasts over 50 years! So just like the no-rot Trex that we chose for all of our decking, it’s another way we’re helping our house stand up to the harsh elements around here.
The pathways, as you’ve seen in some of these photos, were a big project that extended beyond just this fenced area. But before we move outside of the pool zone, let’s highlight one last thing we did in our backyard.
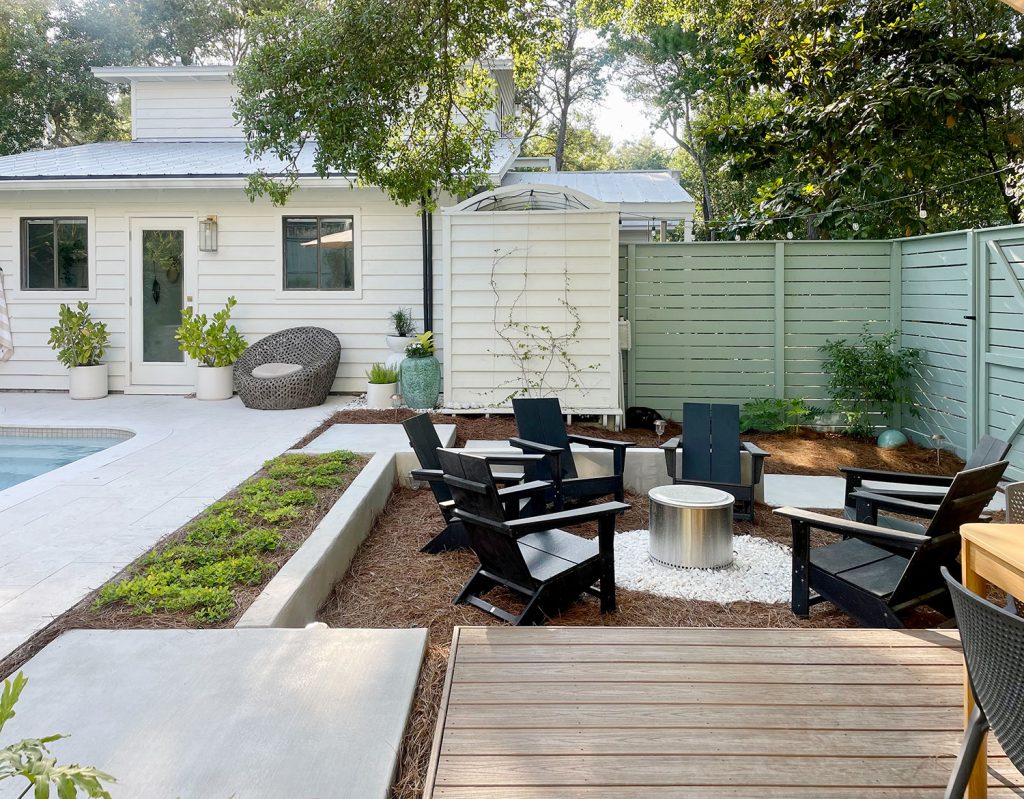
Step 4: Adding A Sunken Firepit Area
Because some of the fixed elements in the space were at different ground levels – namely the house & the big oak tree – we decided the firepit area needed to be lower than the pool & deck (level with the large tree that we love). Lowering the firepit just around 15″ ended up nicely defining the functional areas of the space while creating a sort of sunken lounge area that fits with the modern ’70s vibe that our house tends to give off. Groovy, baby. Peace, love, and s’mores.
The newly defined firepit area was even big enough to fit two extra Adirondack chairs. We only had 4 in the old location, but now we’ve got seating for 6, not to mention plenty of bonus spots at the nearby table and lounge chairs. The Adirondacks we chose are made of no-rot-polywood and we’ve been SUPER happy with the four that we’ve had for almost 3 years (they still look like new – no fading or breaking down at all). So getting two more was an easy choice.
The firepit itself is a Solo Stove, which is designed to burn without all that crazy smoke you get with a traditional campfire. We’ve been really happy with it. We have the Bonfire size and it fits perfectly on one of those old concrete pavers that used to be our walkways. Then we just surrounded that with a ring of marble chips. That way we don’t need to buy the Solo Stove stand (which you def need if it’s on any sort of wood decking or mulch). But we do have and recommend the metal lid, seen above.
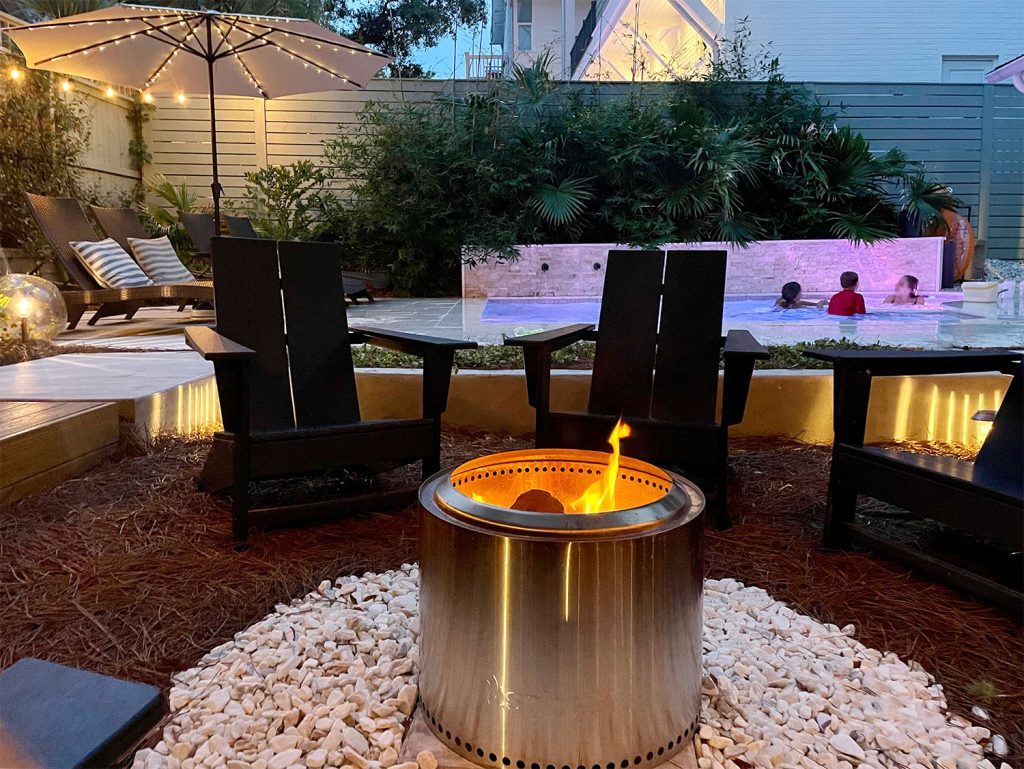
It has been such a big upgrade to have the pool and firepit on the same side of the house, especially now that it’s summer and we’re using that side of the house constantly. The kids love having friends over for a night swim while we adults enjoy lounging by the fire. And yes, I realize a fire sounds weird in the summer, but it’s cozy and every night is a good night for s’mores. Please note that we took the photo below with about 10 kids in the pool, hence the impressive splash zone.
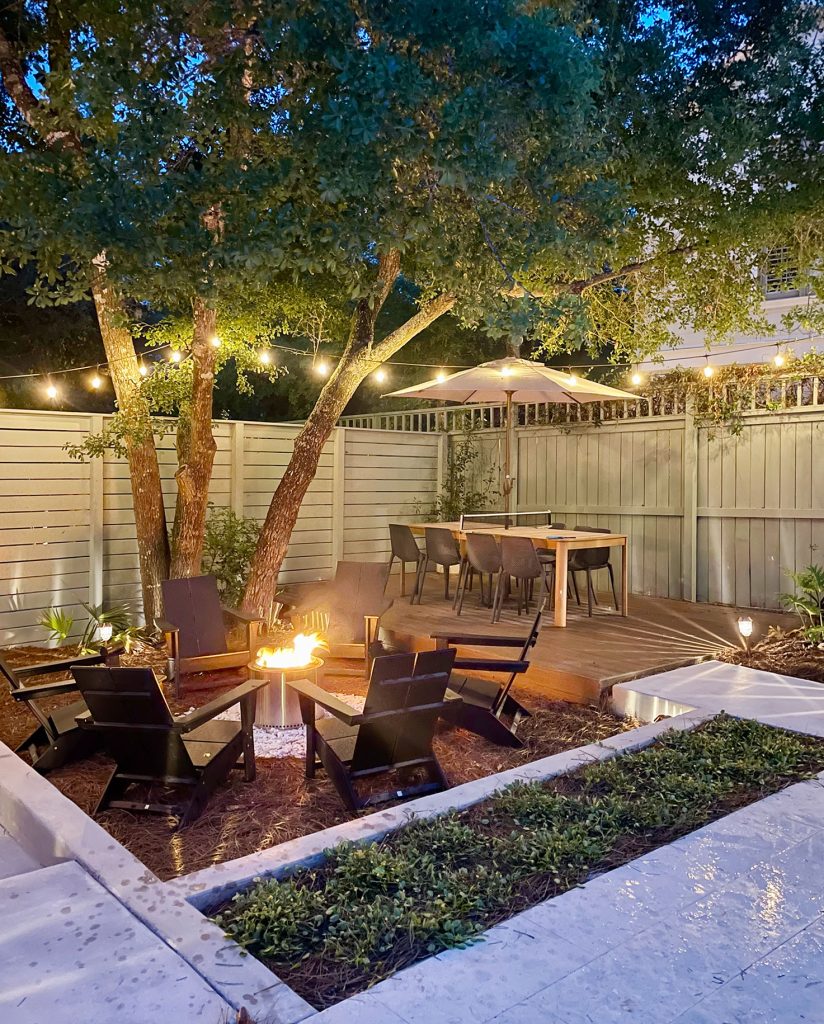
You can also see that we added some plug-in LED cafe string lights to our otherwise fully solar lighting set-up back here. We just wanted some extra brightness for the firepit and dining area, and they’re all Alexa enabled so we just have them on when we’re out there to enjoy them.
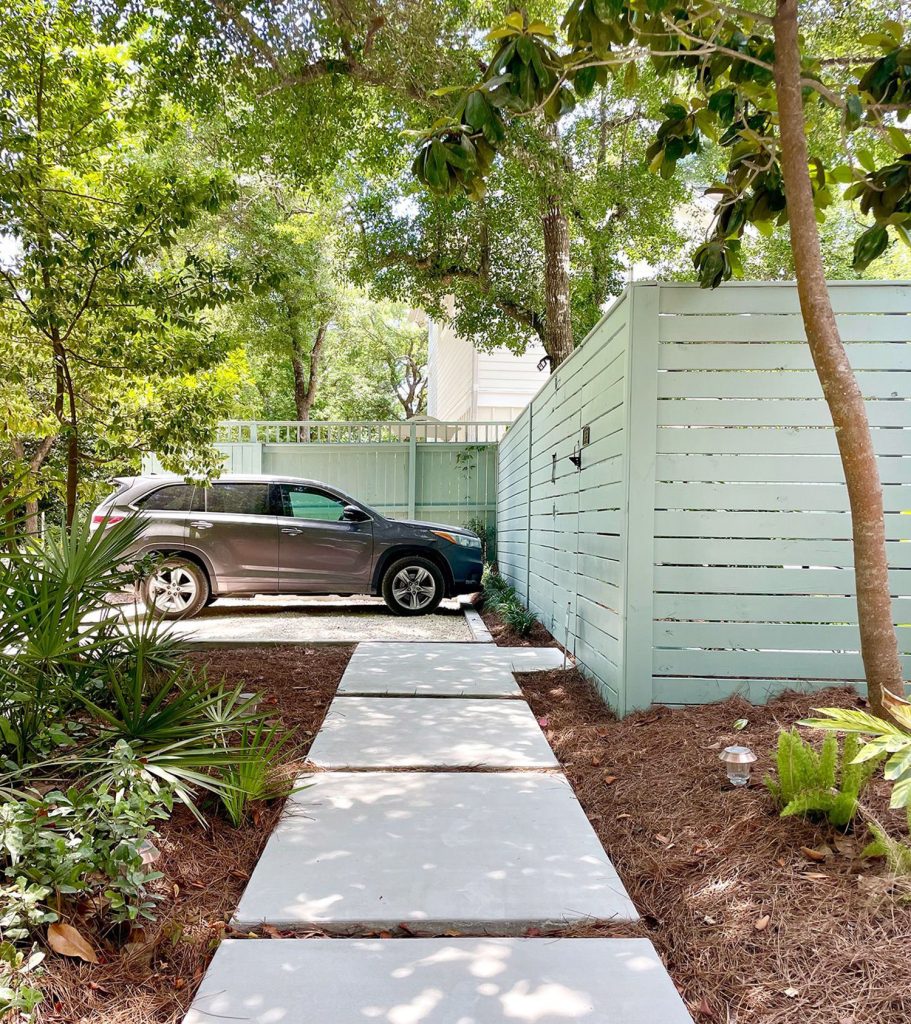
Again, another part of this project was creating a proper parking space and front walkways as well, which we previewed to our email newsletter subscribers recently. We’ve got that post almost complete and queued up for next week (just have to add a few last photos), so stay tuned!
It’s really nice to look back on all the stages of our pool area and feel like it’s finished and functional. These things can take years (and involve moving a fence) but I promise even those long and winding evolutions can lead to such great outcomes. We couldn’t be happier.

Want To See More Outdoor Transformations?
To catch up on the other exterior updates and projects we did here, be sure to check out:
*This post contains affiliate links, so we may earn a small commission when you make a purchase through links on our site at no additional cost to you.
