Table of Contents
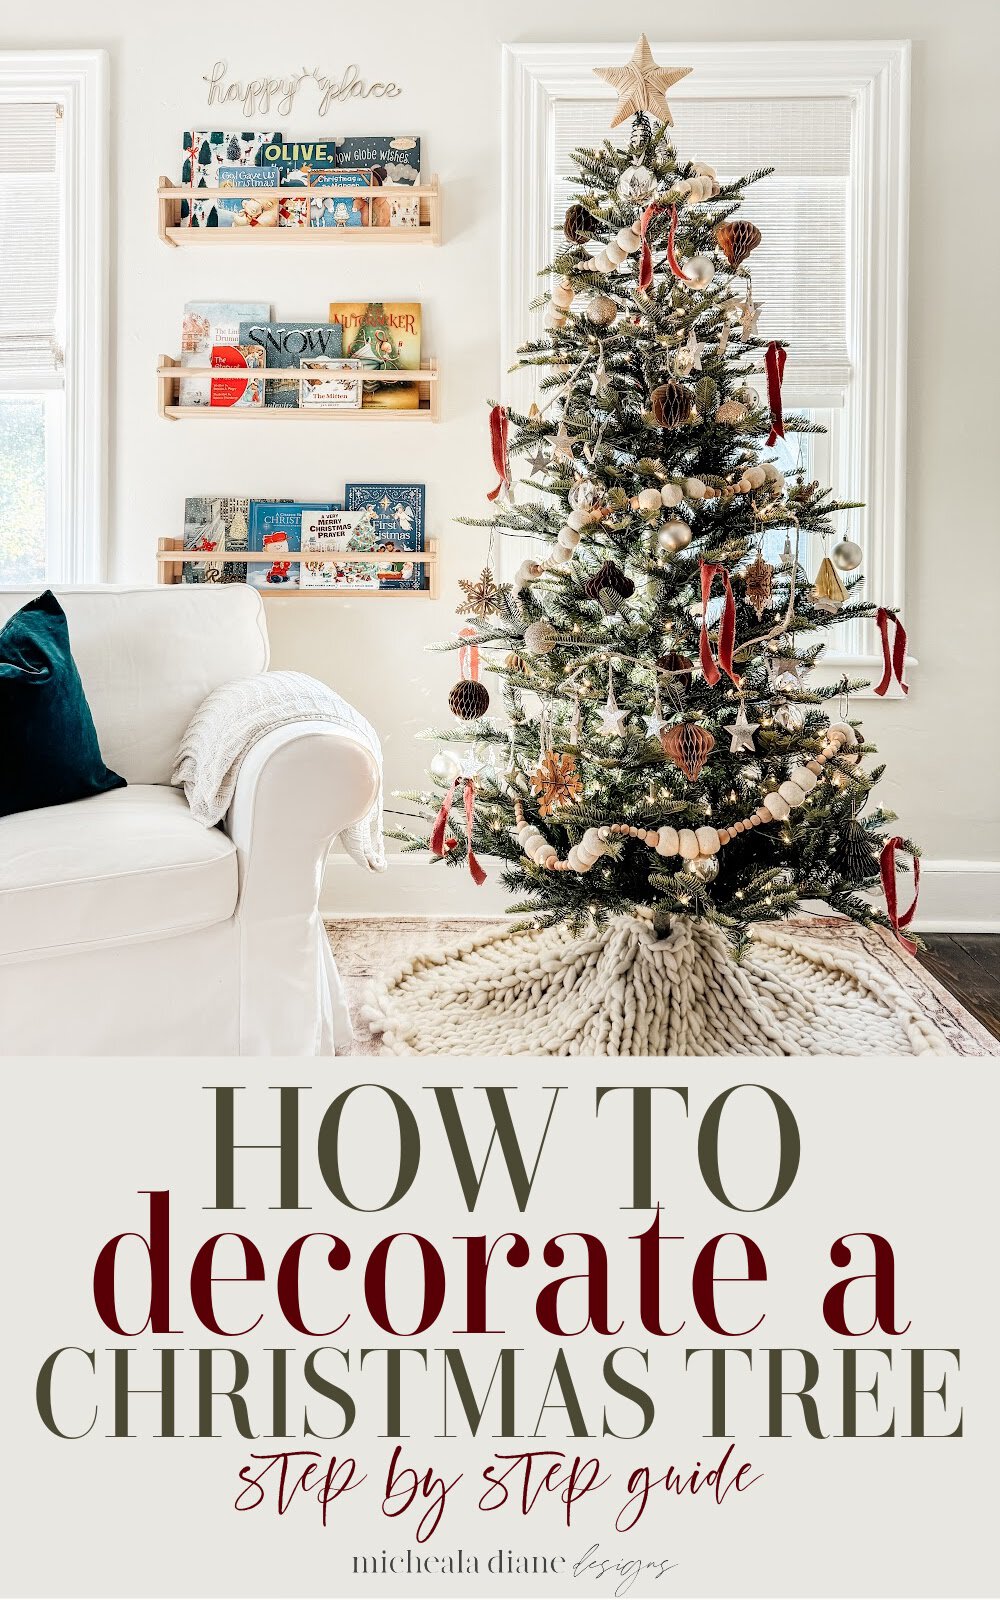
Wondering where to start when it comes to decorating your Christmas tree? We have you covered with ten simple steps for how to decorate a Christmas tree.
We have entered the most magical season of the year. Whether you go all out with Christmas decor or keep it simple, the Christmas tree is always the centerpiece. If you are feeling overwhelmed with exactly how to get started, this Christmas tree decorating how-to is made just for you.
Tree decorating is a skill and if you are not the creative type you may be feeling lost. In this post, I am going to share a step-by-step guide on how to decorate a Christmas tree. No more second-guessing where to start and what goes on first.
I will take you step by step as I decorate my own tree. No matter what your creative abilities are you, will end up with a tree that you are proud to display this Christmas season. Let’s get started!
How to Decorate a Christmas Tree Step By Step
Step One: Choose a Theme and Gather Decorations
This is the most important step. You have to start off with the right materials. Before you start buying make sure you have a theme. This could be as simple as a color scheme or as detailed as a candy-themed tree and anything in between. You want to ensure that all the decorations you choose look good together. Go to the store with some inspiration so you don’t feel overwhelmed by the options.
I will get into the best way to select ornaments in step seven.
Once you have your theme you want to gather all your materials. This includes a tree, lights, garland, ribbon, ornaments, tree topper, tree skirt, and any other decorative elements you plan to use.
“ Affiliate links provided for your convenience, please read my disclosure for more information.”
Step Two: Pick your Christmas Tree
I know I said step one was the most important but you can’t even begin decorating a tree if you don’t have one! So maybe the tree is the most important step!
When it comes to choosing a tree you have a lot of options. The first place to start is to choose whether are you going to do a real or artificial Christmas tree. This how-to decorate a Christmas tree guide works for both!
If you are going with artificial you can either do natural or flocked. I have a great post where I share my favorites for both.
The Best Realistic Natural Artificial Christmas Trees
The Best Flocked Christmas Trees
Once you pick your tree, set it up according to the manufacturer’s directions. If you went a real Christmas tree make sure you put it in a sturdy Christmas tree stand.
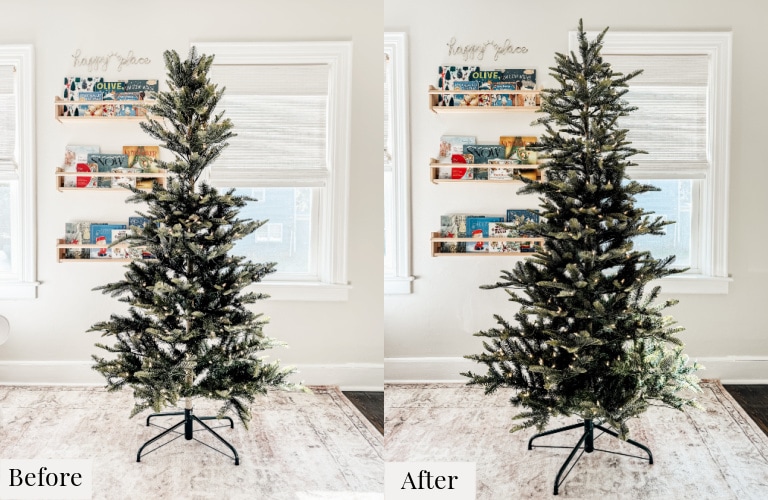
Step Three: Fluff the Branches
Looking for an artificial Christmas tree. Shop the one feature in this post HERE.
REAL TREE: If you went with a real tree you can skip the fluffing part. I do recommend finding the side of your real tree with the most full branches and the best shape. Face that side outwards towards the room and hide the not-so-attractive side towards the wall.
How do you make a Christmas tree look full?
Fluffing the branches is key when decorating an artificial Christmas tree. Not only does it make your tree look more realistic in appearance, but it is also the best way to make a Christmas tree look full.
You want to start from the bottom of the tree working your way up one section at a time. Starting at the bottom ensures a stable foundation for the upper sections.
For each branch, you want to gently unfold/fan from the center stem. Most artificial trees have hinged branches that fold up for storage. To fluff them, gently pull each branch away from the central trunk or pole of the tree.
Then fan out each of the branches in various directions to create a full, three-dimensional appearance. You can angle them up and down to avoid a uniform look.
Once all of the branches are fanned out, pay attention to the needle tips. Bend and arrange the tips to create a natural, random appearance.
As you fluff the branches, be on the lookout for any gaps or holes in the tree. Adjust the branches to cover these areas, and make sure the tree appears evenly filled out from all sides.
Step Four: Start with Lights
If you plan on using an artificial Christmas tree I highly recommend getting one that is pre-lit. I have had both and it is so much easier to not have to worry about stringing the lights.
Prelit trees already come with the perfect amount of light. They are all perfectly spaced and evenly distributed throughout the tree. The con is they are typically more expensive. For me, it is worth the extra cost.
What is the best method for putting lights on a Christmas tree?
If you do have an artificial tree without lights or you have a real tree here are some tips for adding lights to your Christmas tree.
My first tip is to start with the lights before you add anything else to your tree. This is the very first step, trust me you do not want to be adding lights when you have other decorations on your tree.
- Select the right lights. LED lights are energy-efficient and emit less heat, making them a safer option for your tree. I also love using the clip-on candle lights, and even the large outdoor patio globe string lights for a fun vintage look.
- Test all lights before you start stringing!
- Where to start your lights, from the top or bottom, is a hot debate. We like to start at the bottom of the tree and work in sections. The key is to weave your lights in and out of the branches. This provides an even distribution of light and adds depth and dimension to your tree versus wrapping your lights around the tree.
- I recommend using a remote control power plug or a smart plug for your tree. This will allow you to turn off the tree with a remote control or use voice commands with an Alexa device.
A well-lit tree sets the stage for the rest of your decorations and creates a warm and festive atmosphere in your home.
Step Five: Layer on the Garland
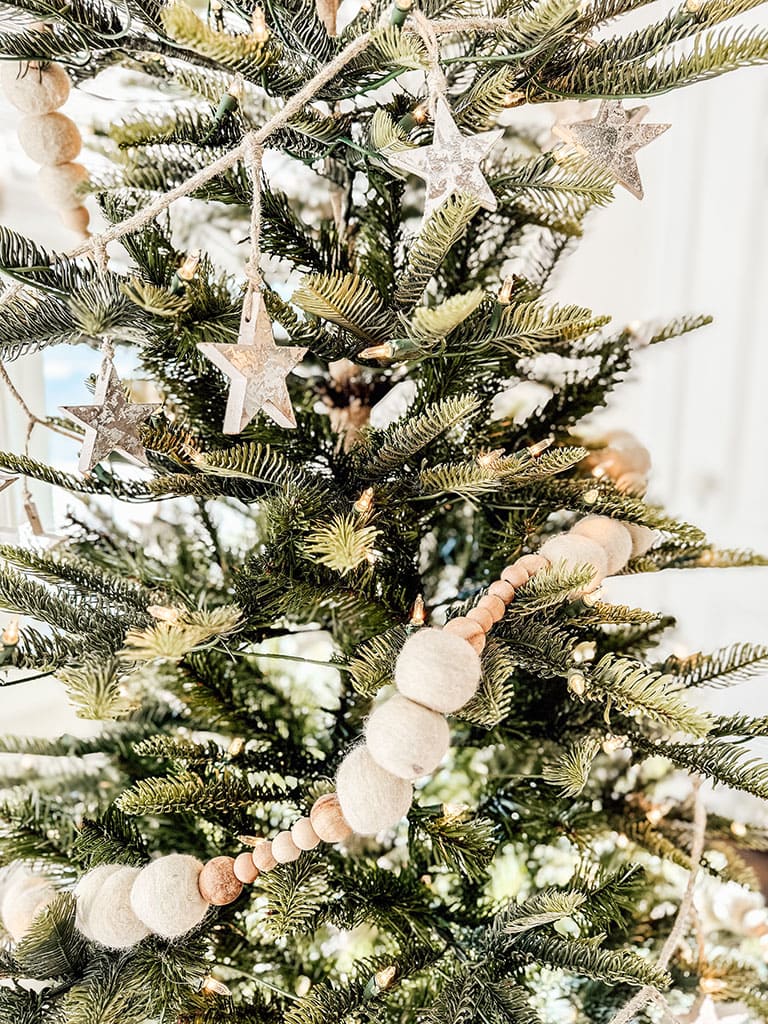
Once the lights are on the next step is to add garland. I like to use two different styles of garland on my trees. Decorating a Christmas tree is all about layers. Two styles give variation without having too much going on. These garlands should coordinate with each other and fit the theme of your Christmas tree.
Some garland options I love are; wood bead garlands, wool ball garlands, bead garlands, bell garlands, felt garlands, jumbo knitting yarn, dried orange slices, and banner-style garlands to name a few.
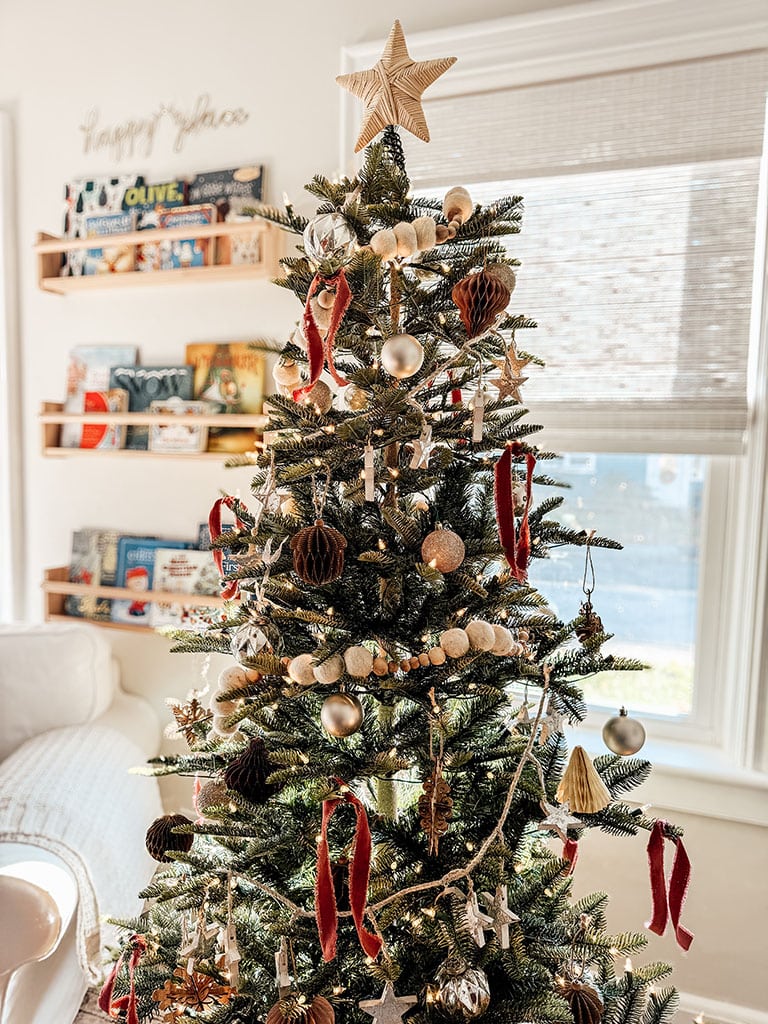
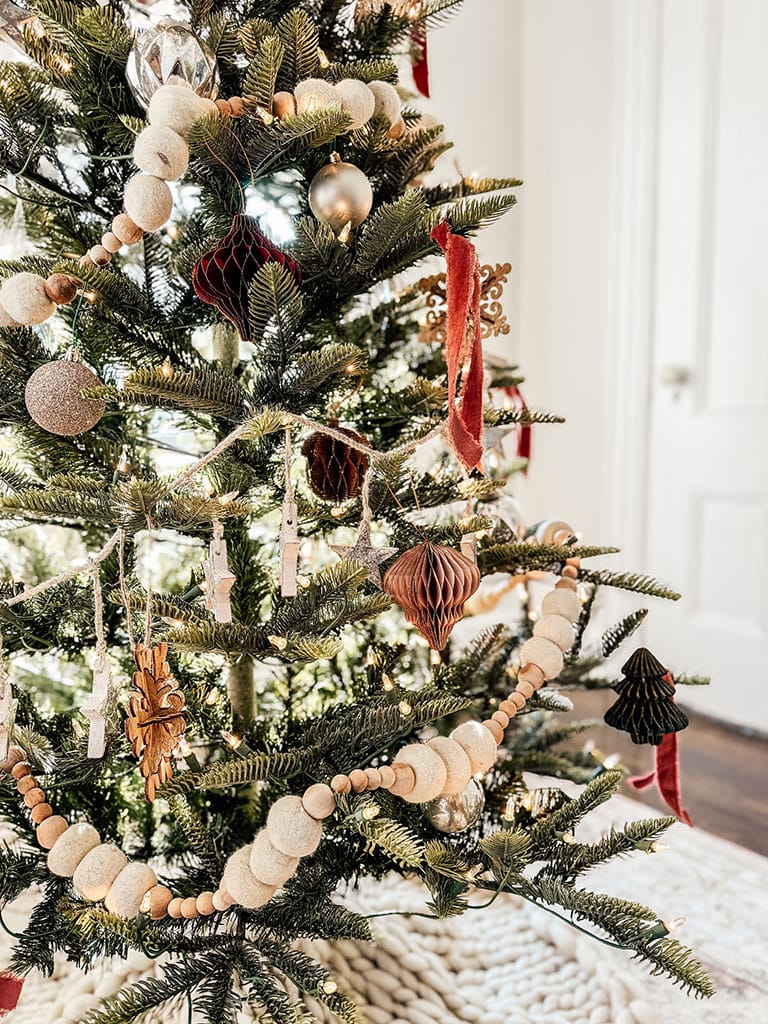
For my tree, I went with a combination garland of wool ball and bead and then my second garland is distressed silver stars. These are similar.

Most garlands come in 5 ft to 6 ft strands. You will want to determine how many strands you need to wrap around your entire tree. I tie the ends of the strands together and starting from the top I wrap around my tree in a cascading spiral/diagonal pattern.
With the second style of garland, I use the same technique but on the next level between the other garland strands. See photo.
Money Saving Tip: One way to save money/or if you didn’t buy enough, is to not wrap your entire tree in garland. But to only do the cascading pattern along the front and sides of the tree instead of wrapping around the back of the tree. I did this with the star garland because they only had two strands left. Can you tell?
Step Six: Add Ribbon
This is one of my favorite decorative elements to add to a Christmas tree and I feel like it is widely underused. Adding Ribbon adds the most beautiful unique touch to your tree and also gives you the opportunity to add a unique color or a textural element.
How to decorate a Christmas tree with ribbon?
There are multiple ways to add ribbon to your Christmas tree. Here are a few of my favorite ways:
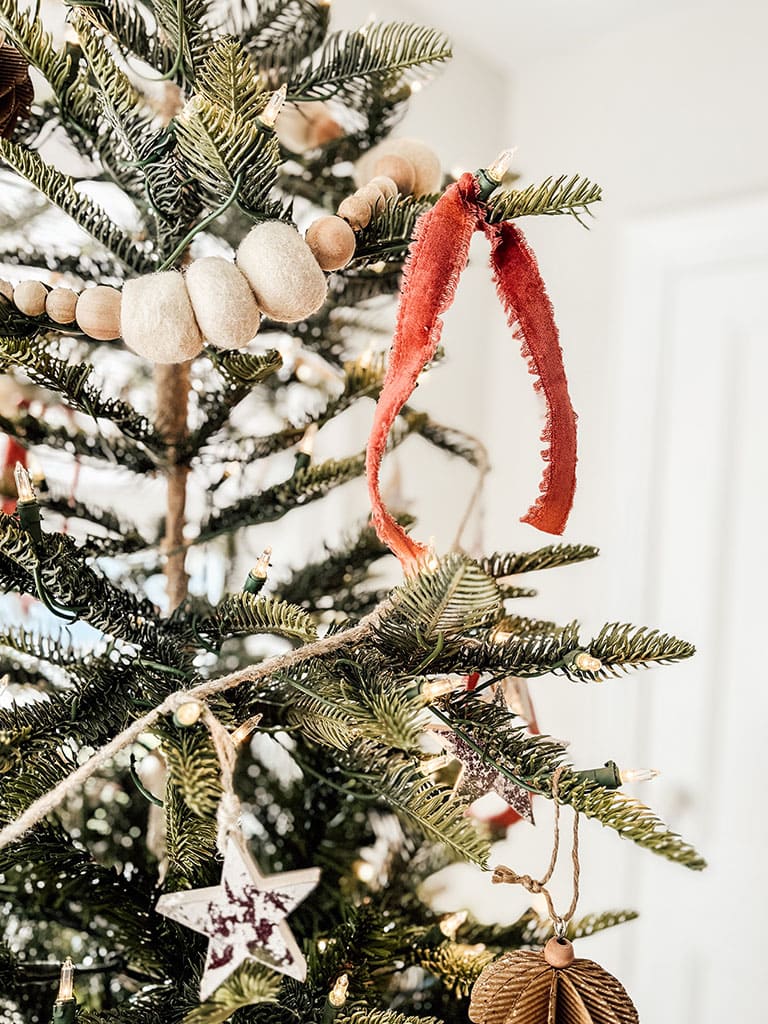
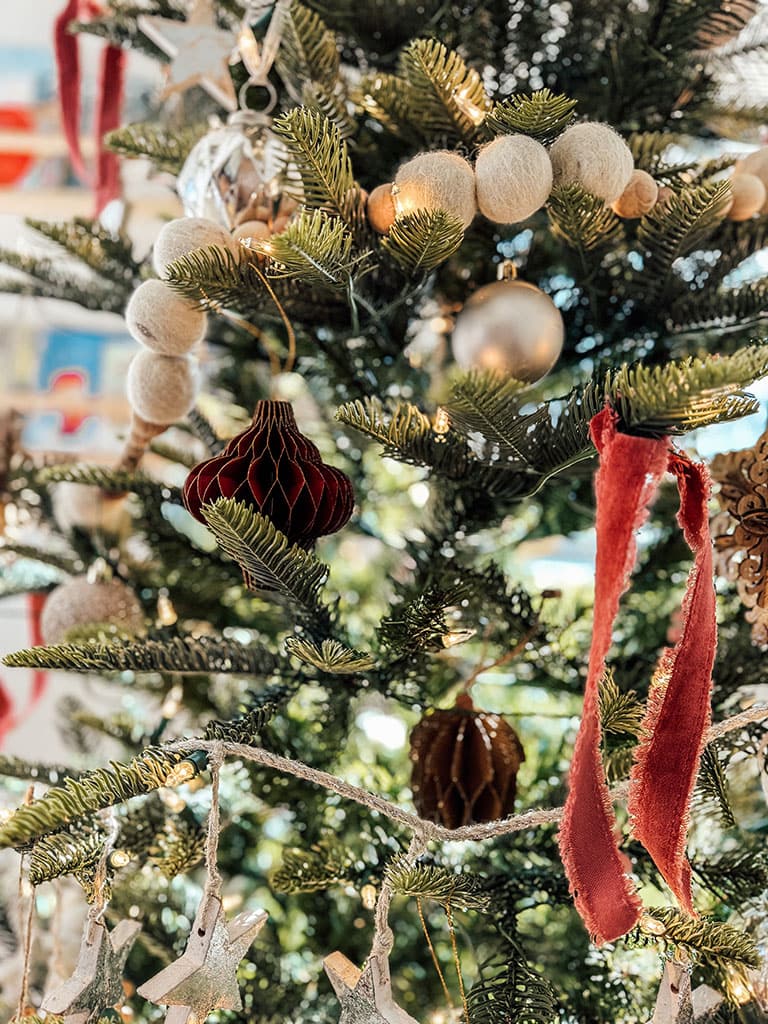
- Bow/ Knot on the Tips: This is the easiest way to add ribbon to a Christmas tree and my personal favorite. I like to use ribbon 1 inch or less. You can choose any style but velvet is always a nice touch. You can either knot that fabric onto the tips of the branches or tie a bow.
- Vertical Cascade: With this technique, you start at the top of the tree and let the ribbon cascade down vertically. You can secure the ribbon at the top of the tree near your tree topper. Let the ribbon cascade down and tuck the ribbon in and out of the branches creating a waterfall effect.
- Loop and Tuck: I recommend a wired ribbon about 2-4 inches wide for this technique. Then you cut the ribbon into strips approx 3ft adjusting length as needed. With the small strip, you tuck the middle into the tree and create loose loops with the ends. Start at the top and work your way down in a diagonal direction.
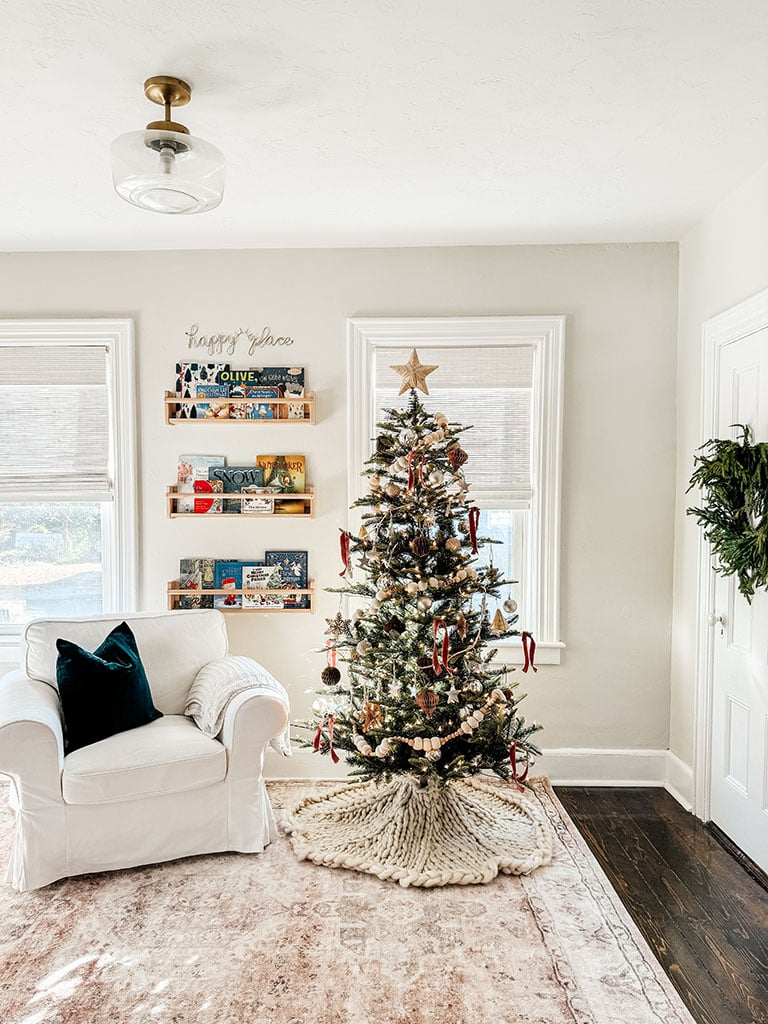
For my tree, I did the knot on the tips method. I used a beautiful velvet ribbon with frayed edges. I cut each ribbon to approximately 18 inches long and strategically placed them in a pattern on my tree. See the image above.
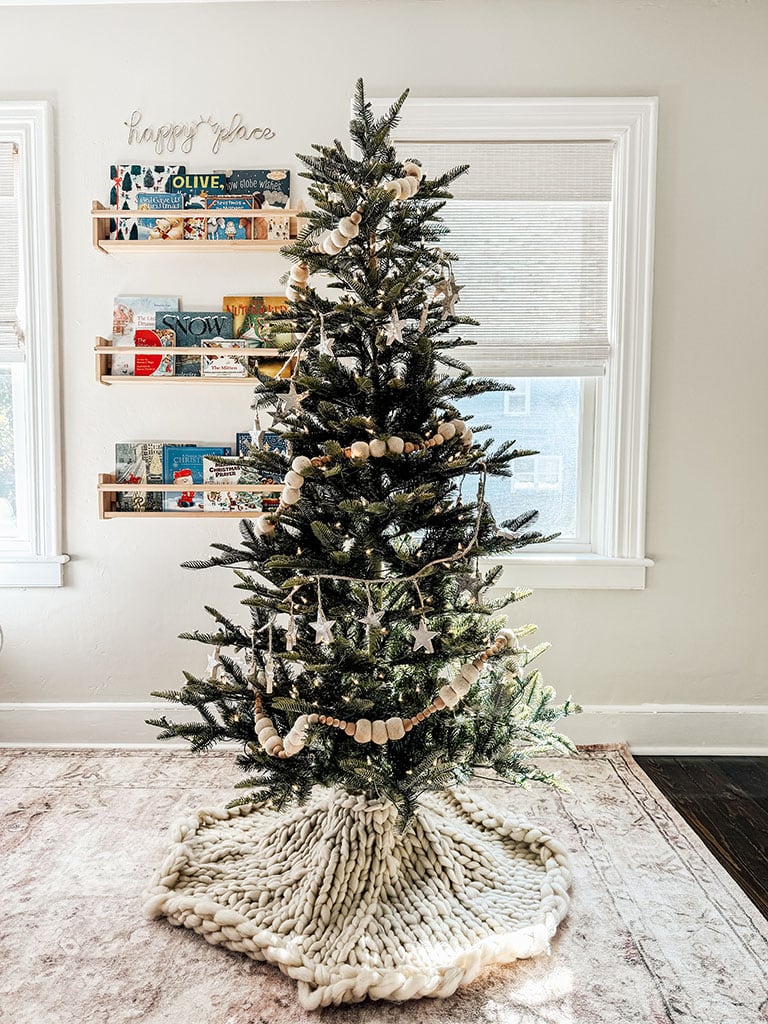
Step Seven: All about the Ornaments
Next, we are going to add the ornaments. Are we having fun yet? I personally love adding the ornaments. Lights, ribbon, and garland can feel overwhelming to get perfectly right but once it’s done you can take a sigh of relief.
Adding ornaments to the tree will always bring me back to when I was a kid. Tell me I’m not the only kid who was only allowed to touch the tree when it was time for the ornaments. Looking back as an adult makes sense because it’s the fun part!
How to Select the Right Ornaments
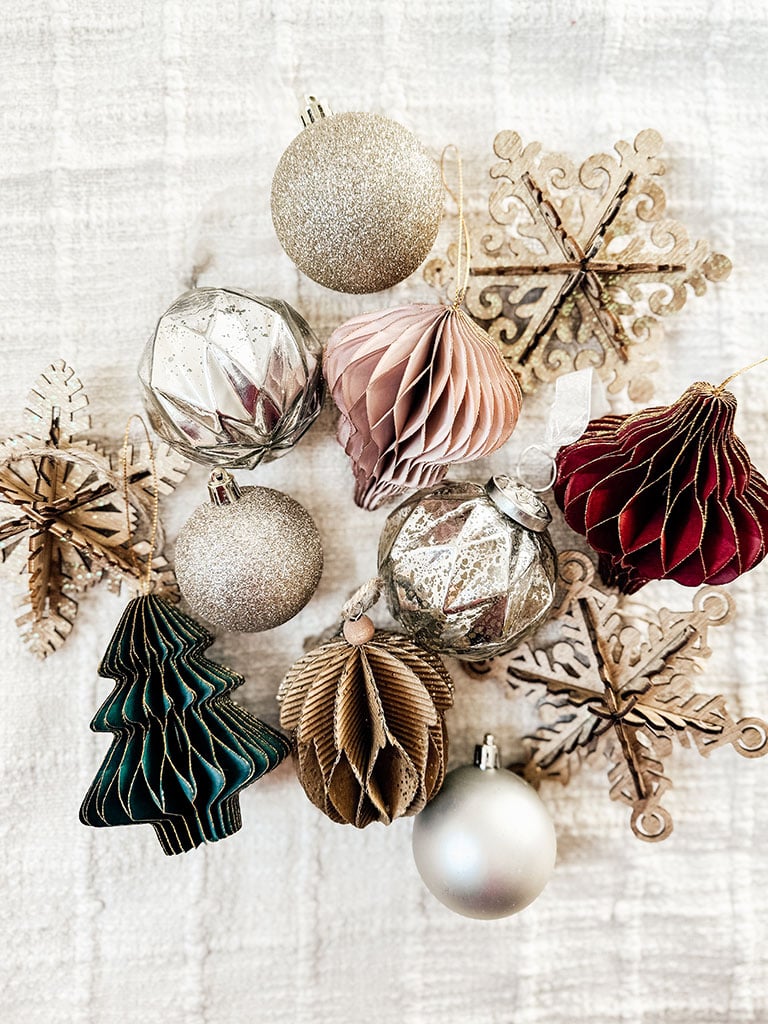
I recommend using at least four different types of ornaments for your tree. This adds visual variety, layers, and interest.
Some ornament types to choose from are ball ornaments, wood ornaments, mercury glass ornaments, fabric/felt ornaments, bell ornaments, figurine ornaments, photo frame ornaments, and ribbon/ bow ornaments to name a few.
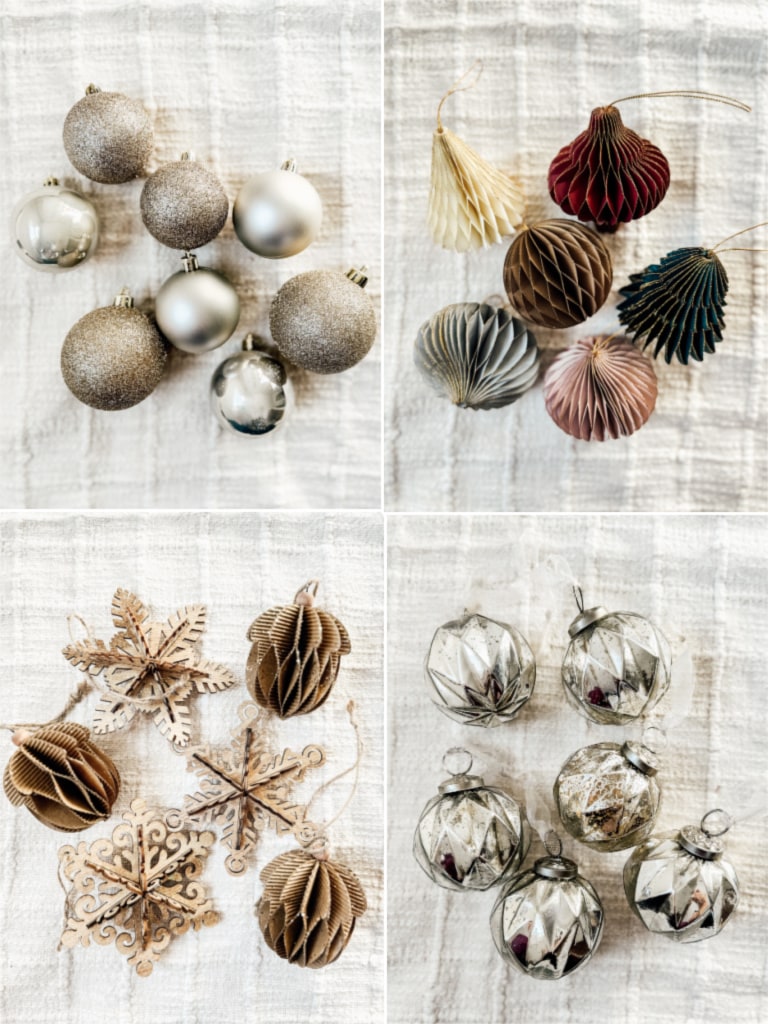
Here are the ornaments I chose: Ball Ornaments, Mini Glitter Edge Paper Ornaments, Wood Snow Flakes (similar), Acorn Ornaments, Mercury Glass Ornaments ( Similar)
What is the best way to put decorations on a Christmas tree?
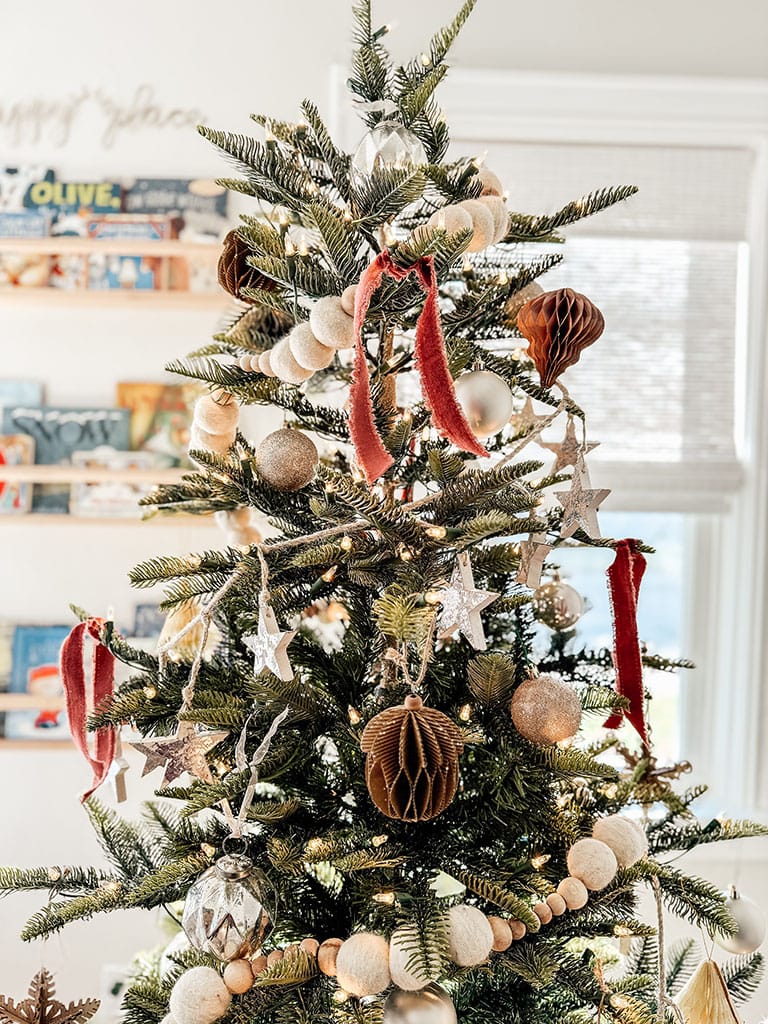
Once you have your ornaments selected I recommend adding the ornament types one at a time. This allows you to evenly spread out that ornament type so that they are not right next to each other on the tree.
If you have one ornament type that is significantly larger than the rest I would start with that one. By starting with the larger ornament you are able to use it to fill in any large gaps.
Then just keep repeating that process with each ornament type. Be sure to place some ornaments deeper inside the tree to add some depth versus just placing them all on the outer branches.
Step back periodically to assess the overall symmetry and balance of the tree. Adjust as needed to ensure a visually pleasing arrangement. Don’t forget to add ornaments to the back of the tree!
Remember, there’s no one “right” way to decorate a Christmas tree. Let your creativity guide you, and feel free to experiment with different ornament arrangements until you achieve a look that brings you joy.
Fun Ornament Tip: Replace the metal ornament hooks with ribbon. This budget-friendly DIY gives your ornaments and overall tree an elevated look.
Step Eight: Add Tree Picks or Not?
Another fun element to add to a tree is tree picks. These can be floral or decorative and they add another layer of decoration to your tree. This is not a must when it comes to decorating a tree but if you feel like your tree needs one more decorative element to feel complete tree picks may be your answer.
You will want to choose a tree pick that compliments the overall theme of your tree. Some options are floral, berries, or even themed picks like candy canes or snowflakes. You can also mix and match styles.
Similar to placing ornaments you will want to evenly distribute them throughout your tree. Picks are a great option for filling in any open gaps. Ensure that the picks are securely attached by either tucking the stems into the branches or using an ornament hook to secure them.
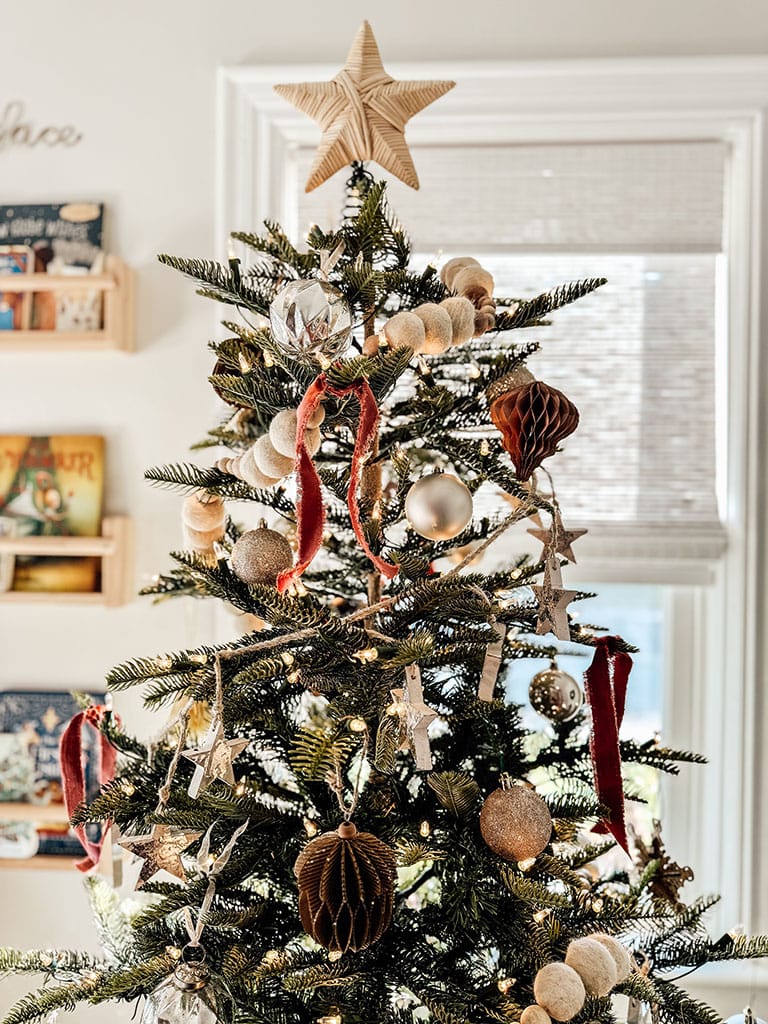
Step Nine: Top it off with a Tree Topper!
Your tree is almost complete. We just need to top it off with a tree topper. Some common choices for a tree topper include a star, angel, or bow. You can find these in a variety of styles and materials. Some even come with light features. Be sure to secure it to the very top of the tree.
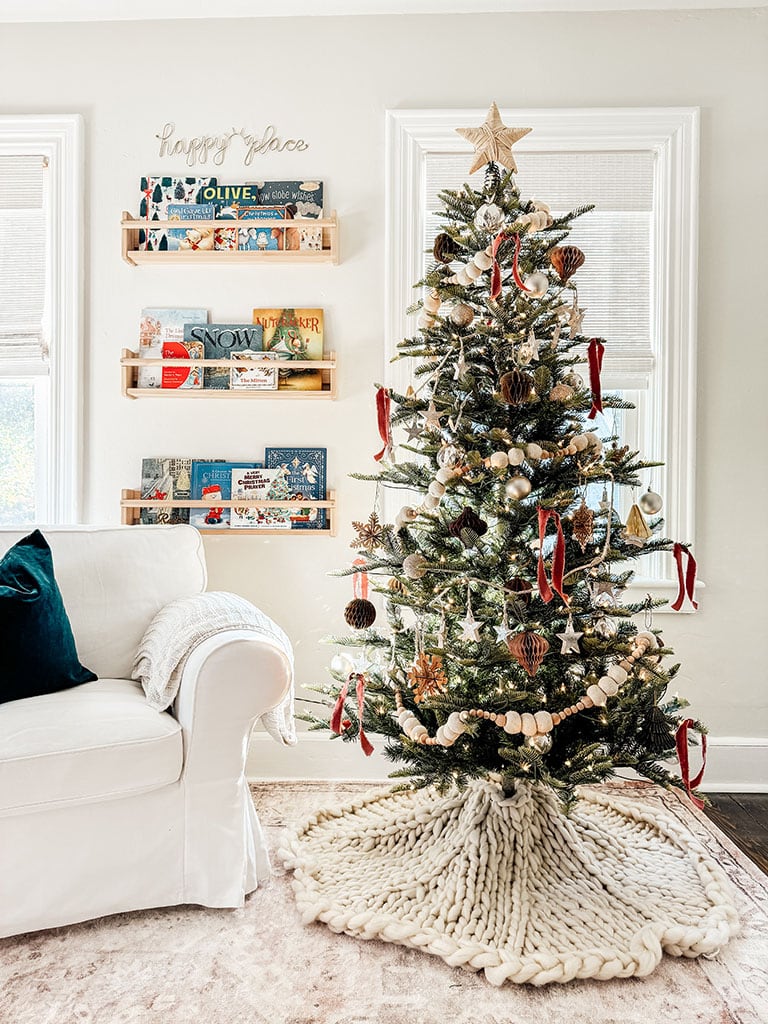
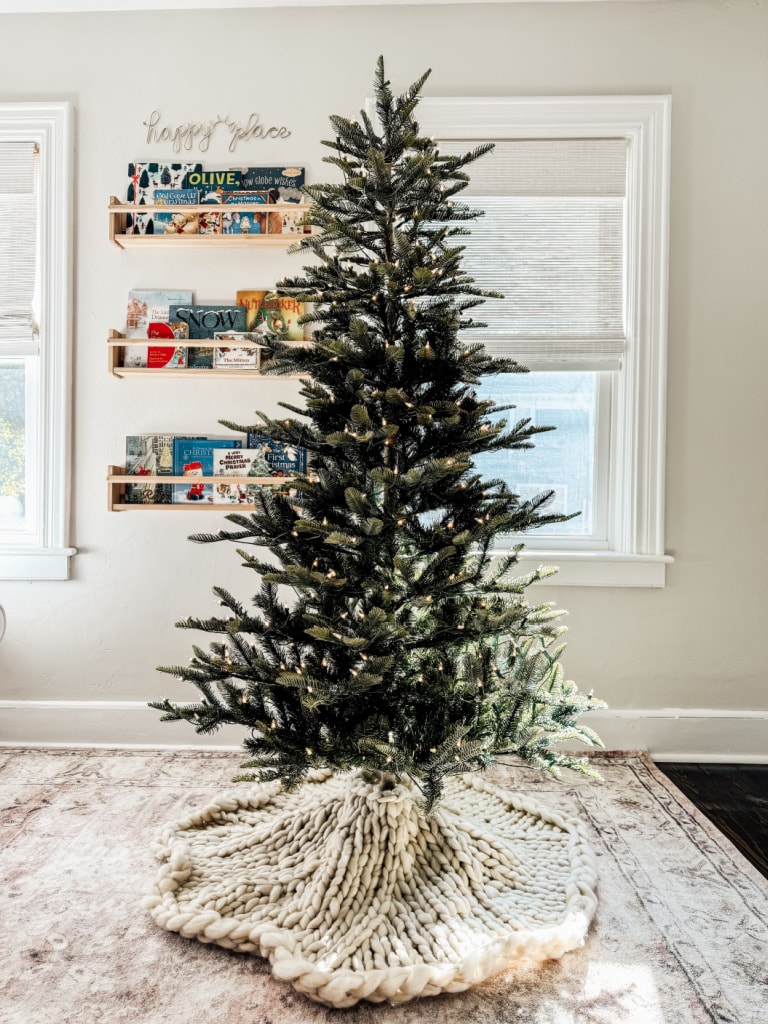
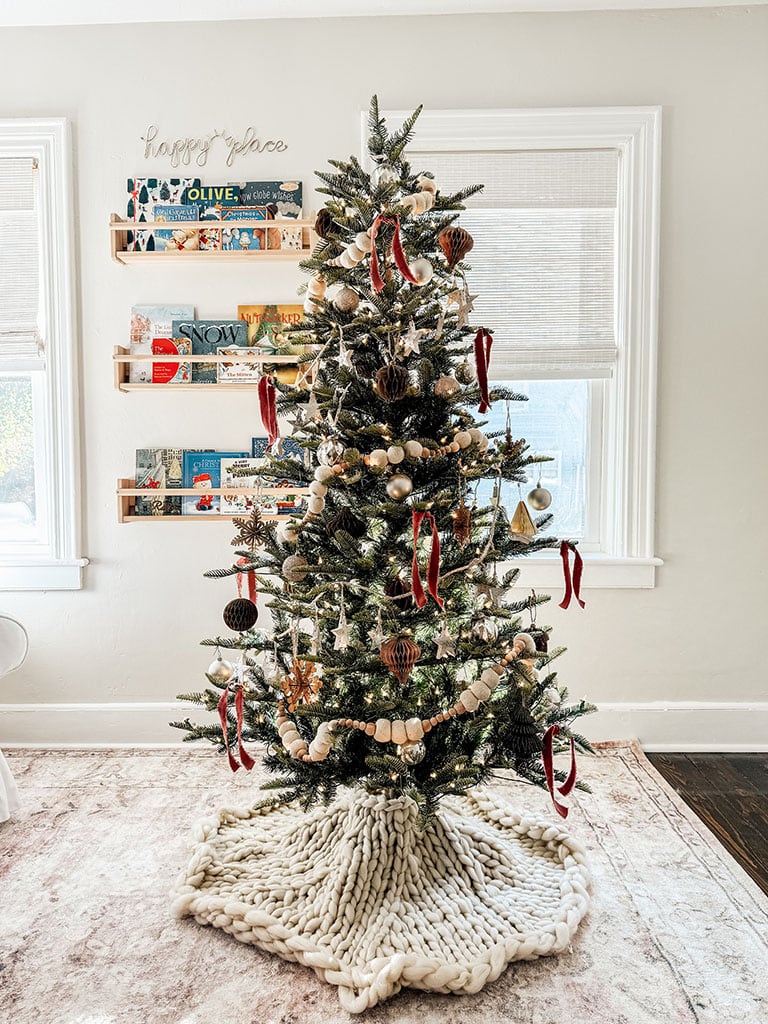
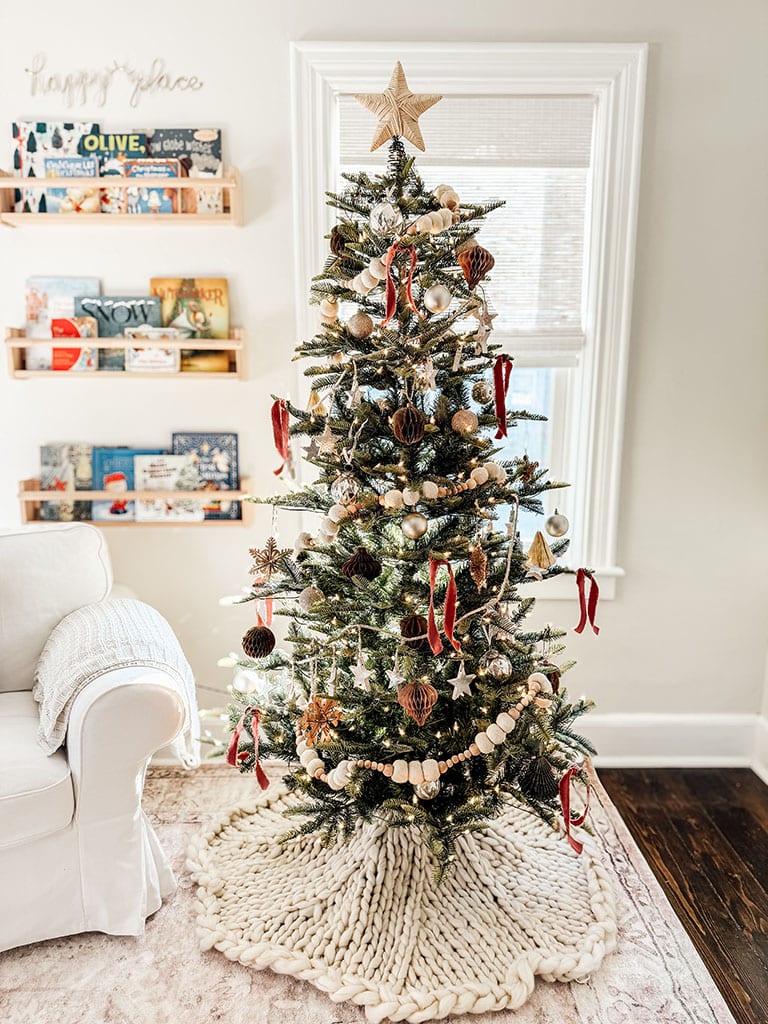
Step Ten: Finish with a Tree Skirt or Collar
We have reached the final and last step for how to decorate a Christmas tree. You will want to finish off your tree by placing a tree skirt or a tree collar. Both are great options. This final layer covers up your tree stand and creates a finished cozy look.
Now sit back and enjoy the magic of the season!
What to Read Next:
Neutral Christmas Decor Shopping Guide
How to Decorate for Christmas 2023
The Best Artificial Christmas Trees
Want to save this for later? Post this “How to Decorate a Christmas Tree” to your favorite Pinterest Board!