
Table of Contents
Raise your hand if you remember how much closet space our bedroom had when we moved in. The answer is zero. We used dressers for a while (and borrowed the tiny closet in our son’s room for our hanging stuff) and eventually added some floor-to-ceiling Ikea Pax wardrobes to our bedroom after about 10 months, which felt like we had arrived. A bedroom closet is so nice to have. And – big news! – as of writing this post, we’ve added another Ikea wardrobe to that wall… which means we have just as much storage in our current bedroom as we had in our last house’s FANCY WALK-IN CLOSET! I know. It’s downright mind-blowing.
For comparison, this is our last house’s walk-in closet (it was an 8′ x 6′ room). Each side had one 29″ cabinet in the middle and two 19″ cabinets (one flanking each side of the larger cabinet). That’s 67″ of linear closet space on each wall, for a total of 134″ in the whole closet.
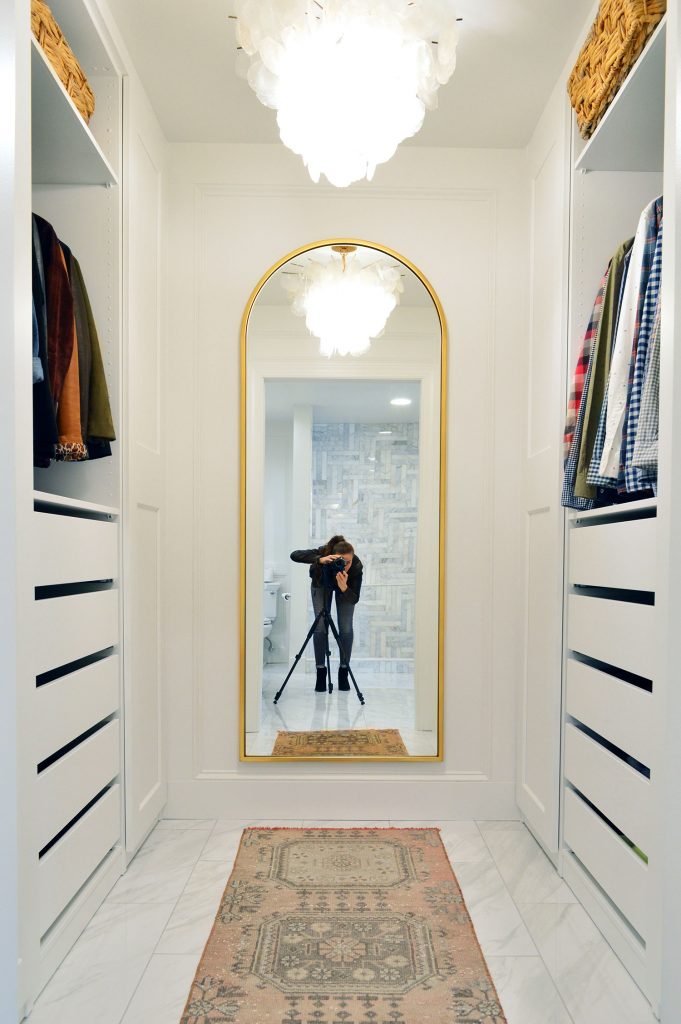
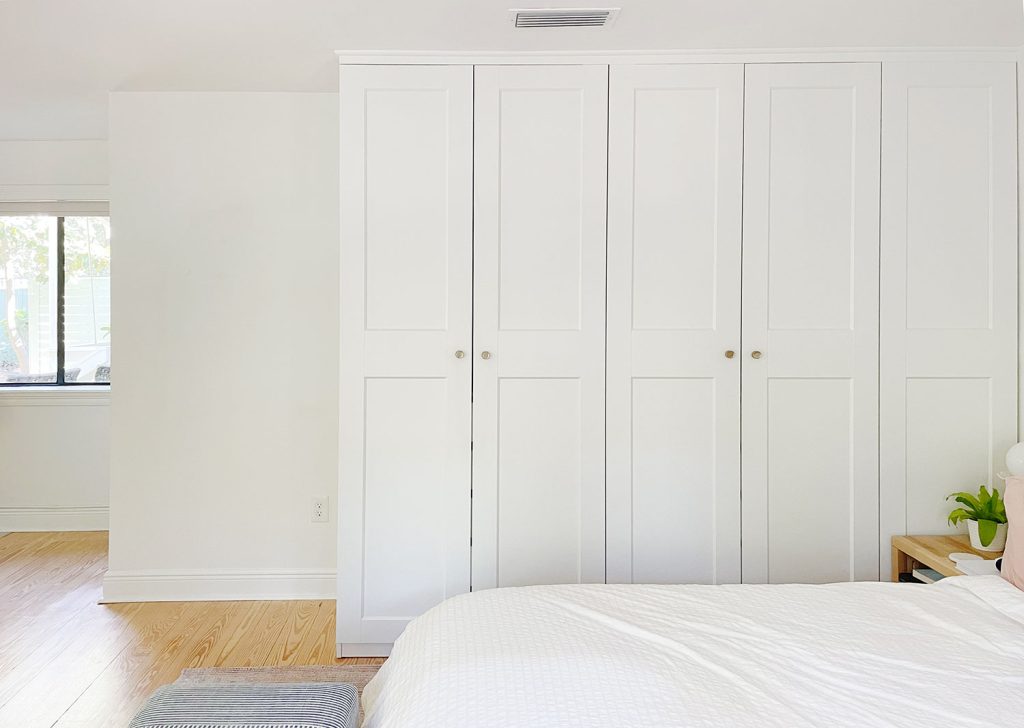
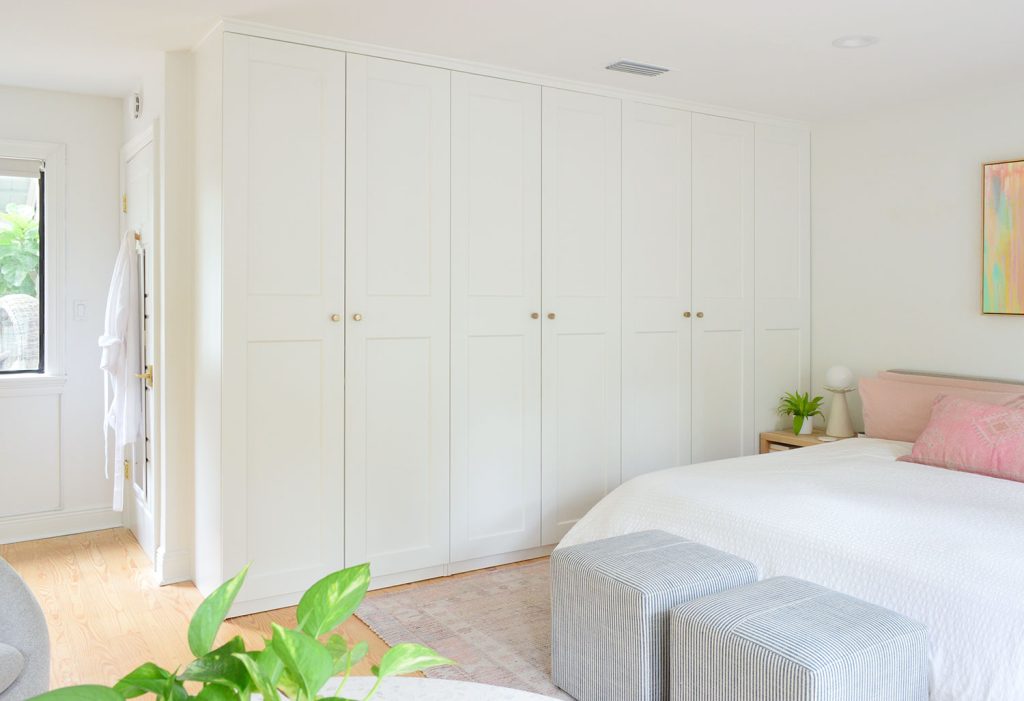
Here we used the exact same Pax systems (floor to ceiling, 8′ height again, same 24″ depth) but in our current smaller bedroom we just ran them along the left wall of our room. The configuration here is three 39″ wardrobes plus one 19″ wardrobe on the end, for a total of 136″ linear inches.
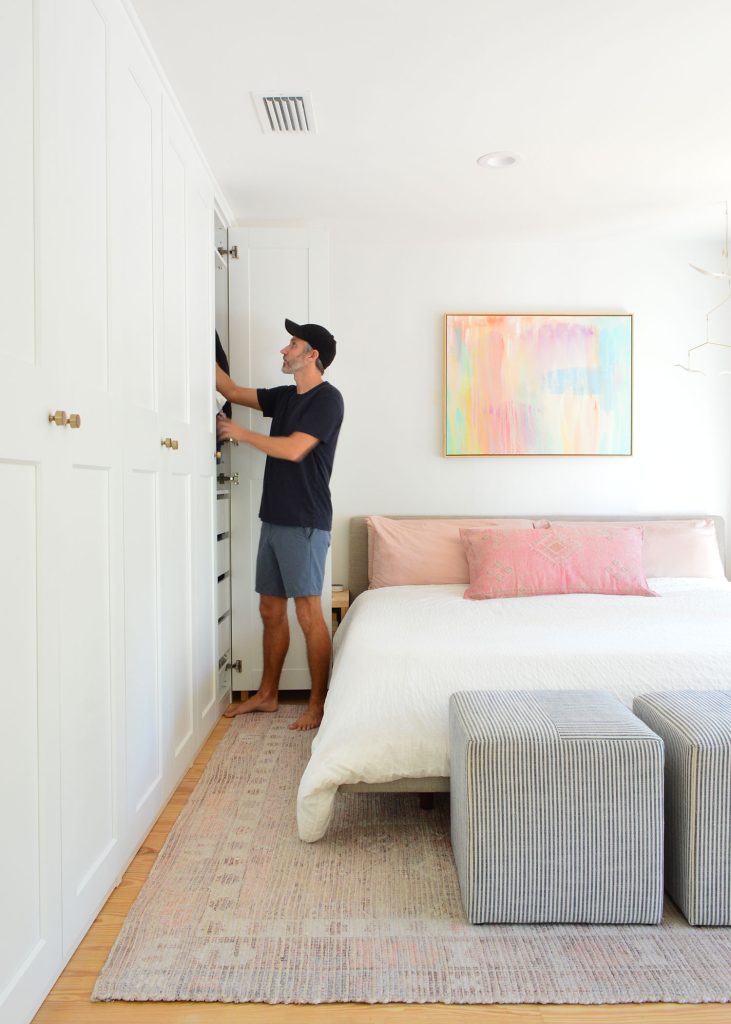
It’s wild to us that our last house had a dedicated 48 square foot room to accommodate this amount of storage, and in our smaller closet-less room we just ran the wardrobes along a wall, and still managed to work in a bigger bed than we’ve ever had! Talk about living large, even while downsizing. It’s pretty amazing.
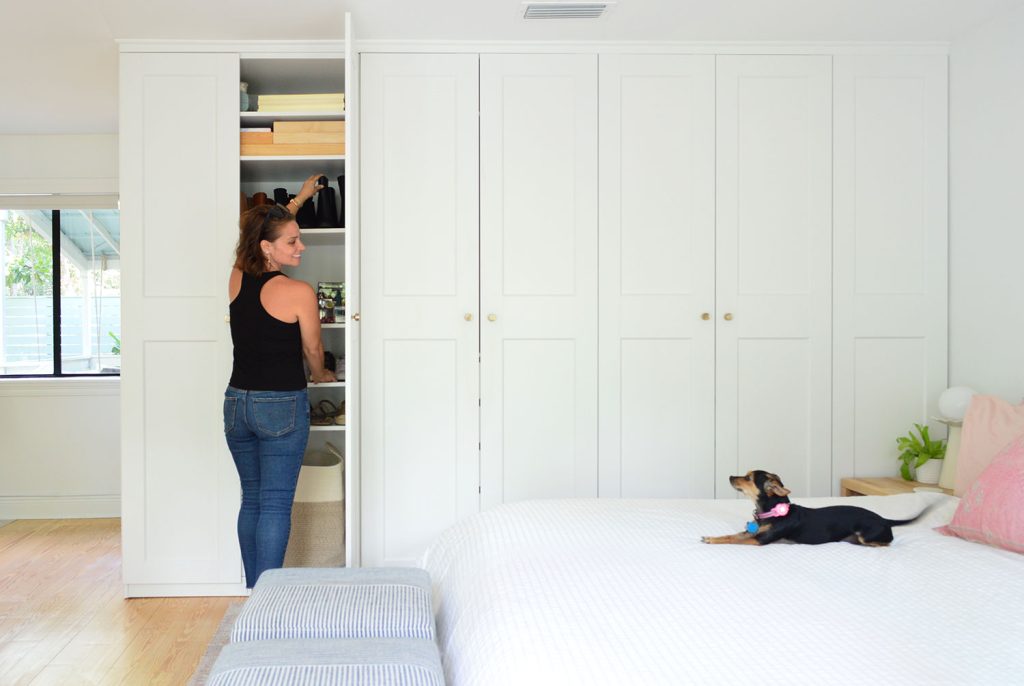
So this post is to show you how we got all of that storage into our smaller bedroom – and to detail exactly how we make them look completely built-in. Plus, we took a bunch of updated pictures of our room for you too (there’s a sneak peek of our new chair and a shot of the glass doors open).
First up, a little background…
Why Use Ikea Pax Closets?
We fell in love with the Ikea Pax closet system 15 years ago when we first used them to add clothing storage AND create a cozy sleeping nook in our first house. Not only are they a budget-friendly solution, they also offer a lot of customization and organization options so you can really tailor your Pax to your needs. That’s why we’ve used them again and again, including for our “fanciest” closet makeover in our last house.
You can check out that closet reveal post for all the details (how much it cost, before & afters, how we organized it, and even a video tour), but back to our current house…
Why Add Another Closet Now?
When we originally added the Pax wardrobes to our current bedroom back in 2021, we left space on one end for a doorway that we were planning to move there eventually (currently it’s just around the corner of that wall below). At the time, we thought moving the entry point to our bedroom over there would be an upgrade, but after living here a while we realized seeing the bed through a doorway from the entryway/casual sitting area where we often entertain doesn’t feel like an upgrade at all.
Currently, the door to our bedroom looks in on the opposite wall where we just have a dresser – so it doesn’t feel as “intimate” as seeing a bed from the front door or the hangout zone downstairs. So we’re glad we waited it out and didn’t move that doorway prematurely. I literally think if we did we would have moved it back to this spot later.
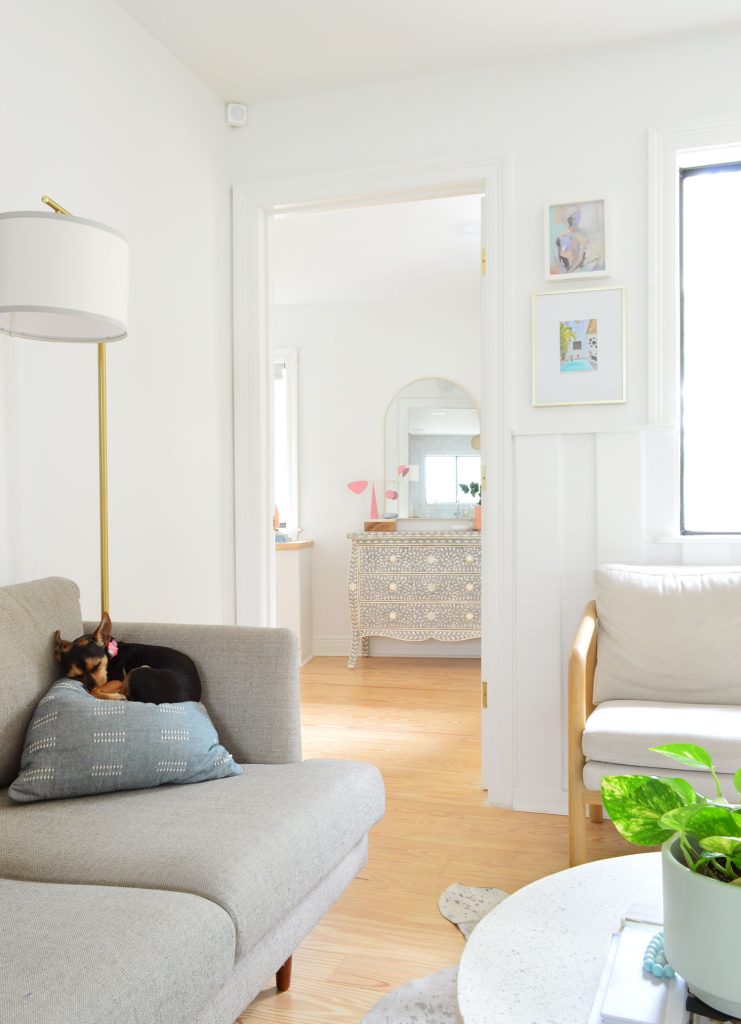
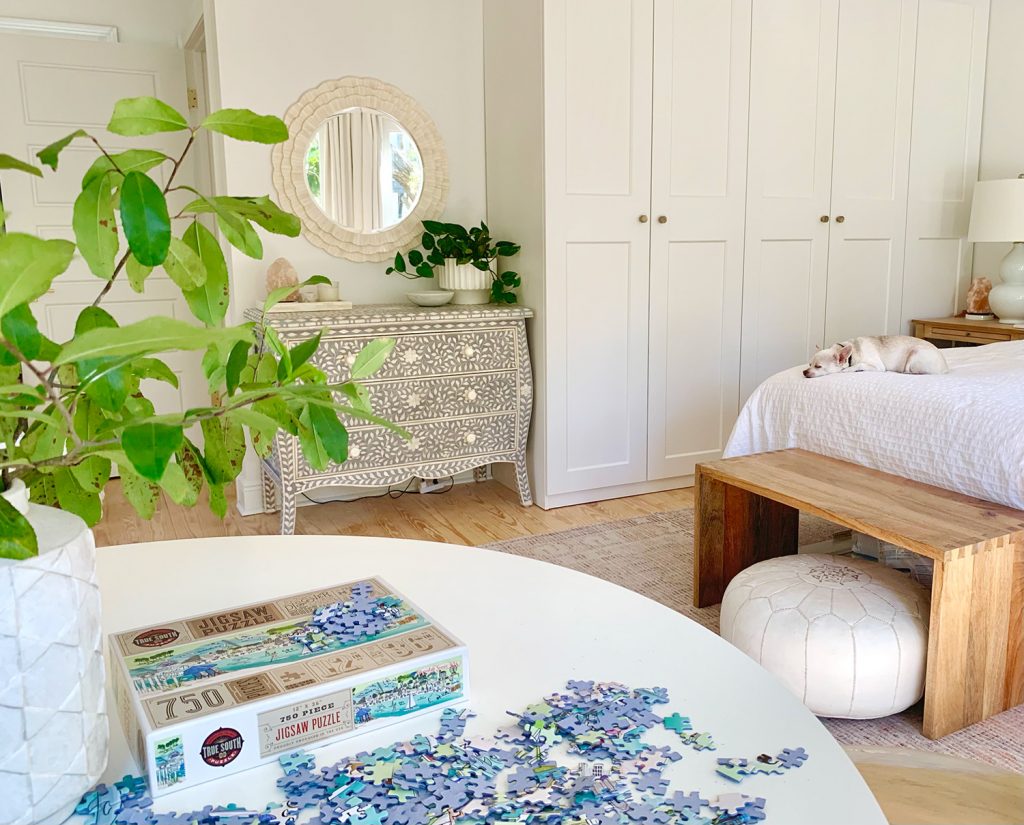
So with that crystal clear realization of “Nope. No door here!” – we knew this corner of the room would look a lot better with one more wardrobe running along that wall, rather than squishing the inlay dresser you see below in that spot (you can see from the photo above that it now lives on the wall that’s seen from the kitchen/sitting area).
Adding one more closet on that end definitely makes the wall look more complete.
Again, here’s that difference. Goodbye random enclave at the end of that wall, hello more closet space!
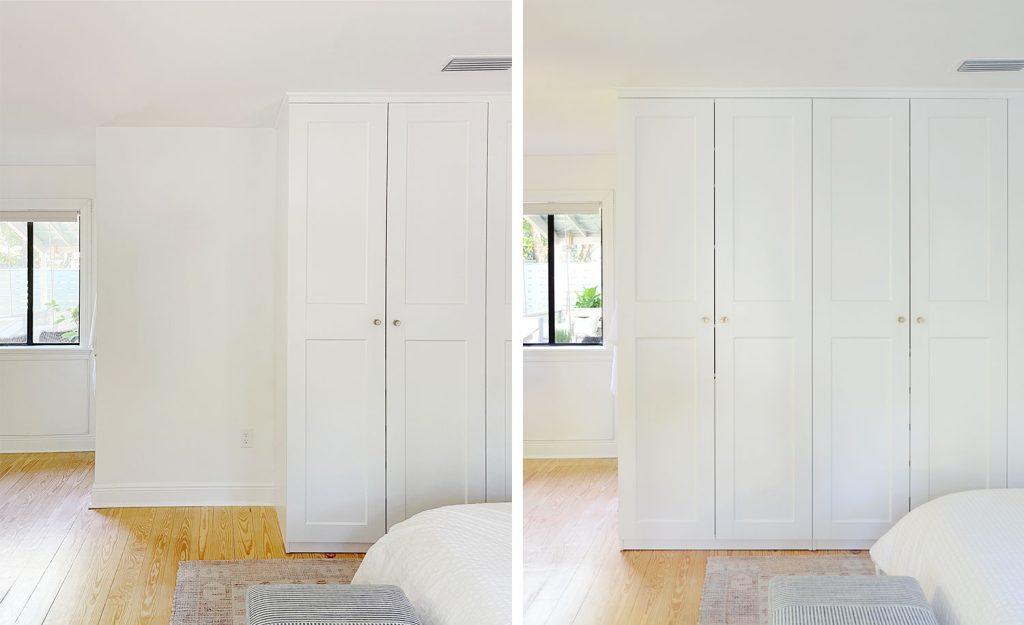
I know the pictures above make it look like the closet overhangs the wall, but it doesn’t. It actually leaves the same amount of wall space that we already had next to the bedroom door, so that corner actually looks pretty balanced – like it has always been this way.
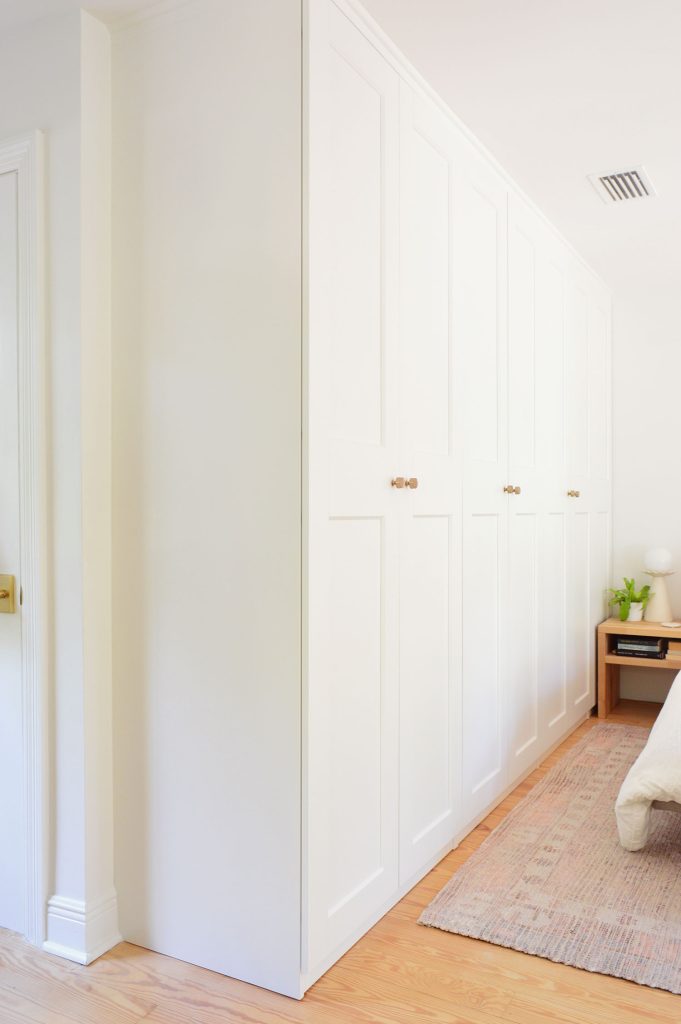
We definitely considered using some super thick filler pieces on each end to make the closets fully flush to the door wall, but ultimately decided we liked it better this way without bulky end pieces flanking the closets.
I’ll share some more pictures of how the space fits together at the end of this post, but let’s dive into the building process.
Making An Ikea Pax Closet Look Built-In
Pax wardrobes are actually one of the easier Ikea pieces to hack if your goal is to make them look more like a custom built-in closet. The main trick is to use trim or molding for that fully floor-to-ceiling look. The Pax system comes in either 79″ or 93″ heights, so if you’ve got 8ft ceilings (96″) like us, all you have to do is fill that 3-ish inch gap. You may need to do some gap filling on the sides too if you also want it to go wall-to-wall (which we did here). That process is pretty much the same one we’re sharing in this post).
We actually captured the entire process – from unboxing to painting! – on a timelapse video that you can watch below. We’ve also got a more detailed step-by-step tutorial after the video as well.
Building-In A Pax Wardrobe: Timelapse Video
We condensed this process down to just 5 minutes, but in real time it stretched over the course of about 4 afternoons. The first 2 were more labor intensive with assembling and building in the closet, while the second 2 were mostly just waiting for caulk and paint to dry. So it’s definitely something you could mostly complete in a weekend.
Note: You can also view this video on YouTube.
Tools & Materials Needed
In addition to your Pax wardrobe pieces themselves (wardrobe box, doors, hinges, interior fittings, etc) you’ll also want to have the following items available:
I’m going to skip over the actual wardrobe assembly and installation parts, since Ikea covers that pretty well in their instructions. You can watch them in the timelapse above if you’d like to see them in action. and we added some notes to the video for you, like how I added an outlet hole. Below we’re going to start at the stage where you’ve already got your Pax in place and secured to the wall.
Step 1: Make Your Plan
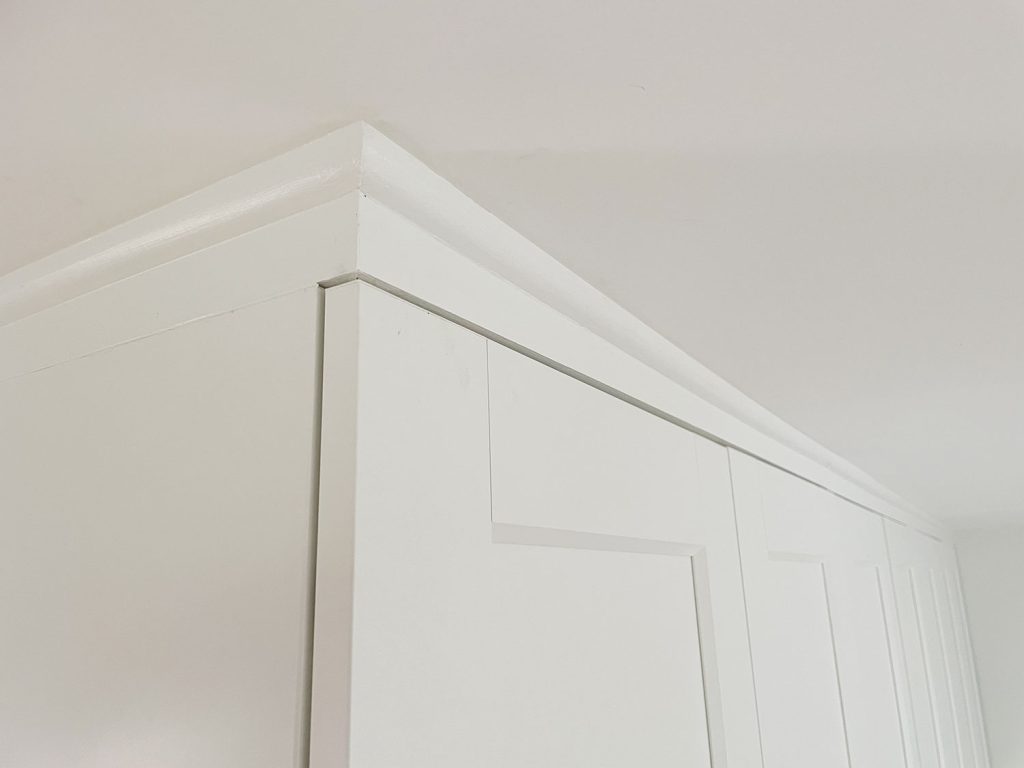
Like I said, the main trick to making it look built in is just filling the gap between the top of the Pax to the ceiling. Almost like you’re creating some crown molding around your closets.
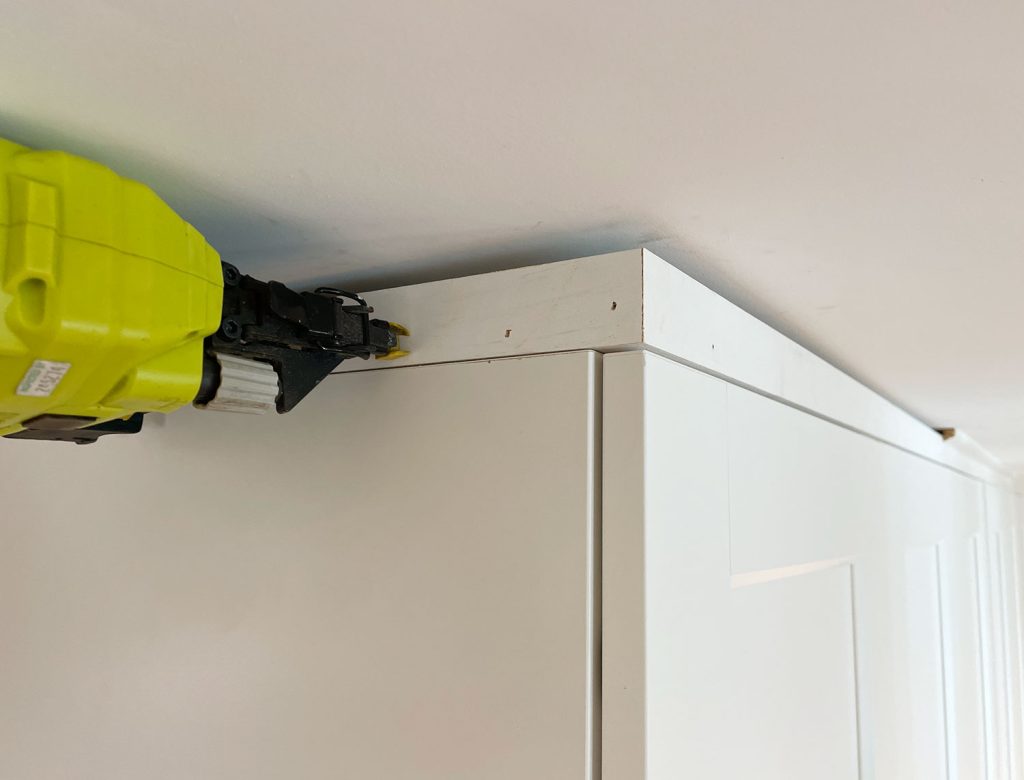
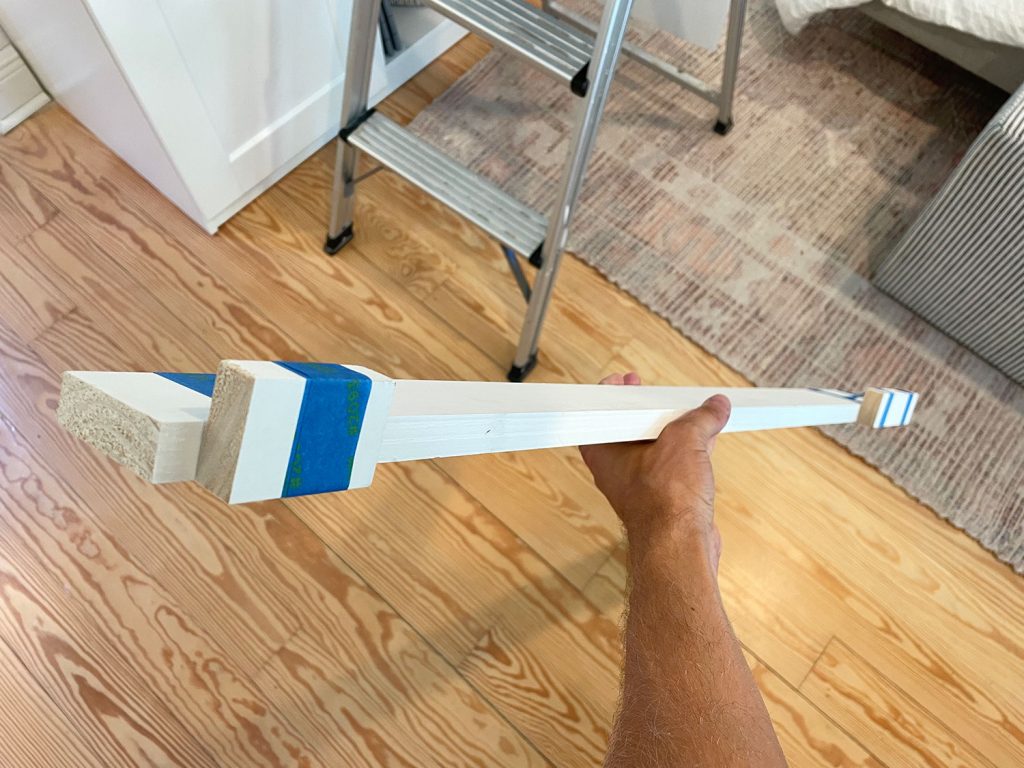
The challenge is that the Ikea doors go all the way to the top of the box, leaving no exposed surface to nail your molding into. So before you add your trim, you’ve gotta add a “backer piece” that it can attach to. Here’s a little overhead view of how we solved this. What you see me nailing in the photo above is the piece that is labeled “trim” in the photo below:
The “backer piece” is just some spare 1×3 I had laying around, but it can really be anything. It will attach flat against the top of the closet (nailed in from underneath). Then whatever you use as your visible trim can be nailed into the 1″ side of the backer. I promise this will make more sense as we go.
Step 2: Align & Attach Your Backer Piece
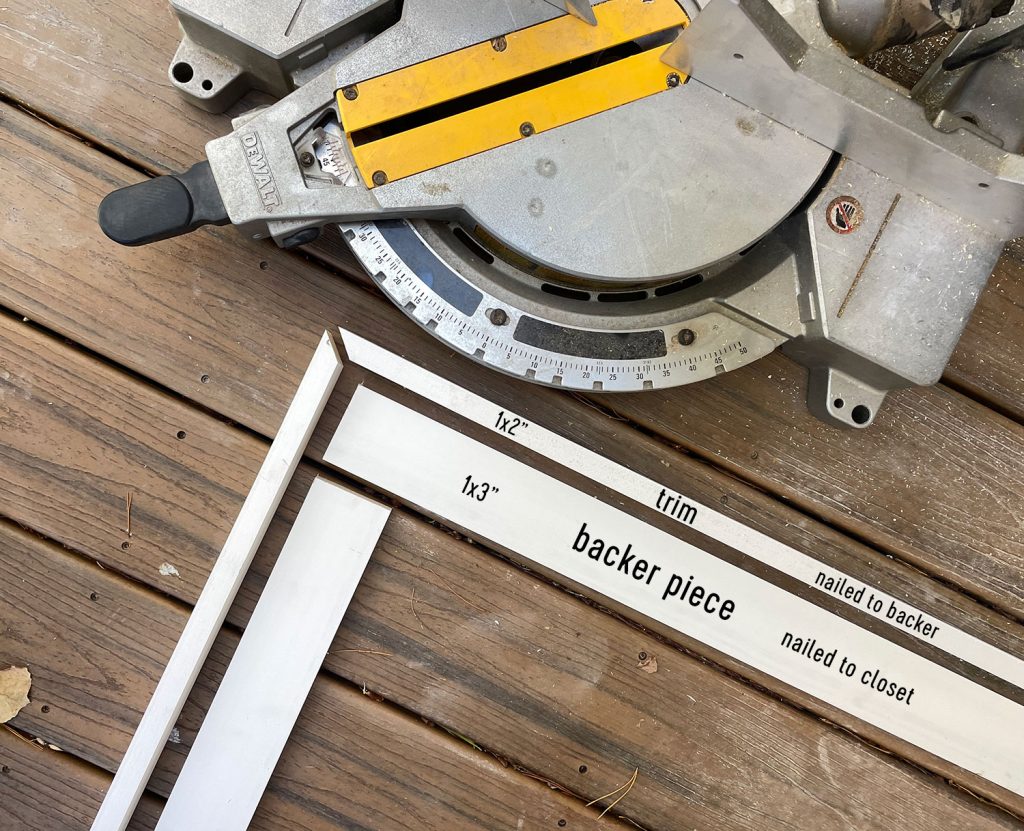
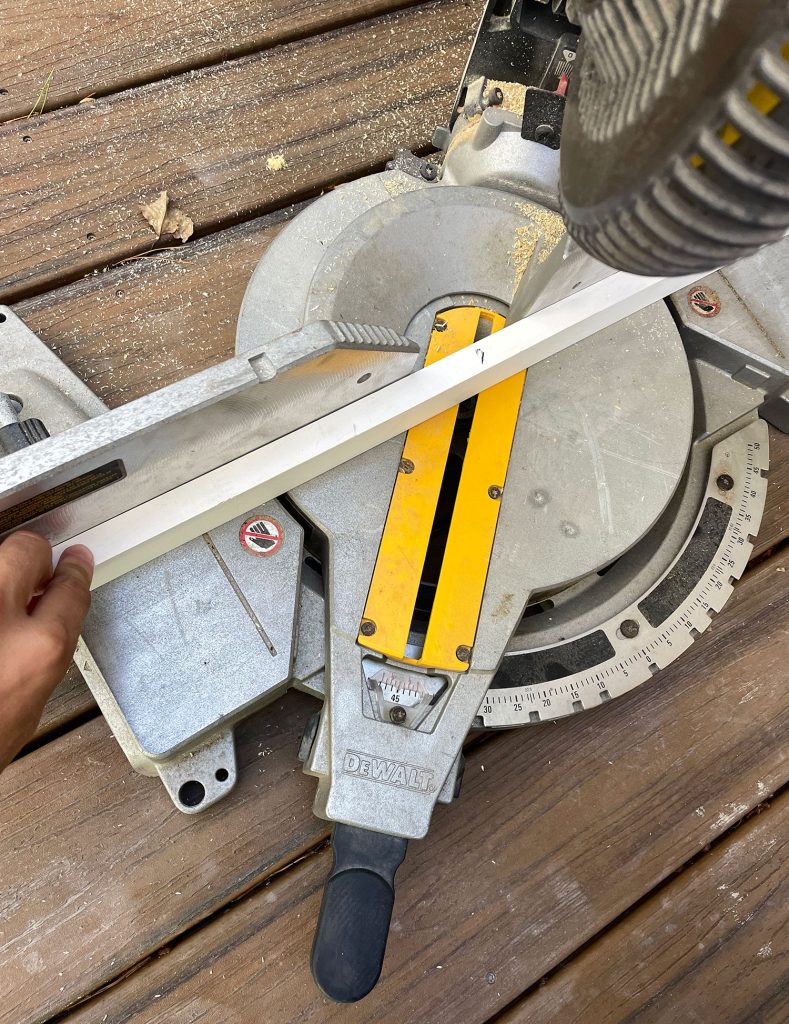
First, we used the miter saw to cut our 1×3″ backer pieces – one for each side – to size. Next came the tricky part: getting the placement of the backer just right.
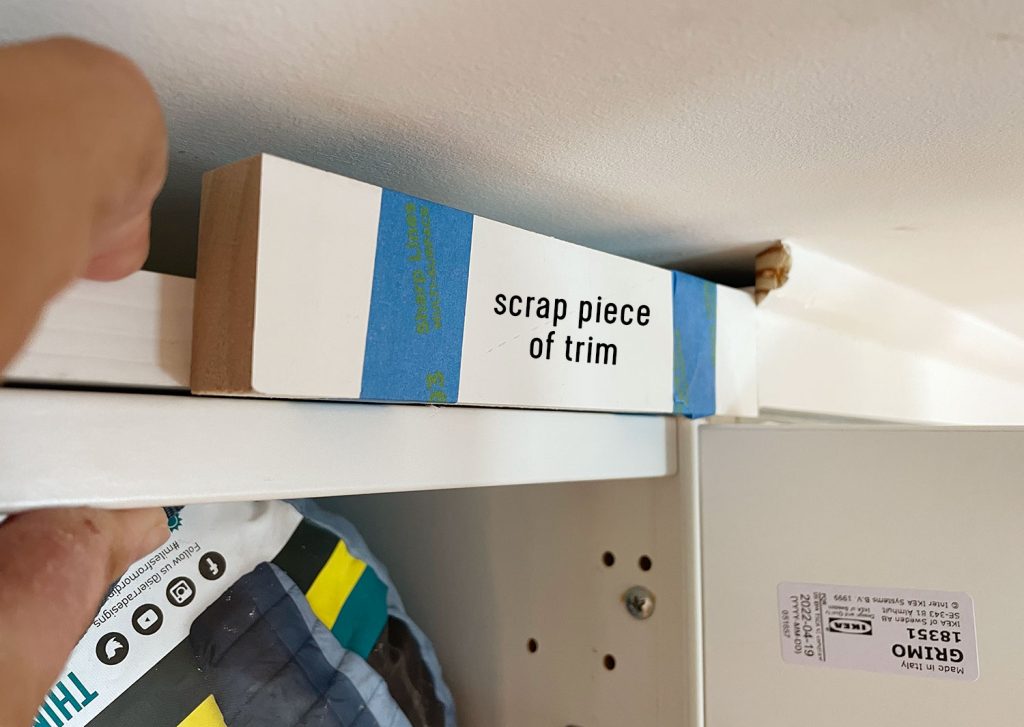
Assuming, like us, you want the trim to be flush with your closet doors – resist your instinct to install this piece flush with the front edge of the wardrobe box. That would only work if your trim were exactly as thick as your closet door. Since it’s not, we’ve always had to mock something up to get our placement just right. That’s where this puppy comes in handy.
What I’ve done here is taped a couple of pieces of scrap trim (aka, the same 1×2″ that I’ll be using as my final molding) to the front of my backer piece. That way I could hold up my backer piece and double-check that my final trim would end up exactly where I wanted it. In this case, it would be flush with my existing trim (since we were adding this last wardrobe to an existing one here) as well as flush with my doors.
With the backer firmly held in place with my hand, I secured it with a couple of nails using my nail gun. You can also see this part in action during the timelapse video above.
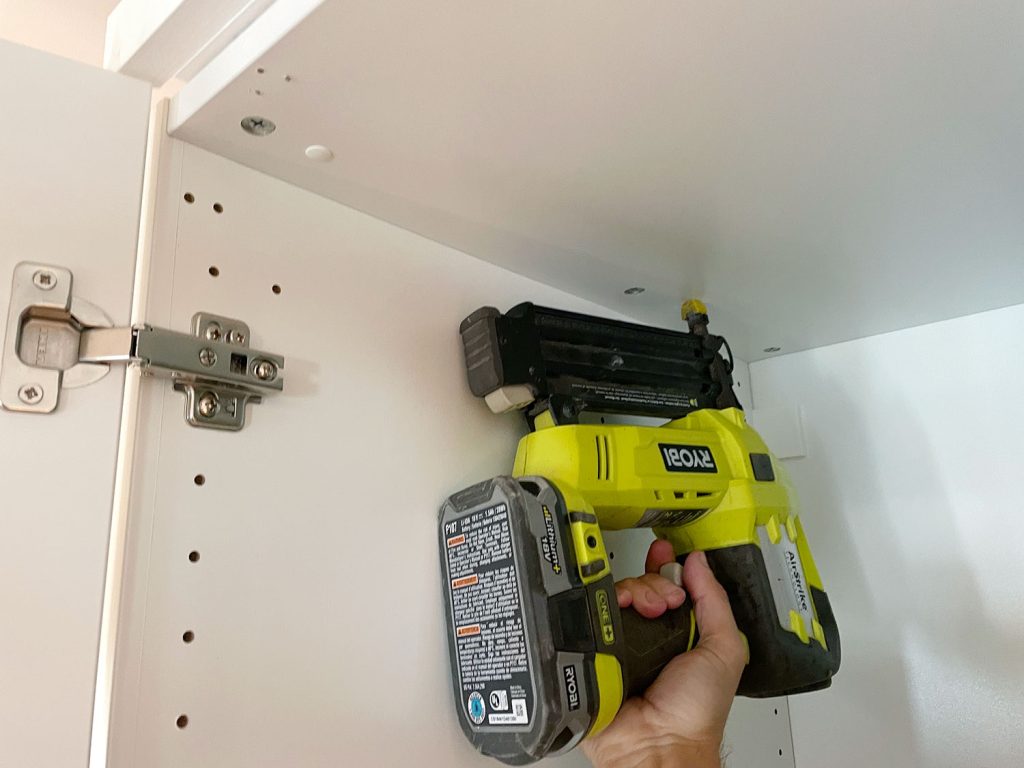
Here’s another view of that process, as repeated on the other end of the closet. You can see how the scrap piece of trim helped us ensure the backer piece got attached in precisely the right spot. Because on this side, I wanted the trim to be exactly flush with the side of the Pax box.
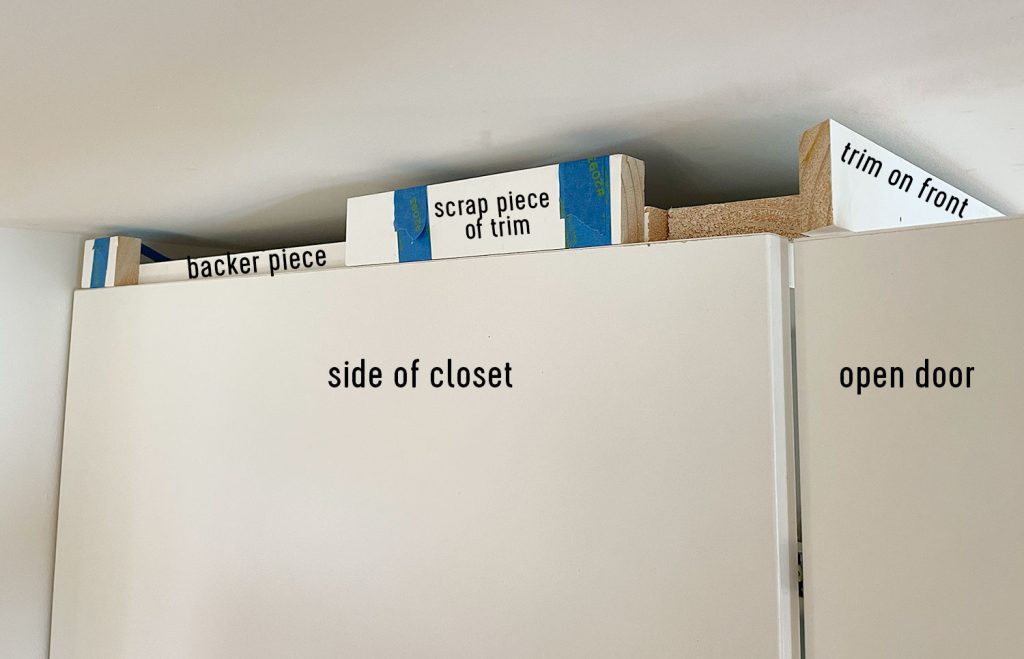
You can also see above that we had already attached the trim on the front of the closet. Notice how much it hangs over the wardrobe box? But as you’ll see below, it’s perfectly flush with the door when it’s closed.
Step 3: Cut & Attach Your Trim
Once your backer piece is nailed into place, you can cut and nail in your trim (aka: the molding that will actually be visible and give your closet a built-in look). Since we have an exposed corner, we chose to miter cut ours on an angle for the most polished look.
Then we nailed the trim pieces into the backer, as you can see below. Don’t worry about the nail holes. You can fill them later with caulk or wood filler.
Step 4: Adding Quarter Round To Finish It Off
As you can see above, our 1×2″ molding wasn’t tall enough to fill the gap to the ceiling entirely (and a 1×3″ was too big). But luckily a piece of quarter round was enough to close the gap. Depending on your ceiling, you may have to get creative with what molding or combination of trim works best. You also can always use a table or circular saw to rip a larger piece of wood to size.
In the photo above we’ve actually already completed the last step, which is…
Step 5: Caulk & Paint
Once everything is built, use paintable caulk to fill any nail holes, gaps, or seams – like where your moldings meet the wall, the ceiling, and each other. From there you can paint your trim to match. I’ll admit we’ve yet to find a paint that perfectly matches Ikea’s white (especially since different Ikea products are different whites). But we’ve found that our wall & ceiling color – Sherwin-Williams Pure White – is a pretty close match. We’ve just been using it because, if nothing else, at least it’s a perfect match to the adjacent surface in our room.
The Finished Built-In Closet
We finished this project a month or two ago, and it’s been so great having the “bonus” storage. Not to mention that the wall doesn’t feel in limbo anymore.
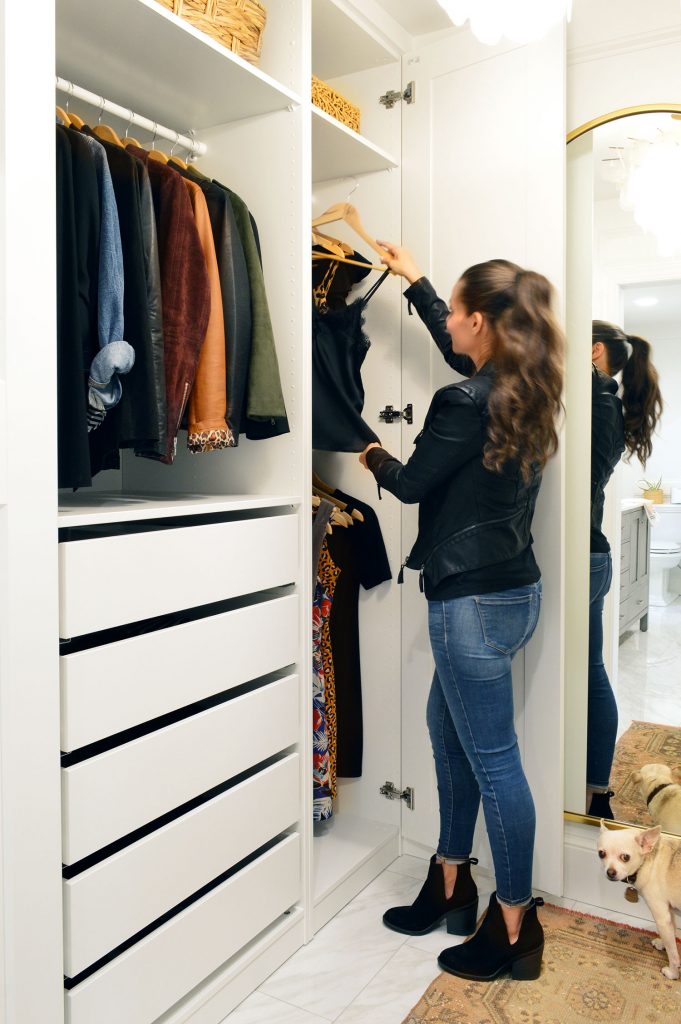
We’re also working on a closet organization post because we know people like to see specific interior components of the Pax wardrobes and how we’ve chosen to store stuff in ours. Maybe Sherry will do the whole video tour deal.
The biggest takeaway from this many-years-long closet evolution is that wild realization that we didn’t actually end up giving up a whole lot when we moved to a house that’s half the size of our last one. Back when we decided to downsize, we assumed that we’d constantly be cutting corners and sacrificing space, so the fact that our current bedroom has just as much closet space as our last house (which had a 48 square-foot walk-in closet!) – it just shocks us. And to now be luxuriating in the largest bed we’ve ever owned… we just didn’t see that coming.
We also laugh about how, in our old walk-in closet, we seriously contemplated sacrificing some wall space to add a window for some natural light in there. And now, even though our current closet is a little less traditional (wardrobes along the wall of the bedroom versus having an actual closet), we’ve got sunlight in spades!

Now that you’ve seen how we added to our built-in closets, we’ll be back with a whole-shebang tour of how we’ve organized them inside (that has been a bit of a moving target as we continue to optimize it, but it’s on our to-do list!). In the meantime, feel free to check out the other side of the room and the other Ikea storage we customized and our last house’s closet, which was full of favorite Pax components!
Other Ikea Customization Projects
Wanna see some other Ikea hacks? Here are a few of our favorite customizations:
*This post contains affiliate links, so we may earn a small commission when you make a purchase through links on our site at no additional cost to you.
