
Table of Contents
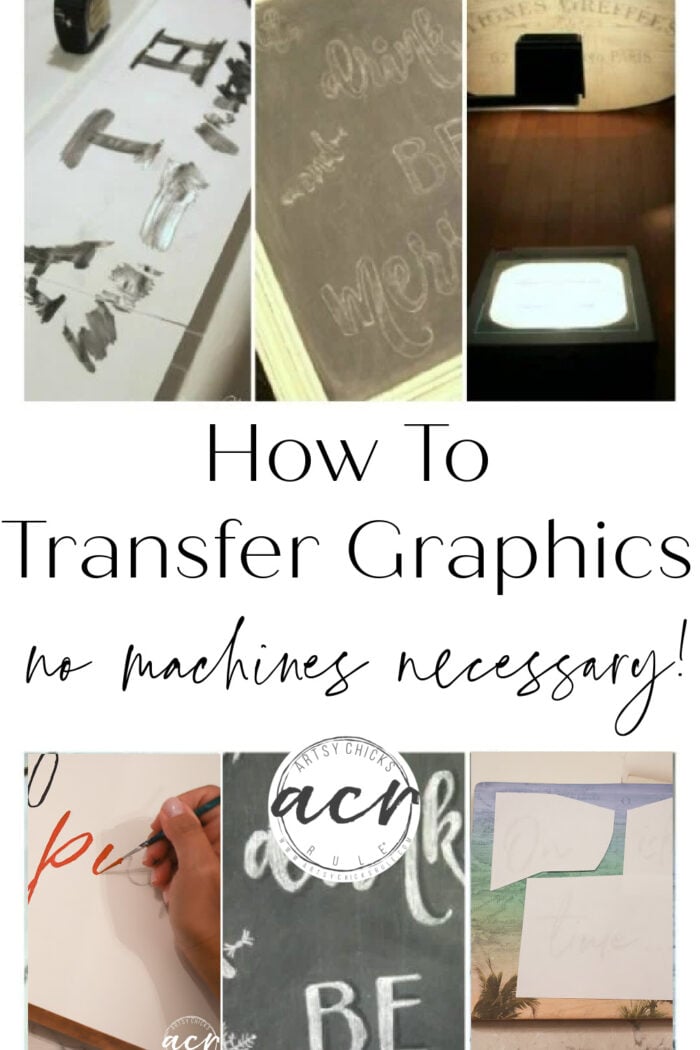
Learn how to transfer graphics and all those pretty word images, etc., no machines necessary!!
Updated Aug/2023
Hello Friends! Today I’m going to share “How To Transfer Graphics & Images” all in one post.
It’s something I do quite a lot on this blog but it’s a bit spread around, here and there, in all the posts.
When creating something new, I will usually link to another post that gives the basic tutorial on a particular transfer method but that really isn’t ideal.
The ideal would be, being able to link to an entire post, that included every single type of transfer method I use and have used here on the blog.
All in one place.
So, welcome to that post.
This “how to transfer graphics” post is part of a “back to basics” series that I’ve begun. All parts to this series are linked at the bottom of the page.
Hope you will find them helpful!!
How To Transfer Graphics & Images:
- Reverse Inkjet Transfer Method
For this one, you only need an inkjet printer. It’s about as simple as it gets.
Simply print out your desired graphic in reverse, then align it onto your project, tape in place and (with firm pressure) trace over the entire printed graphic area.
A tape measure is your friend here! Trust me on that one.
Once you remove the paper, the ink from the printed paper will be transferred to your project.
***You can even do this days later, the ink doesn’t have to be “wet”.
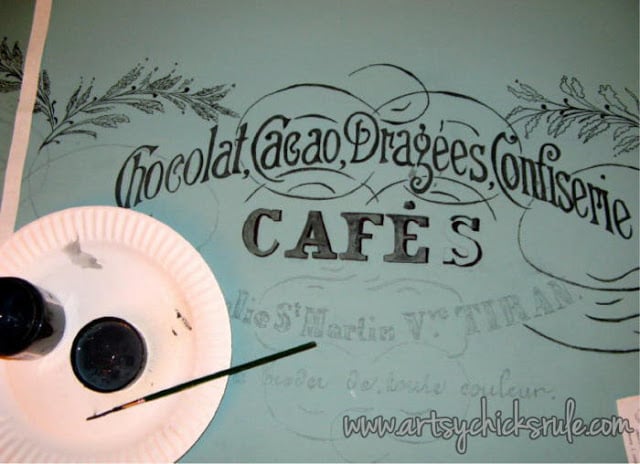
All that’s left to do it paint it in.
Script liner brushes are my very favorite for painting in lettering and graphics.
I find that it gives me the most control plus it enables me to create those thin, fine lines when needed.
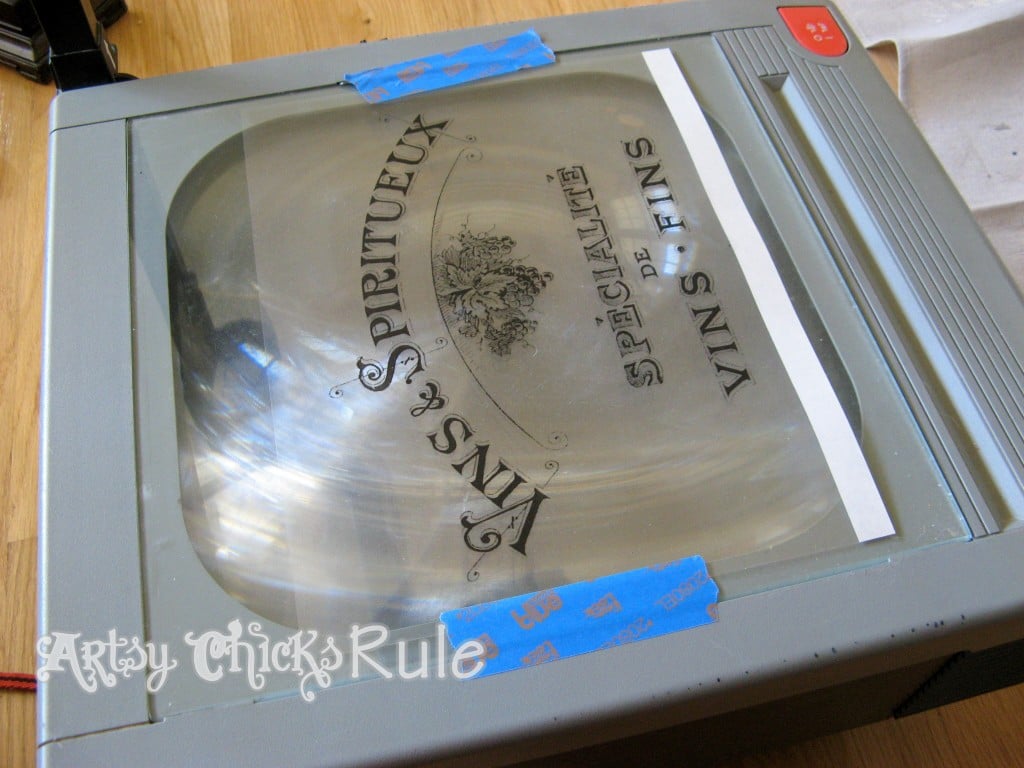
REVERSE YOUR IMAGE DIRECTIONS:
I know there are several programs that will reverse an image for you but I do it in Picmonkey.
Go to Picmonkey, click EDIT to upload your graphic… (edited to say that this used to be a free service, it no longer is)
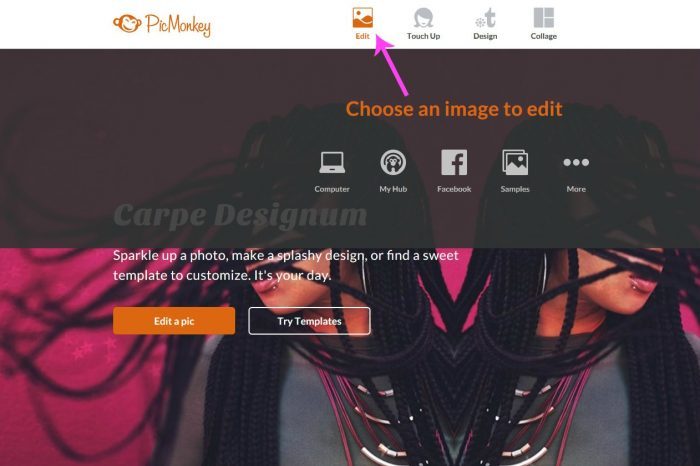
Once it’s in the window, as below, click ROTATE….
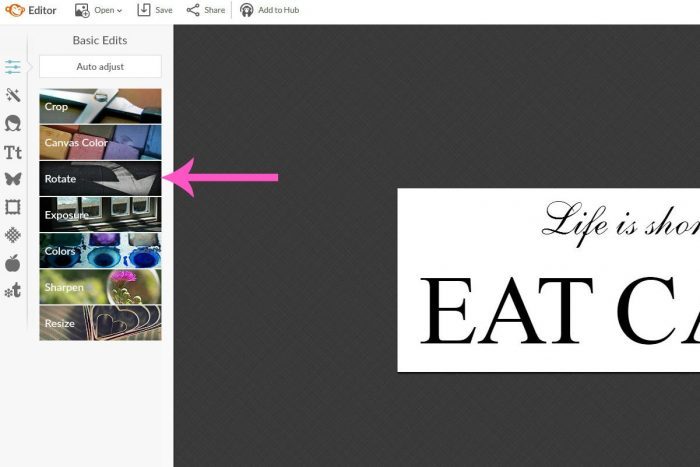
…then click the arrow button I have notated….and then APPLY.
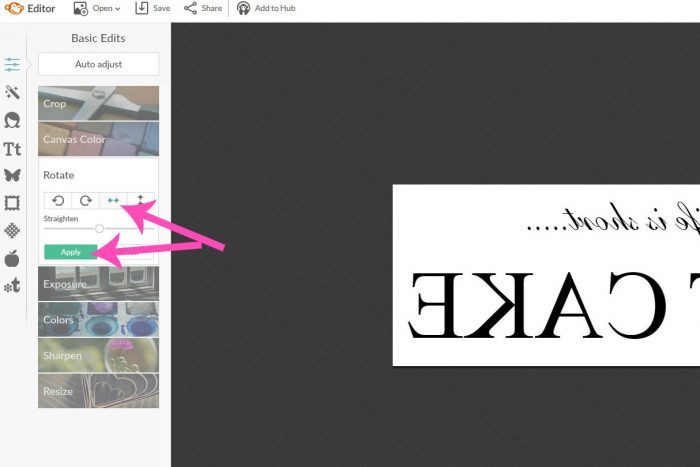
That’s it!
Click SAVE and you are done.
Here’s an example of a recent one I did.

You can read about this project, here.
Here are a few projects I’ve done with this method:
- “Believe Sign“
- “Gather Sign“
- “French Paris Box“
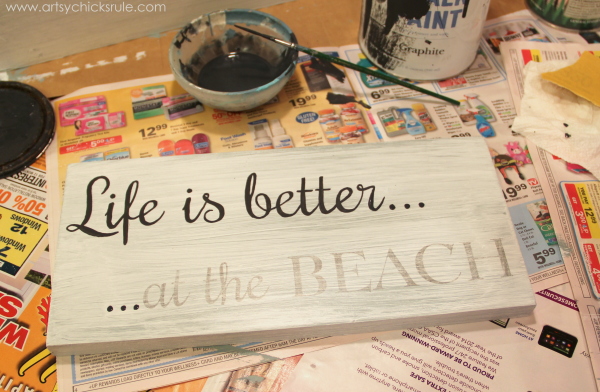
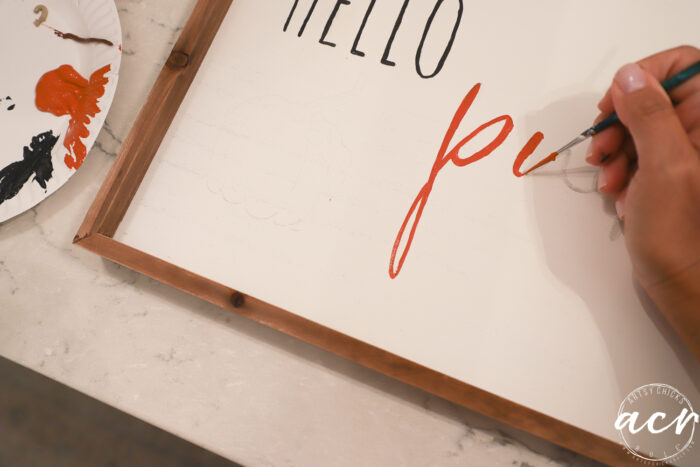
- Pencil Shading Transfer Method
This is pretty similar to the above method.
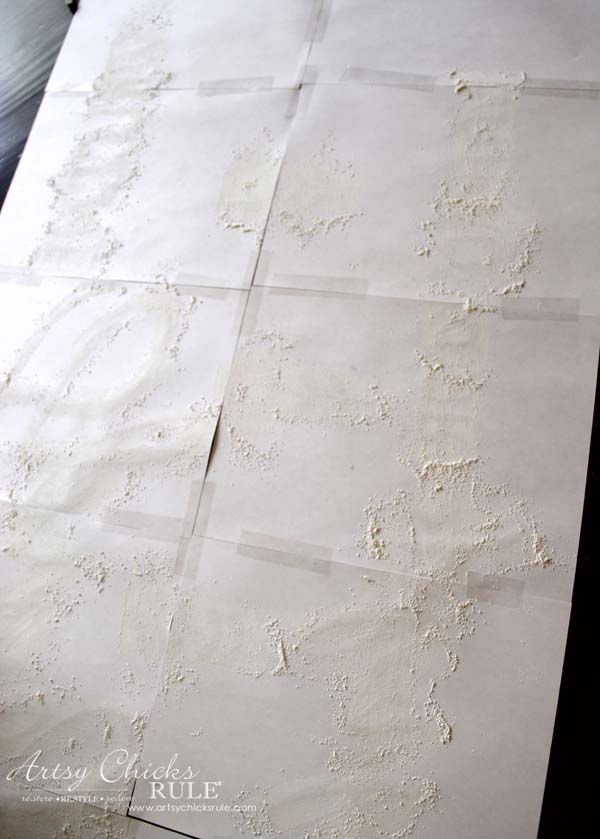
Print out your graphic the right way (not in reverse). Then shade the backside of the paper where the letters/graphic are with a pencil.
Do it rather firmly so there will be enough pencil lead to transfer.
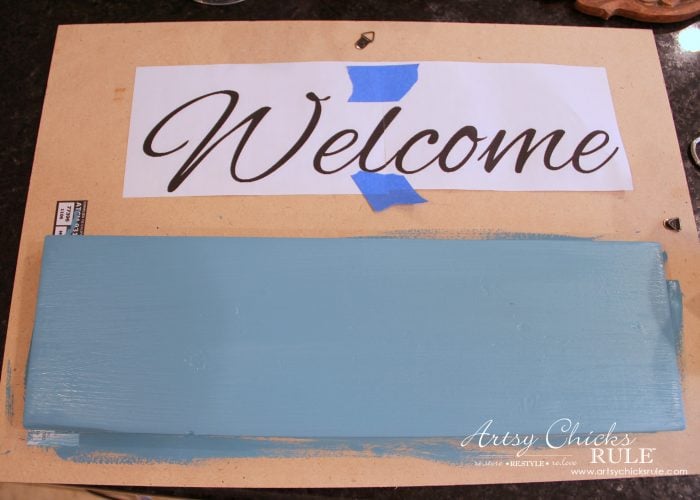
You can use a regular pencil for most projects that you will be painting in black.
I’ll talk about transferring images onto colored or dark backgrounds that you want to paint in white, further below.
Trace the letters so that the pencil lead you shaded in will transfer onto your project….
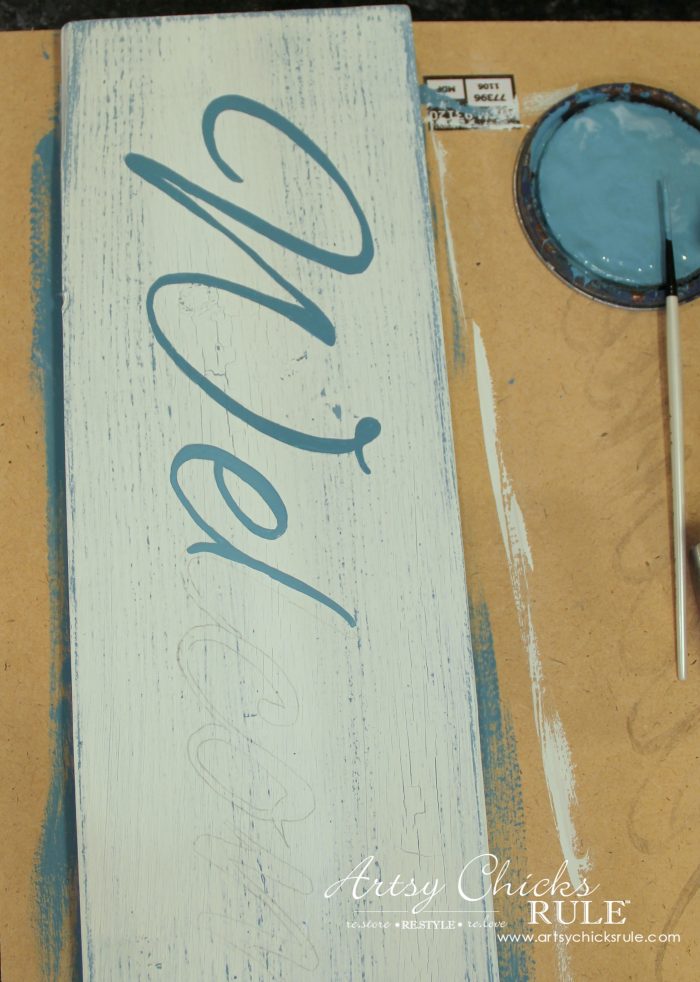
Then hand paint in.
Here are a few projects I’ve done with this method:
- “Beach Box“
- “Welcome Sign“
- “Spring Sign“
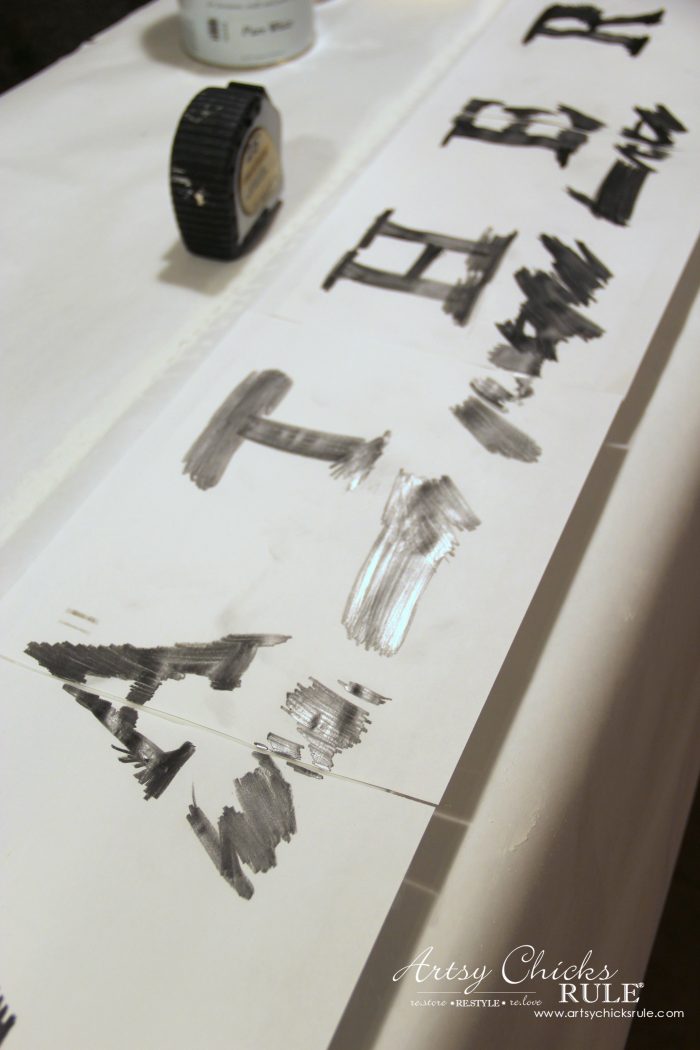
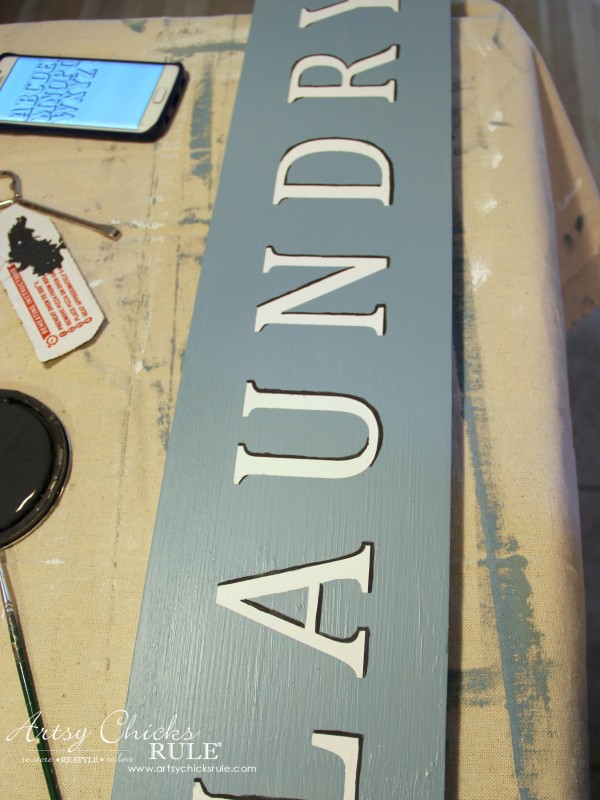
- Carbon Paper Transfer Method
This is really simple too. Print out your graphic, place a piece of carbon paper in between it and the project.
Tape into place, and trace.
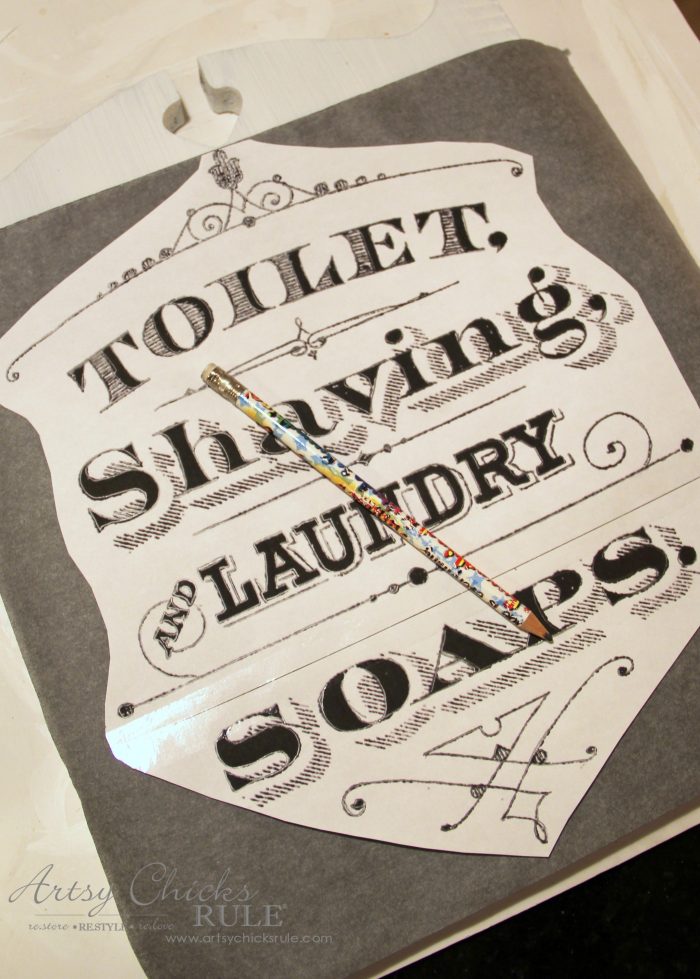
So simple!
I really love this one and should use this technique more often.
Here’s the brand I use >>> Graphite Transfer Paper (it also comes in white for those dark-colored projects!)
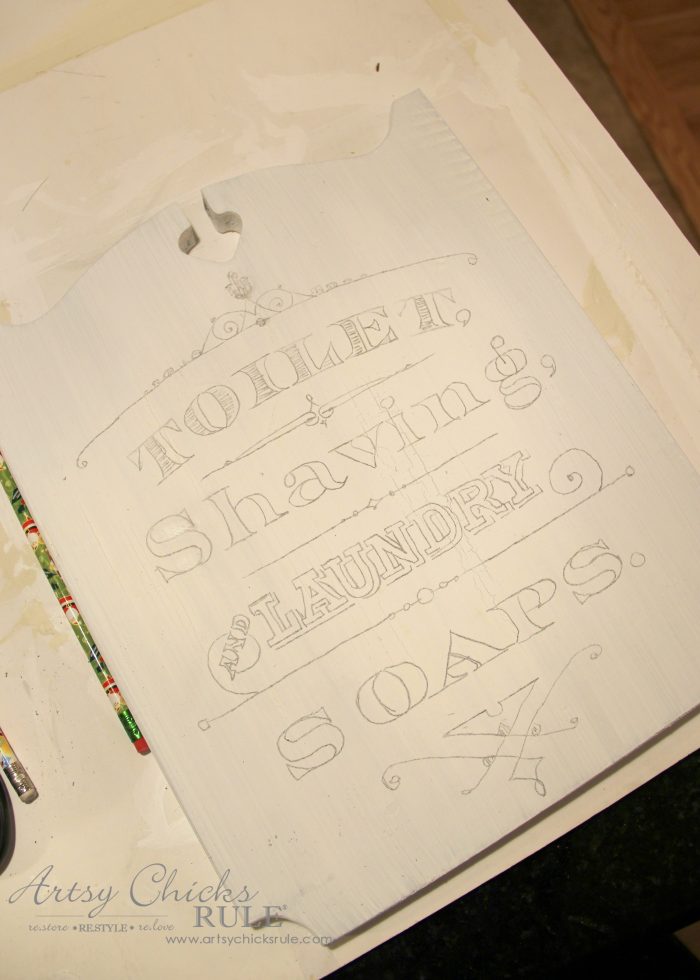
Now all that’s left to do is paint in the letters.
You can see this project I did with this method:
- “Toilet, Shaving, Laundry Sign“
- Waterslide Decal Paper Transfer Method
This is not actually painting in any of the graphics but it is still technically a “transfer” method, so I included it.
You have to buy the specialty paper, print out your graphic on it, and then apply it to your project per the directions.

It’s not my favorite method and why I’ve only used it once, but you may love it!
You can find waterslide paper >>> HERE
You can see this project I did with this method:
- “Cigar Box Makeover“
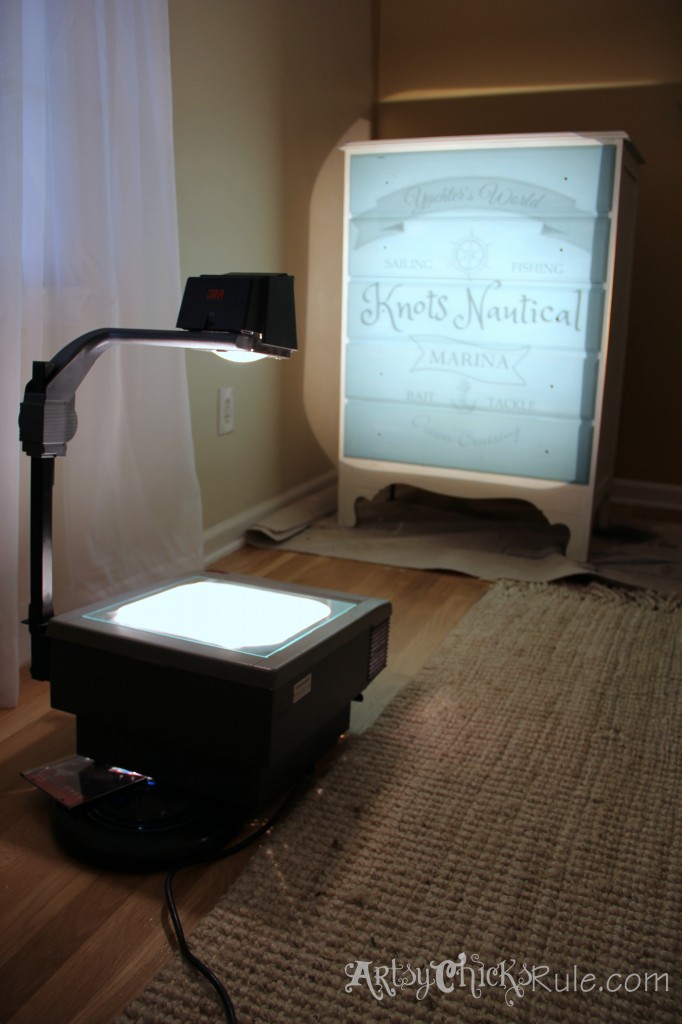
- Projector Transfer Method
This is one of my favorite methods for large pieces, like furniture.
I found my projector on Craigslist for $35 so don’t let that scare you off.
Simply print out your graphic onto clear sheets or save it to a thumb drive and take it to an office store to print onto transparency paper.
Get your projector set up and move it about until it’s in the desired location on your project piece.
Then simply trace the letters/graphics … (either a white watercolor pencil for white paint or a regular pencil for dark or black paint)
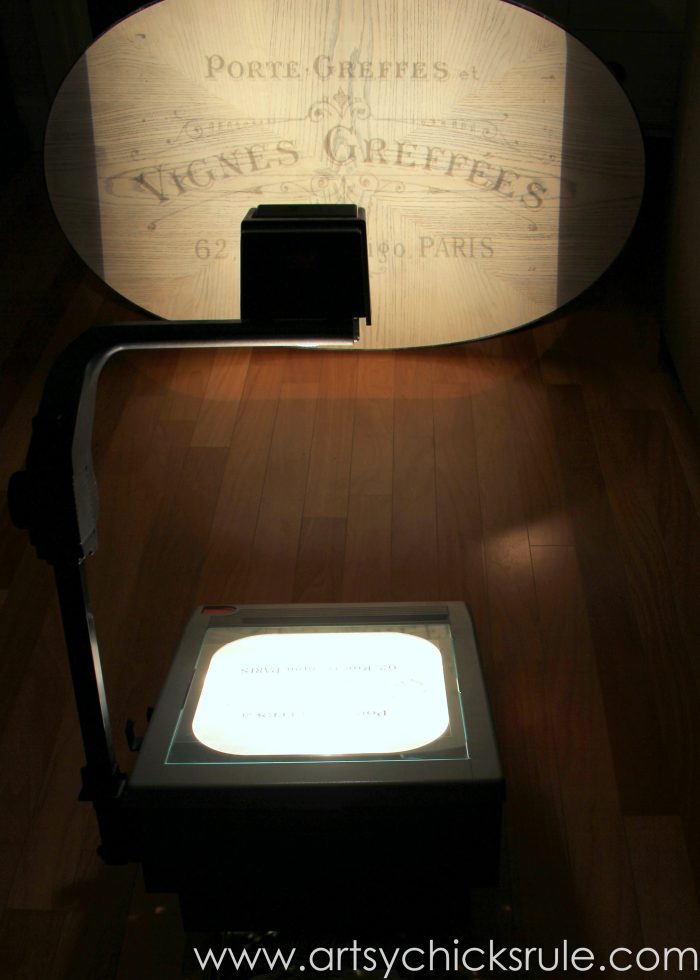
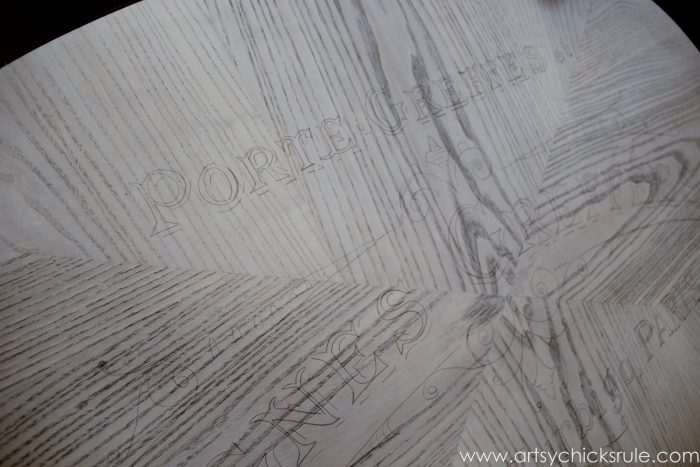
Hand paint it in and done. Perfect for those large pieces.
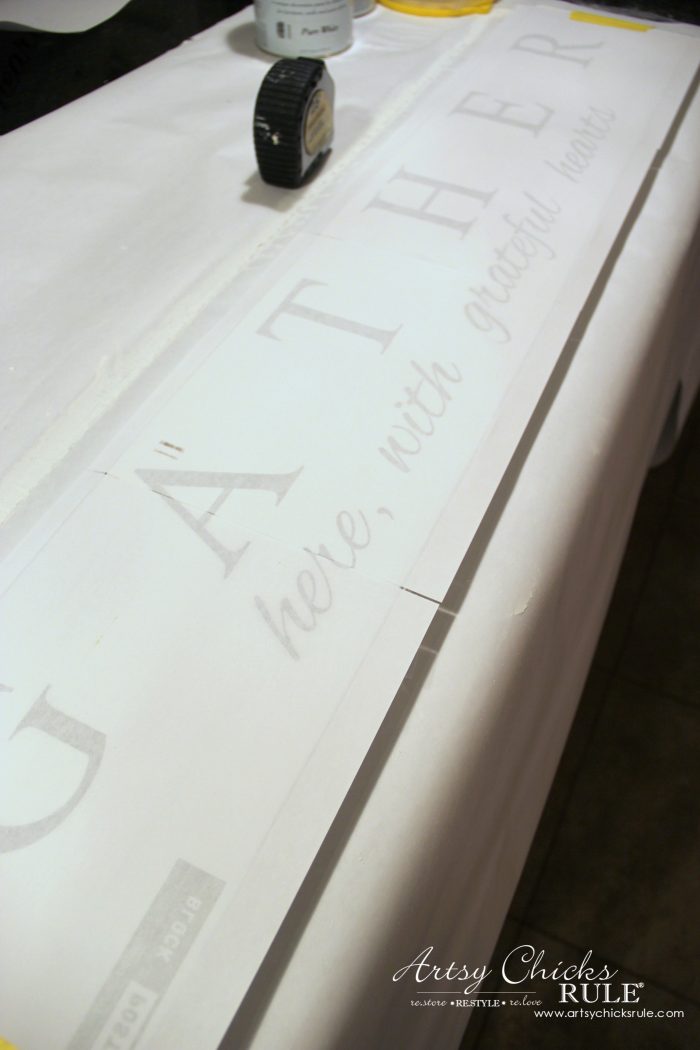
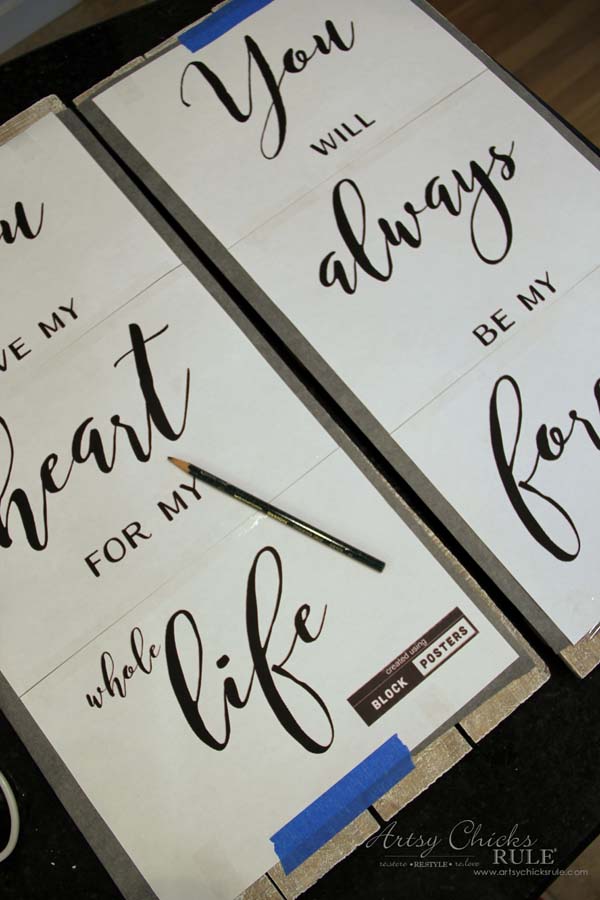
***If you don’t have a projector and don’t want to buy one, you can also use BlockPosters . com for large graphics.
Upload your graphic there and print it out whatever size you need (you can adjust and make it however big you like).
You would then need to attach the pages together but this works very well.
You can see how I did just that on this sign here, “Gather Sign“.
Here are a few projects I’ve done with this method:
- “Knots Nautical Chest“
- “French Coffee Table“
- “Compass Rose Dresser“
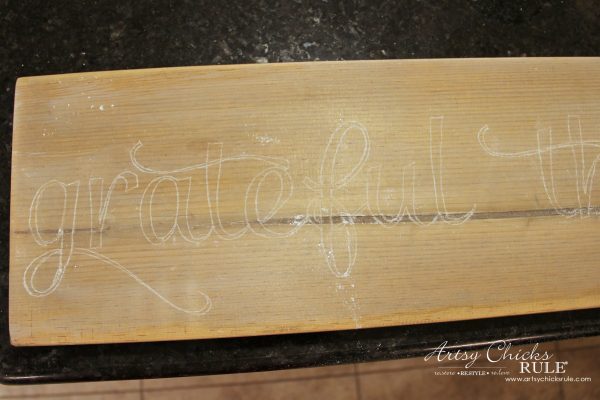
This method is perfect for transferring your images/graphics onto a chalkboard.
It even works well for furniture or signs where you want to use white paint for the letters/graphics.
Print out your graphic in regular view (not reverse), and shade the back heavily with chalk.
Shake the paper to remove excess chalk and gently attach it to your project.
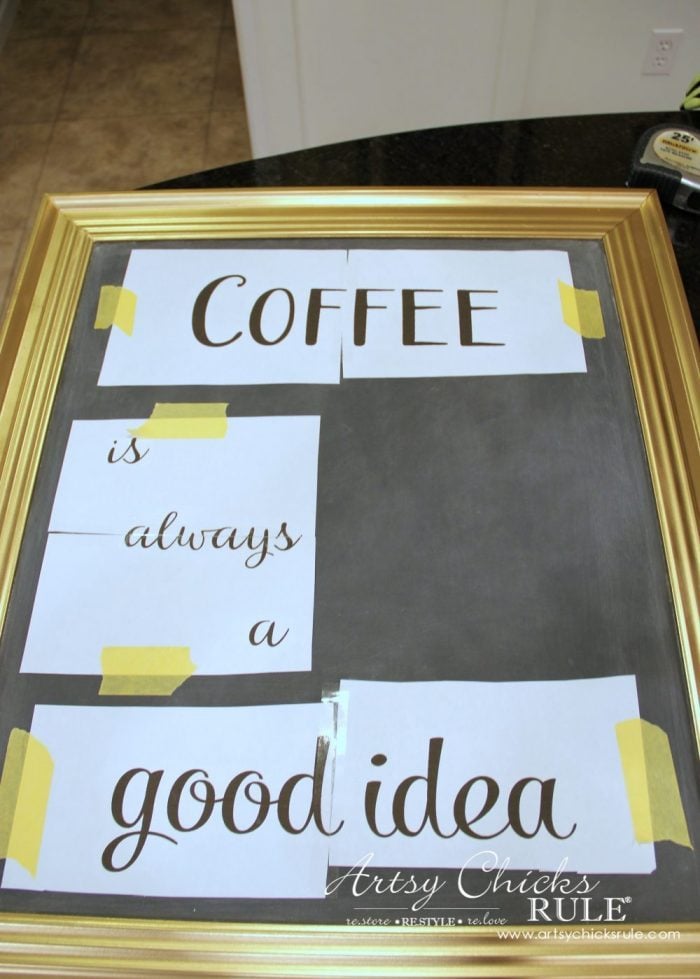
Lightly trace around the letters with a pencil to transfer the chalk onto the chalkboard or furniture.
This method works very well.
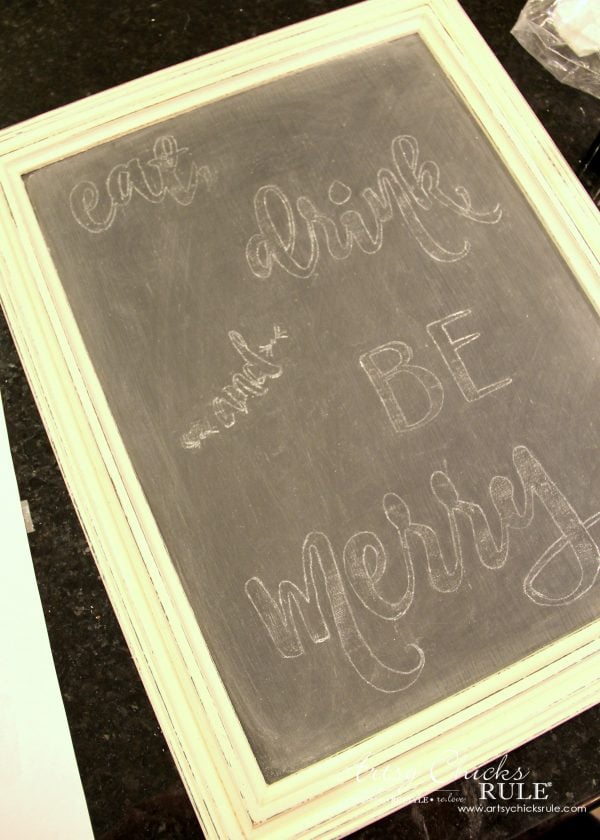
Here’s a little tip I learned…
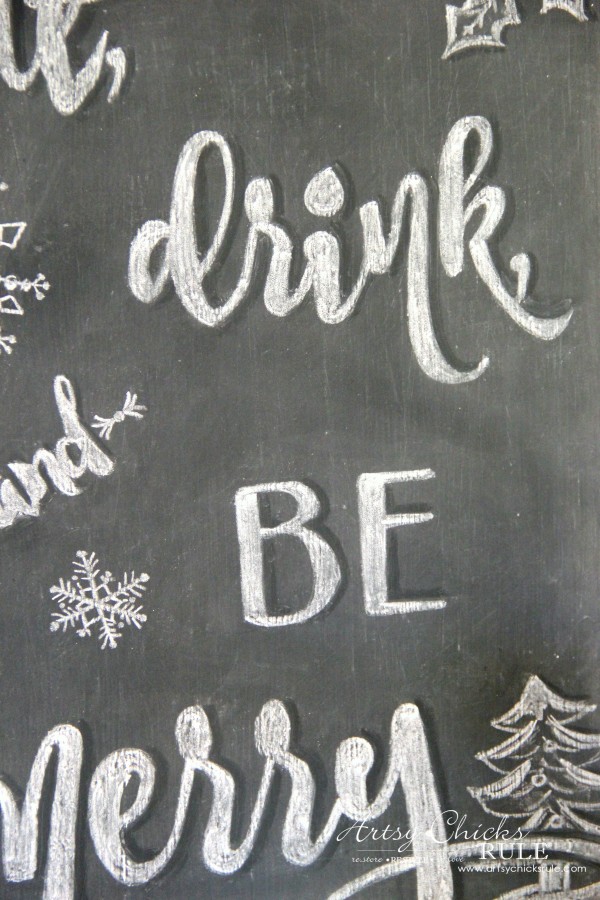
Want those chalkboard letters to pop?
Once you are finished “coloring in” all your letters, take a damp Q-tip and carefully wipe the right side edge of each letter. (as shown above)
Anywhere a natural shadow would be. (I’ve got a handy guide further down the page)
I LOVE the look it gives chalkboard art.
Here is another example of white chalk transfer but on a wood sign, not a chalkboard.
It works well for dark-colored furniture pieces too.
Here are a few projects I’ve done with this method:
- “Eat, Drink, Be Merry“
- “Spring Chalk Art“
- “Grateful, Thankful, Blessed Sign“
- “Coffee Bar Sign“
……………………………………………………………………………………………………………………………………………………
I’ve mentioned that you can use a white watercolor pencil to draw your image onto your project as I did here using the Projector Transfer Method…
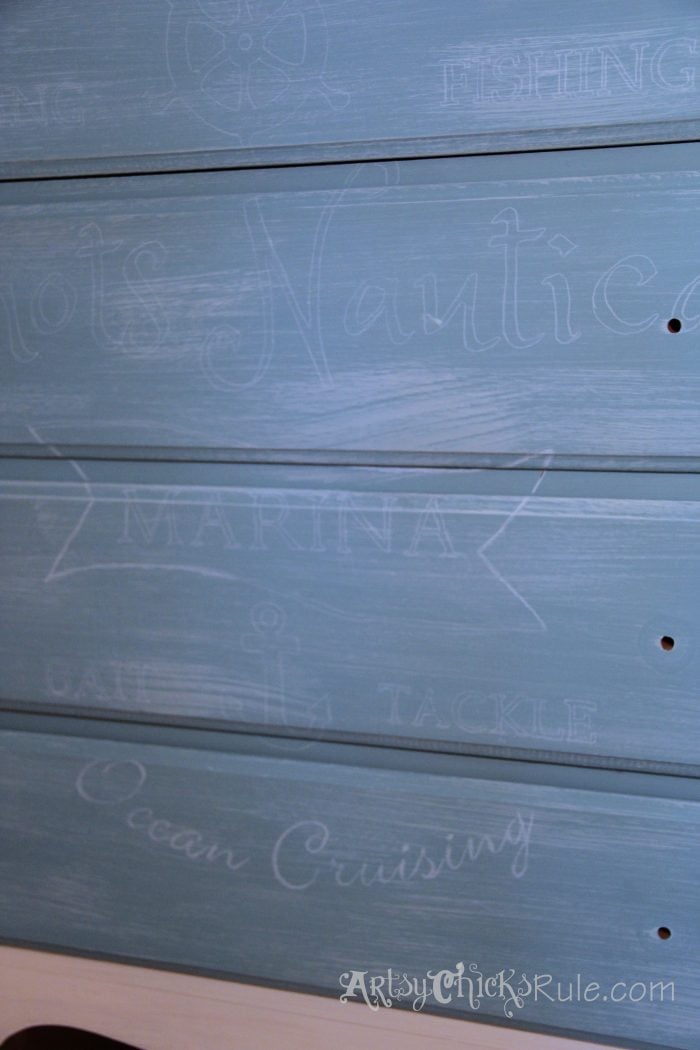
I then used white paint to hand paint in the lettering.
So you can match whatever color you’re painting in your image with a coordinating watercolor pencil.
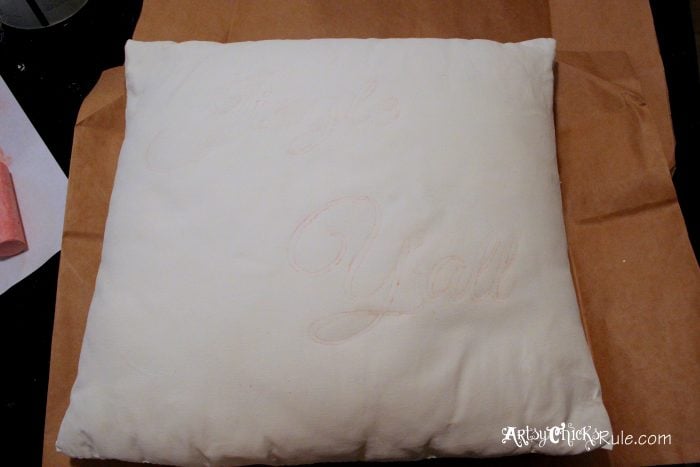
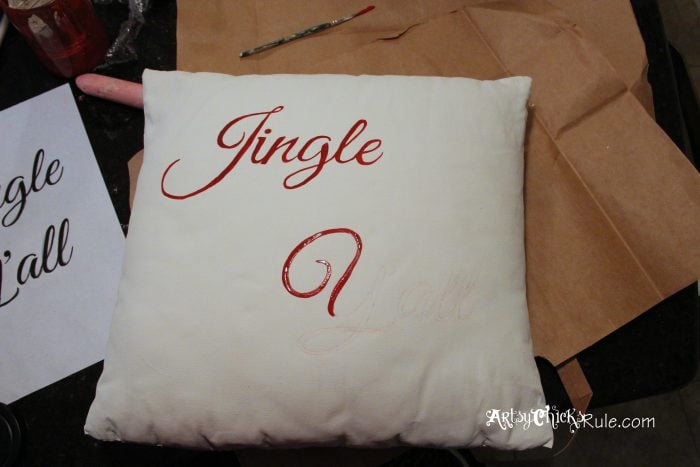
The same goes for the chalk transfer method. You can use different colors of chalk to transfer like I did on this chalk-painted pillow….

Pink since I was using red for the paint color. (and because white would not have shown up)
On something soft like this, fabric, etc., chalk is your best bet.
Pencil and watercolor pencils wouldn’t transfer well.
And here’s another thing, you aren’t always limited to hand painting in with a brush.
Not comfortable with a brush? There are other options out there.
You can use things like, chalk pens, paint pens and even permanent markers.
I have several times and it does make the job oh-so-easy!
Here are a couple of projects on how to transfer graphics & images with other options besides a brush and paint.
Chalk Pen – “Thrift Store Coastal Tray”
Paint Pen – “Thrift Shop Shakedown”
Permanent Marker – “French Farmhouse Bread Box”
Here are a few various items needed to do some of the image transfer methods I’ve talked about above:
Here’s a Handy Shadowing Guide I created for you.
You can print it out and use it as a guide to creating those shadows on your chalk art with a Q-tip that I mentioned above.
Or even adding a bit of gray/black paint to your newly hand-painted letters, like so…
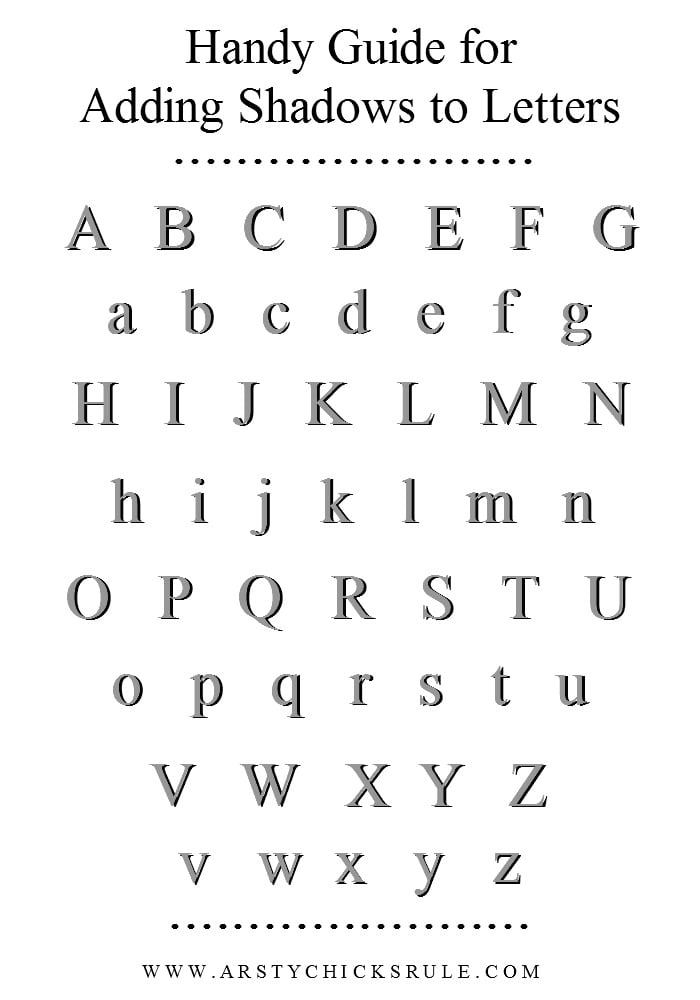
Download it >>> here.
- Transfer Gel (or Mod Podge)
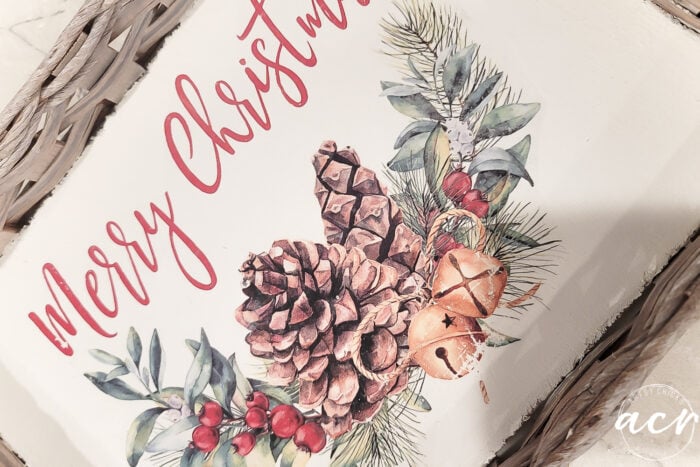
This is a great (and super easy) transfer method! You simply print out your image/words in reverse then use Transfer Gel to transfer the image to the project.
Now, I will tell you, a laser printer works best for this (ask me how I know! 😉 ) and it’s the easiest method. However, you can use an inkjet too if that’s all you have access to there are just a few extra steps if you do. (and it might not be as perfect as a laser-printed one would be)
Print out your image in reverse.
Cut around as closely as possible.
Apply Transfer Gel to the project piece.
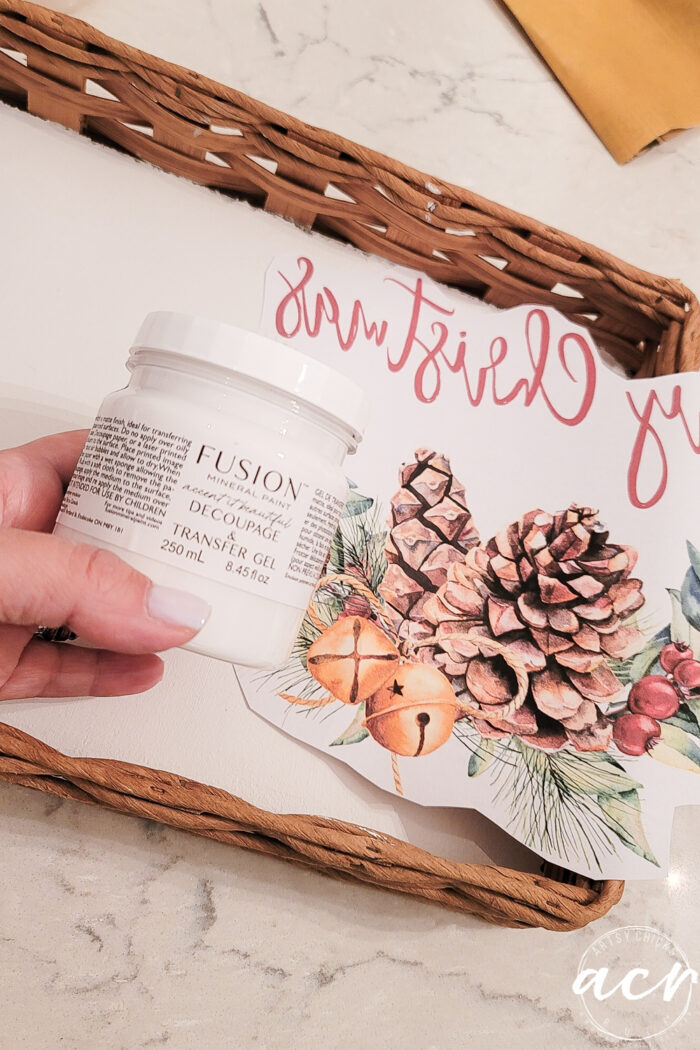
Position it ink side down where you want it to go. Then let it dry overnight. (be sure it is fully saturated/covered on the underside)
The next day, dampen a sponge and wet the paper to remove it.
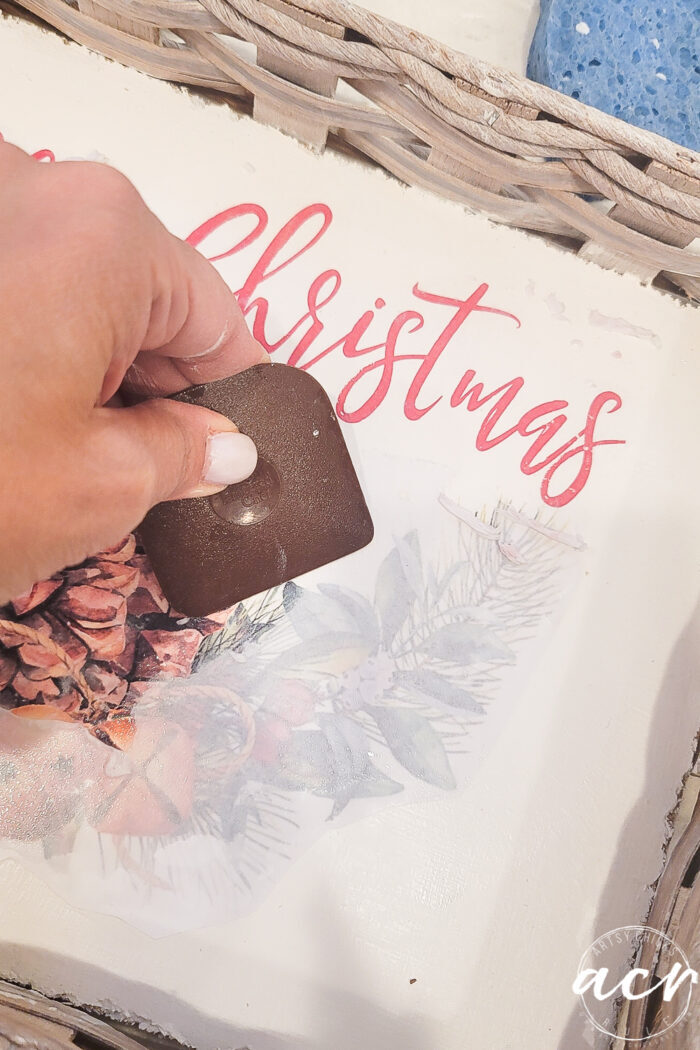
You can rub it off with your fingers easily at this point. The ink remains on the project.
Now, if you are doing inkjet the extra steps are as follows:
- Let the printed graphic dry overnight.
- The next day, apply the Transfer Gel and let dry. (you can try skipping this step but I think it helps)
- Apply Transfer Gel (or Mod Podge) like usual to the project and follow the remaining steps above.
…………………………………………………………………………………………………………………………..
There are other methods, and I’ve used a few of them, but these are my tried & true favorites, by far.
They are also ones that I think are the most simple that anyone can do.
Mostly foolproof and that’s always a good thing!
I hope this “How To Transfer Graphics & Images” post is and will be, helpful to you.
So, are you ready to create your very own treasure?
You really can! It’s so much easier with simple little shortcuts like these.
You don’t have to be a master at calligraphy either. I’m certainly not! (at all!)
Just create or download a free printable, print it out, and go!
Join our list and gain access to 100+ free printables/graphics I’ve created (and continue to add to!) right here >>> Get Access
Have fun and happy making!!
Be sure to bookmark this page for future reference and PIN this to save it!
More posts in the “back to basics” series:
Happy Creating!
xo

